NE-M Installation Guide H5692448
850050111 Issue 03 August 2017 63
Configure Controller – Minimum
This section covers the basic operations that must be performed so that the controller is minimally configured. See the
controller manual for further detail.
Configure Pulsar Controller
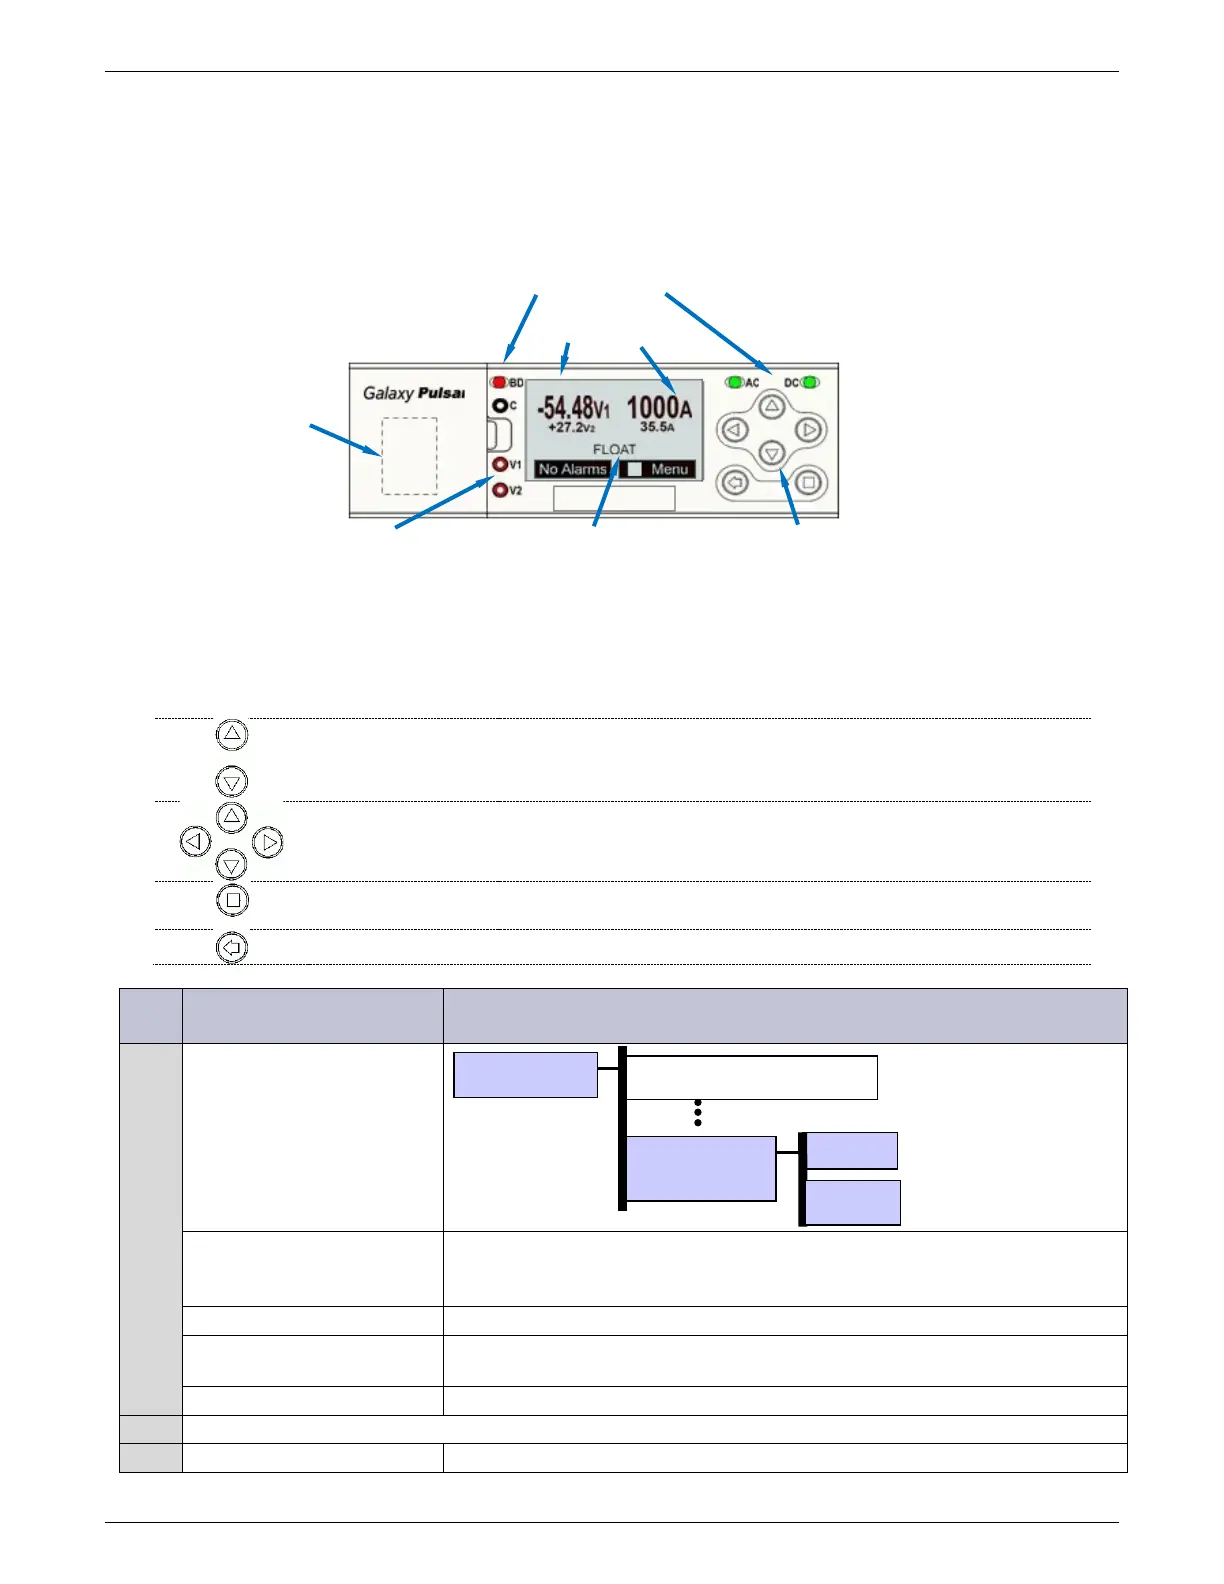
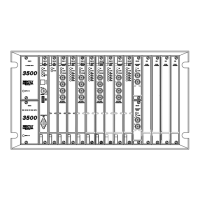
Figure 86 Front Panel - Pulsar Plus Controller
This display shows the front panel display for a system with both rectifiers and converters. The display (V1 versus V2)
correlates with test jacks. The large font indicates the “Primary” or rectifier dc bus; the smaller font shows the
“Secondary” or converter dc bus.
Menu Navigation Buttons
Parameter Change Increase or decrease the value of the selected parameter.
Navigate Navigate menus – move to different selected menu item.
Enter Button
Enter a sub-menu or confirms a parameter change.
Go to the Main Menu from the Normal display.
ESC Button Go up one menu level or exits a parameter change without saving.
Step
Configuration Attribute
to Change
Menu Path/Action - Pulsar
1
This field allows you to select one of the following date formats: MM/DD/YY,
DD/MM/YY, YY/MM/DD, MM/DD/YYYY, DD/MM/YYYY, YYYY/MM/DD. Use the <+>
or <-> key to select the desired format and press <ENTER> to save the change.
Month Use this field to change the month; the possible value is from 1 to 12.
Day
Use this field to change the day of the month; the possible value is from 1 to
31.
Year Use this field to change the year; the possible value is from 1992 and up.
Note: The system will validate the entries before the system date is modified.
Configuration
System
Time
Plant Voltage and
Load Current
Voltage Test Jacks