40 GE INFORMATION D20E ETHERNET I/O MODULE INSTRUCTION MANUAL
CHAPTER 3: CONFIGURING THE D20E FIRMWARE
Start DAPserver Studio
DAPserver Studio is used to access and configure the D20E module. For further
information on DAPserver Studio, refer to appendix:
DAPserver Studio on page 125.
To start DAPserver Studio:
1. Double-click on the DAPserver Studio desktop icon.
If the icon does not appear on the desktop, navigate to Windows Start > All Programs
> DAPserver Studio and click on the DAPserver Studio icon.
Result: The Start screen appears.
2. Create a New D20E project or select a D20E project from My Devices ore the Recent
list.
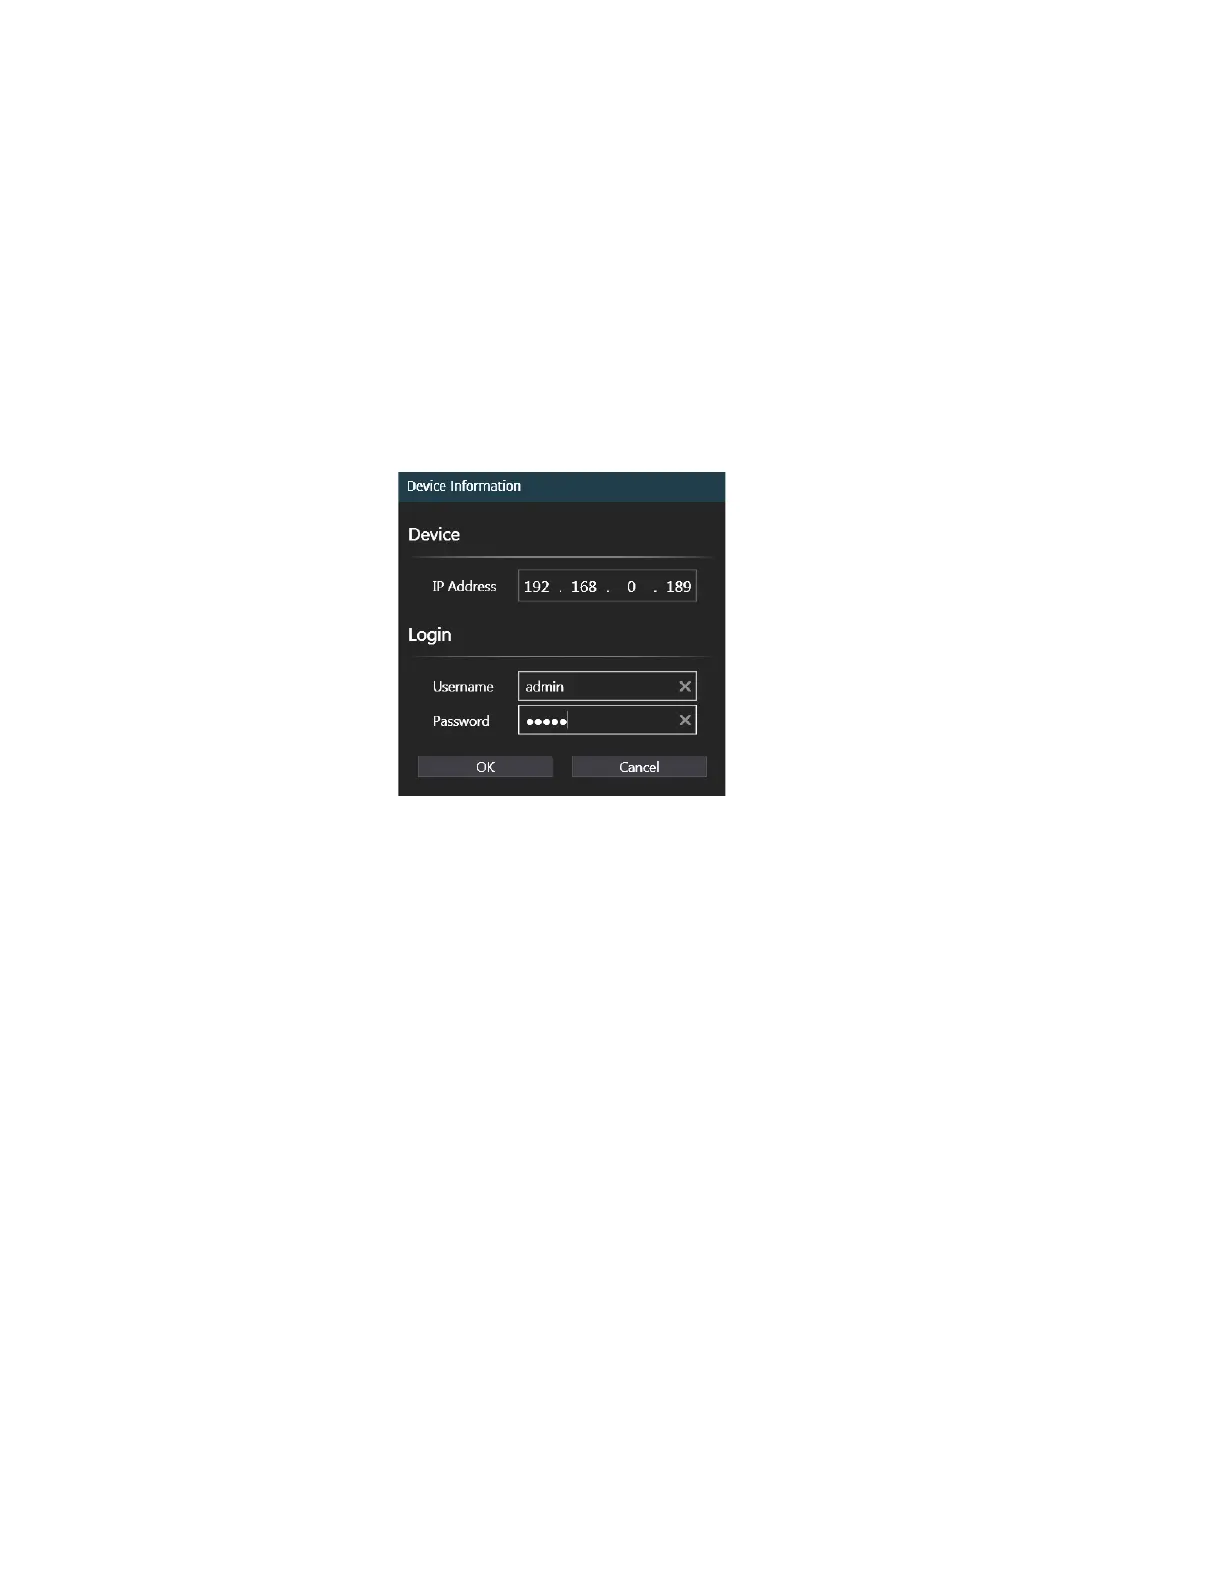
3. On the right side of the screen select Device > Explore.
Result: The Device Information window appears.
4. Type in the actual IP Address of the D20E module.
5. Type in the Username and Password login credentials (default: admin).
6. Click OK.
Result: The upper-right LAN connection icon should show Connected in green.
7. Ensure that the:
– PC Ethernet port used to communicate with D20E module is configured to be on
the same subnet as the D20E module.
– The IP address configured in DAPserver Studio must match the IP address in the
D20E module for a successful connection. The default IP addresses for DAPserver
Studio projects and the D20E module LAN 1 are 192.168.0.189.
Result: For example, the Explore window can appear as shown in Figure 7.