CHAPTER 3: CONFIGURING THE D20E FIRMWARE
D20E ETHERNET I/O MODULE INSTRUCTION MANUAL GE INFORMATION 51
7. Select the NTP configuration by either:
– Double-clicking on the NTP configuration box or
– Clicking NTP, right-clicking a blank area of the window, and then clicking Edit at
the bottom of the page.
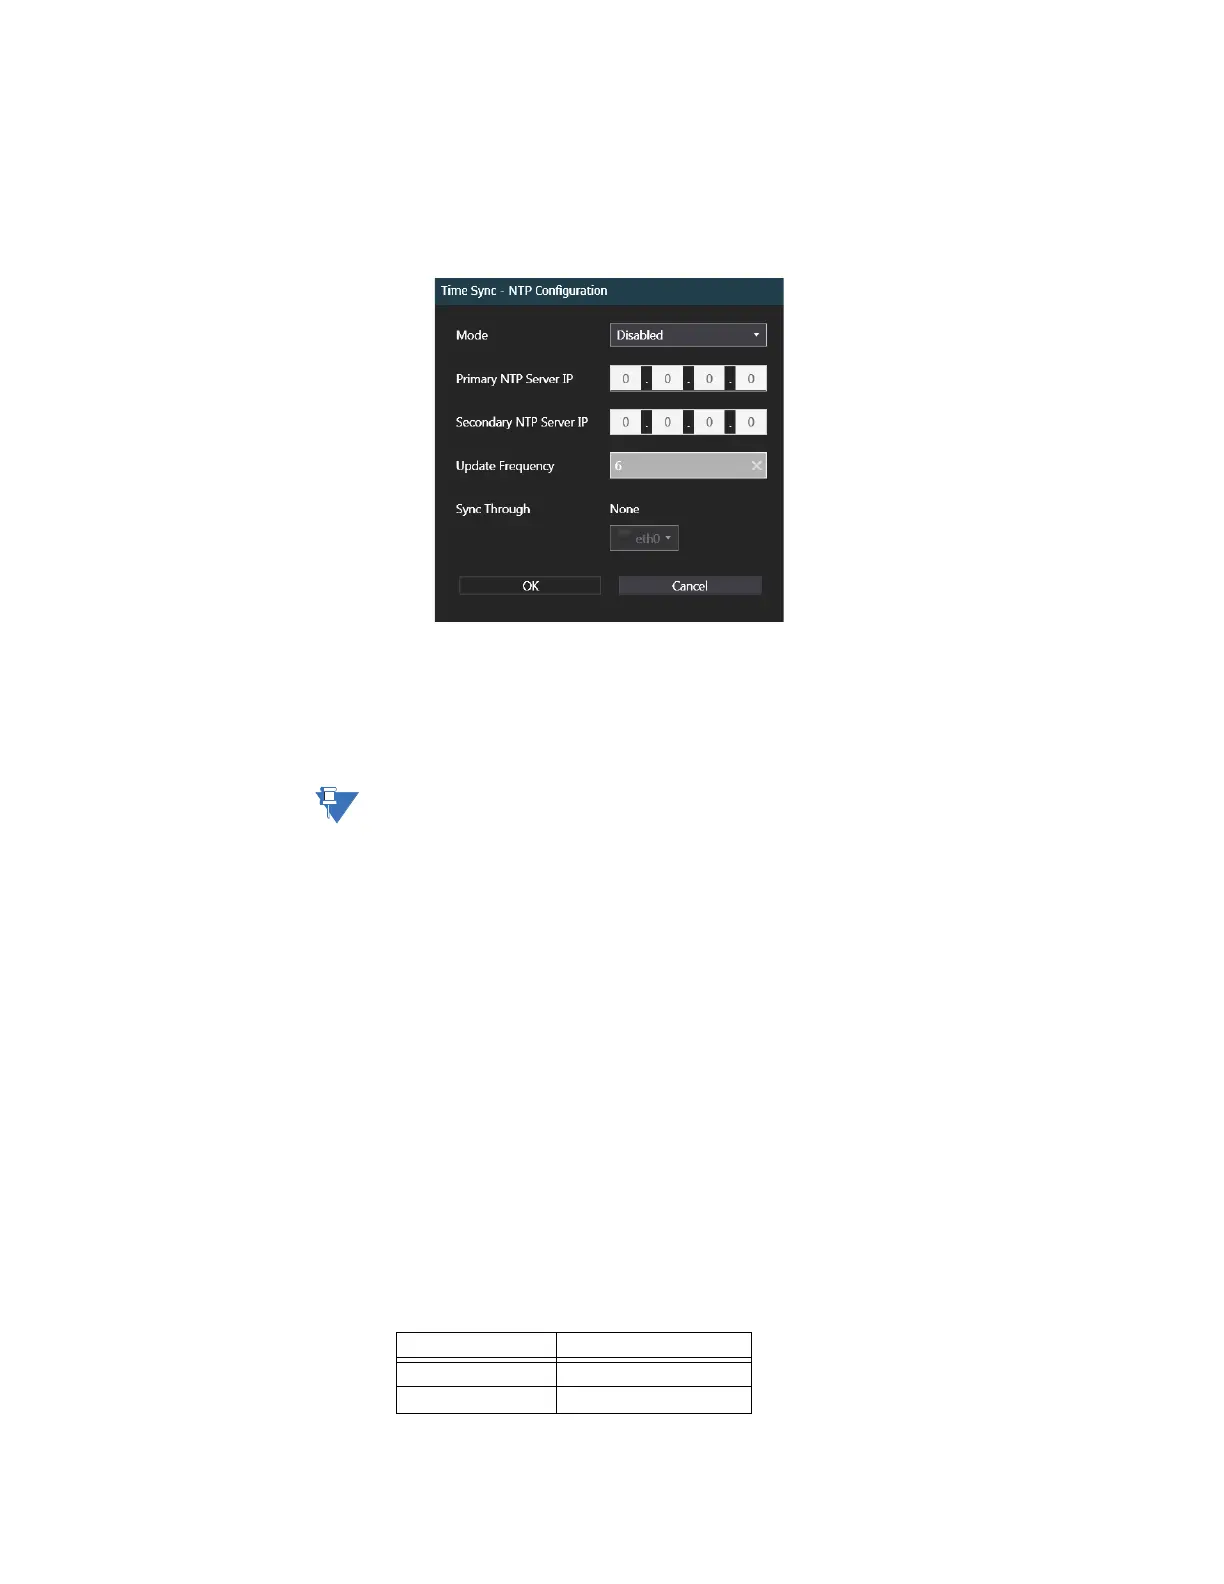
Result: The Time Sync - NTP Configuration window appears.
8. From the Mode menu, select Client.
The D20E device only supports the NTP Client.
9. Type in the Primary NTP Server IP addresses and the Secondary NTP Server IP
addresses.
10. Change the Update Frequency, if necessary.
Update Frequency is used for legacy devices. Not supported/used by D20E modules.
11. Click OK.
Result: The Time Sync - NTP Configuration window closes.
Result: The changes are saved.
12. Click the Sync icon at the bottom of the Time Sync page.
Result: The DAPserver Studio downloads the new NTP settings to the D20E module.
Result: A screen appears, indicating that the sync was successful for the Primary NTP
Server IP.
13. [Optional] Access the D20E device console (through the USB connector) and set the
D20E clock so that the actual NTP server time sync will be closer on first initial
adjustment, reducing initial error and accelerating time sync convergence:
13.1. Run the terminal emulator.
13.2. Logon to the D20E module console mode.
13.3. Change the time and date to be synchronized with the NTP server after the
configured update period.
For information on setting the clock, see section: Clock setting on page 118.
Change an existing user’s password
The default User names and Passwords are
Username Password
admin admin
root root