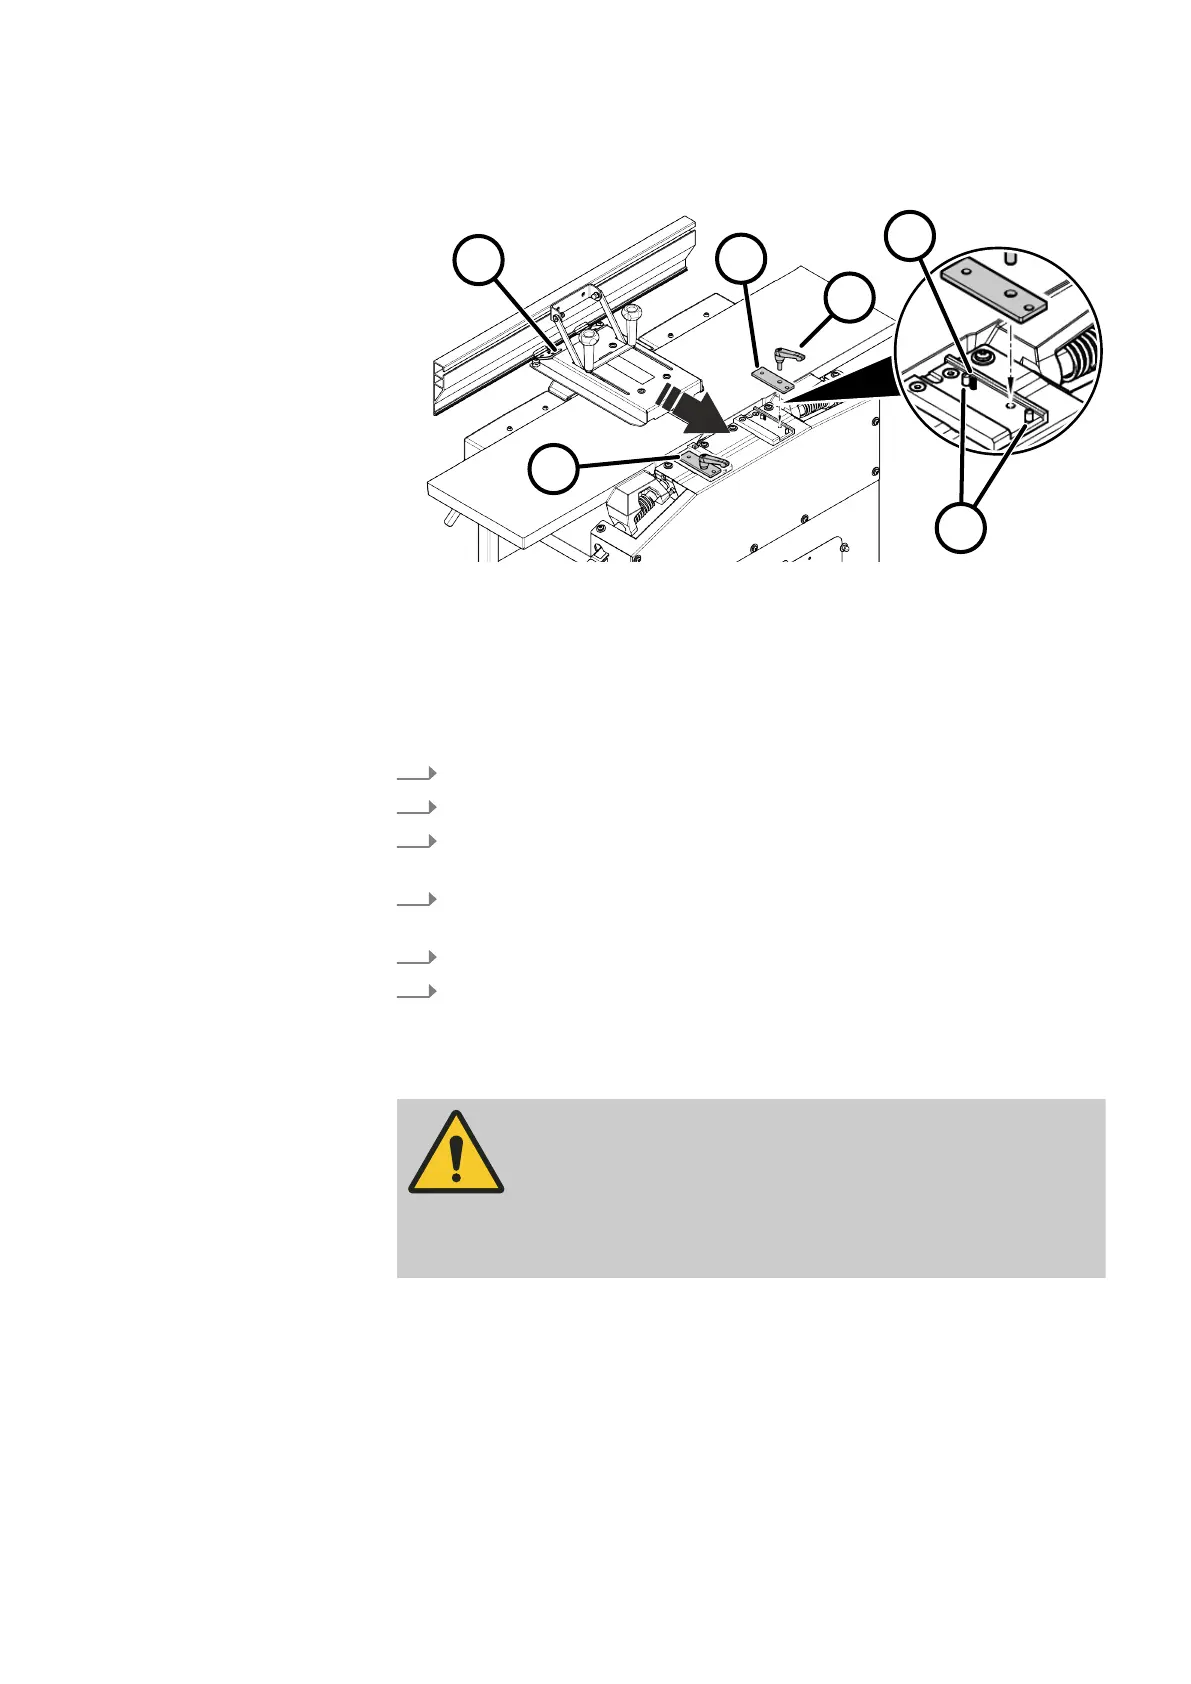
7.3.2 Mount the planer fence
Fig. 26: Mount the planer fence
1 Clamping lever
2 Locking plate
3 Guide pins
4 Clamping lever and clamping plate
5 Planer fence
6 Pressure spring
1.
Ensure, that the compression spring is correctly placed in the hole.
2.
Position the clamping plate on both of the guide pins.
3.
Screw the clamping lever in through the clamping plate in the machine
c
hassis.
4.
Fit the compression spring, clamping plate and clamping lever on the
sec
ond side.
5.
Slide the planer fence under both of the clamping plates from the front.
6.
Slide the planer fence in until it hits the stop and clamp it into place using
bo
th of the clamping levers.
7.3.3 Mount the cutterblock cover
WARNING
Extremely sharp planer knife cutters
Cut in
juries to hands and fingers
− Wear protective gloves.
− Be particularly careful when working with the cutterblock.