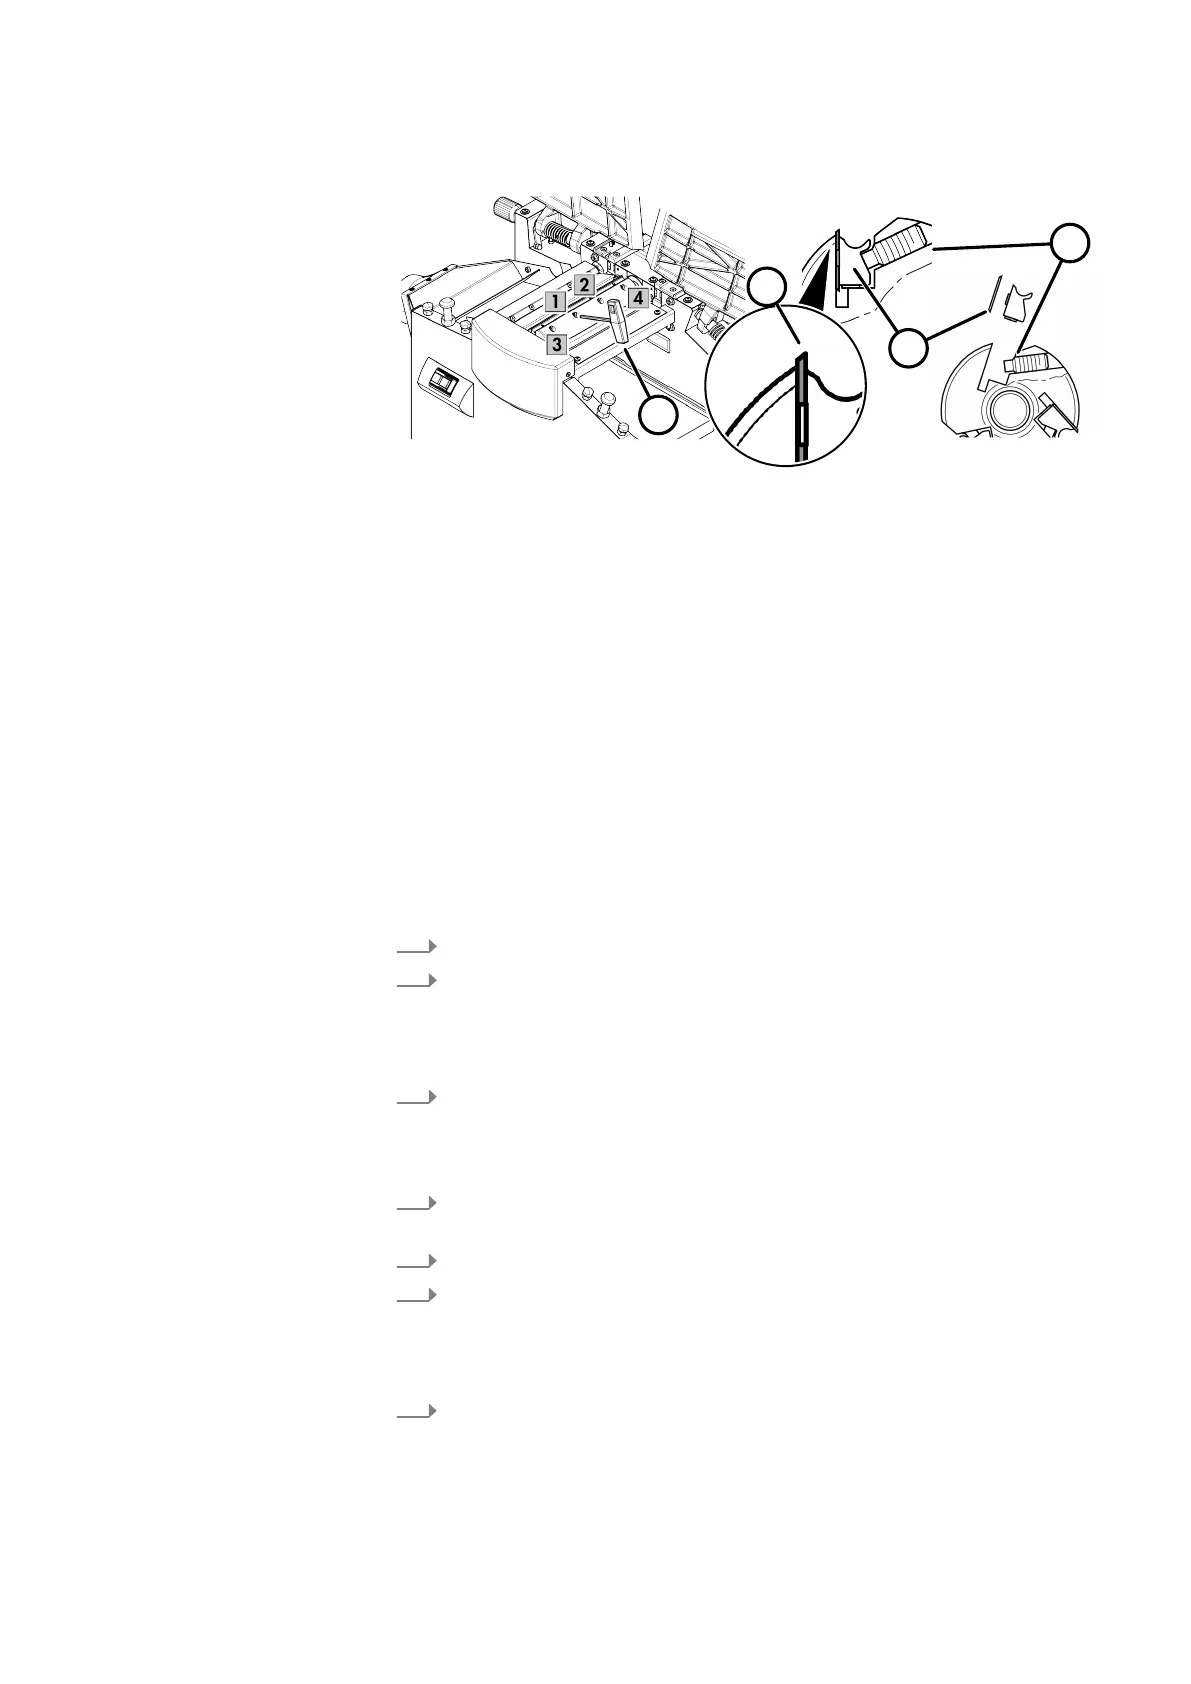
Fig. 61: System Planer Knife
1 Blade-holder screws
2 Blade holder
3 Planer Knives
4 Allen Key
Protective equipment:
● Protective clothing
● Protective gloves
T
ool:
● Cleaning cloths
● Resin remover
● Vacuum cleaner
● Hex key
● System Planer Knife HS-M42
● Standard system planer knife
1.
Switch off the machine and secure it against being switched on again.
2.
Disconnect the machine from the mains power supply.
Chan
ge the machine over for thickness planing, swing the extraction hood
up. ⮫Chapter 8.1.6 ‘Changing over from a planer to a thicknesser’
on page 51
3.
Release all the blade holder screws of a blade and remove the blade holder
and planer blade
s. Release all the blade holder screws of a blade and
remove the blade holder and planer blades. Repeat this process with all
blades.
4.
Clean the planer blades, blade holders and cutterblock of traces of resin as
thor
oughly as possible.
5.
Reverse the planer knife (if only one cutting edge is worn).
6.
Reinsert the planer blades and blade holders, tighten the blade holder
scr
ews lightly at first, then firmly.
Ensure correct installation position of the planing knives (direction of rotation
of the cutterblock).
7.
Always tighten the knife holder screws from the inside outwards.
Minimum t
ightening torque: 20 Nm