4. Input
Mounng Height of the device.
5. Input the min. pupil distance in the text eld, or click draw min. pupil distance.
Min. Pupil Distance
The min. pupil distance refers to the minimum area between two pupils, and it is basic for
the device to recognize a face.
6. Click Save.
7. Set arming schedule. See Set Arming Schedule .
8. Set linkage method. See Linkage Method
Sengs .
3.1.2 Expert Mode Sengs
Steps
1. Oponal: Click Lock to lock PTZ control to prevent the interrupon from other PTZ related
acon during conguraon.
Normally, the PTZ control is automacally locked when you enter the conguraon interface.
You can manually resume the lock when the countdown is over.
2. Set
detecon scenes and detecon areas.
1) Select a detecon scene.
2) Adjust the live image to a desired scene. You can use PTZ control
buons or click to locate
a scene with a face.
3) Click
, and draw a detecon area on live image.
4) Click Save.
5) Repeat above steps to set other detecon scenes and areas.
3. Input
Mounng Height of the device.
4. Input the min. pupil distance in the text eld, or click draw min. pupil distance.
Min. Pupil Distance
The min. pupil distance refers to the minimum area between two pupils, and it is basic for
the device to recognize a face.
5. Set patrol schedule.
1) Click Patrol Schedule.
2) Draw
me bars as desired.
3) Click a
me bar and click Conguraon.
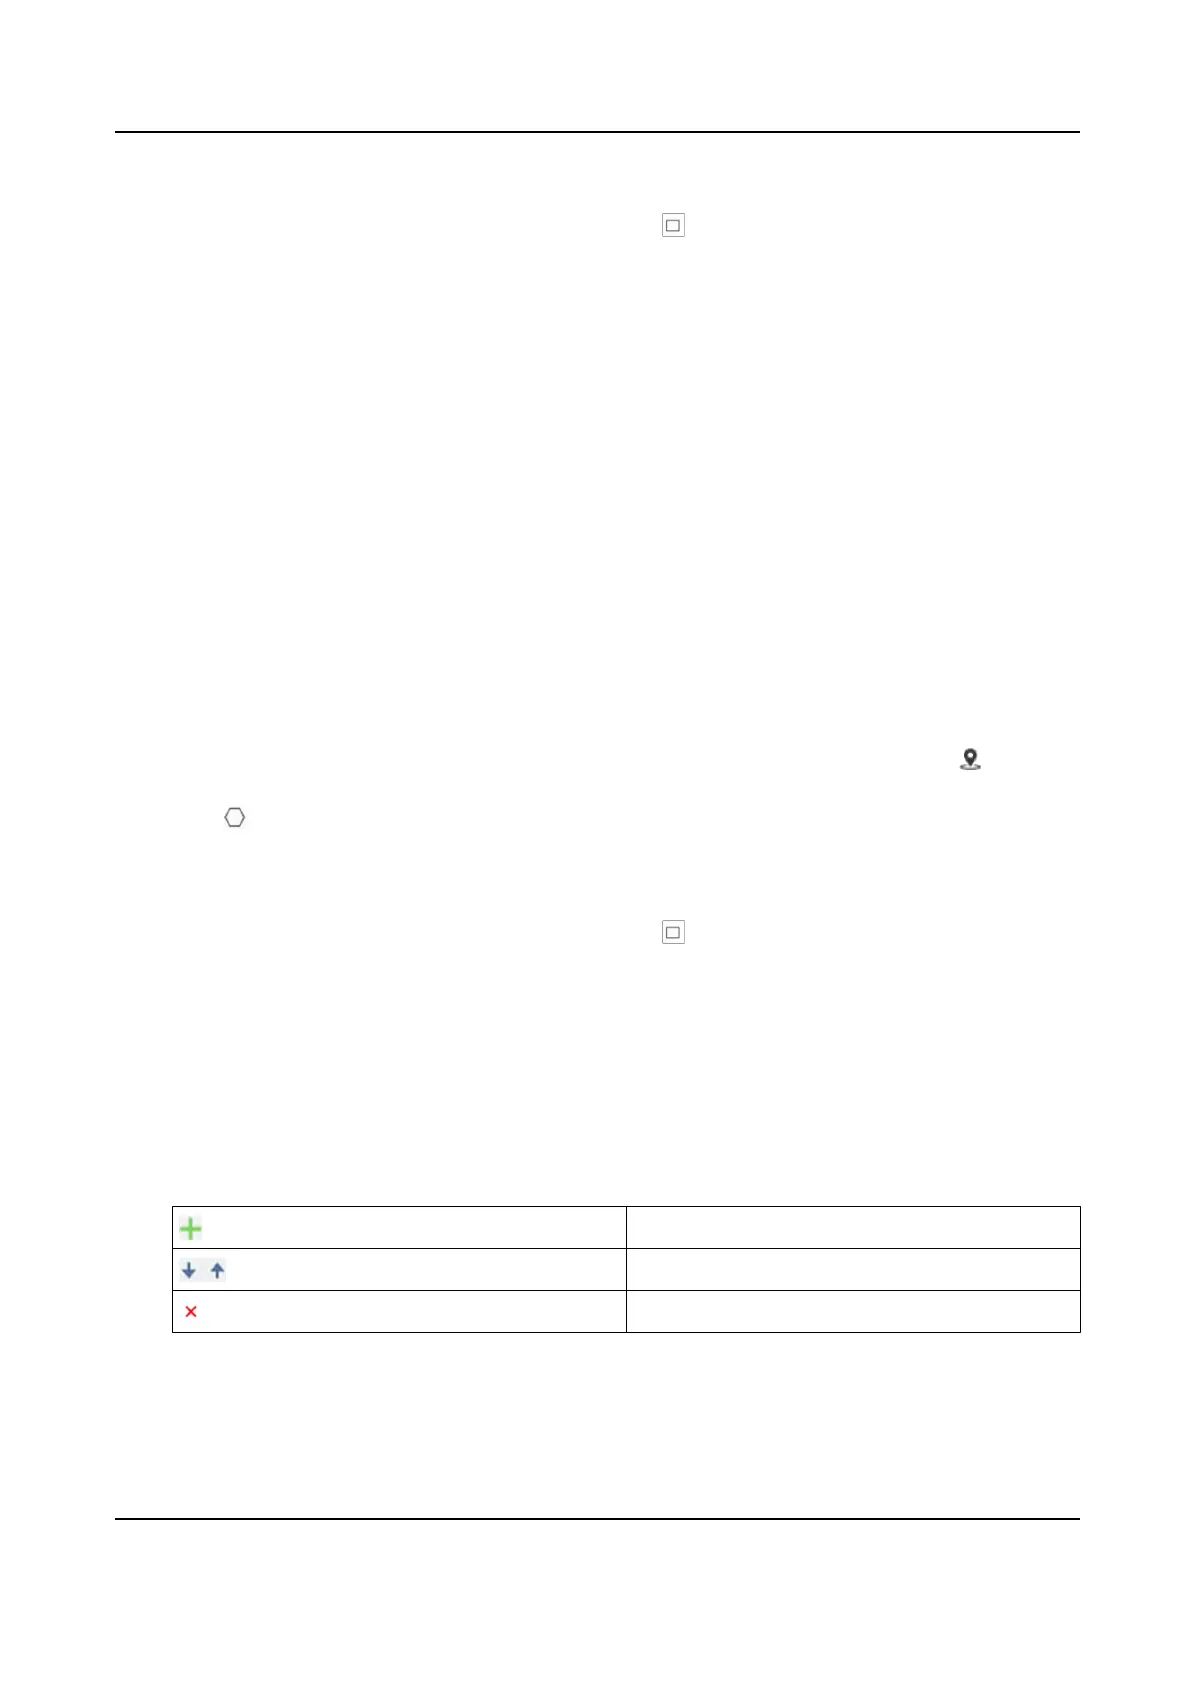
4) Edit patrol path and input dwell me for each detecon scene.
Add a
detecon scene to the patrol path.
Adjust the order of the scenes.
Delete the detecon scene.
6. Set linkage method. See Linkage Method Sengs .
7. Click Save.
F Series Network Speed Dome User Manual
8
 Loading...