Portable PLUS Computer
Removal and Replacement
6·19
2.
Remove the metal case. Slide
it
toward the connector until the metal tabs disengage, then lift the
case off.
Reassembly Note: Align the metal tabs with the slots in the plastic cover, then squeeze them
together until the screw holes align. You'll feel some resistance as the foam tape inside the
drawer is compressed.
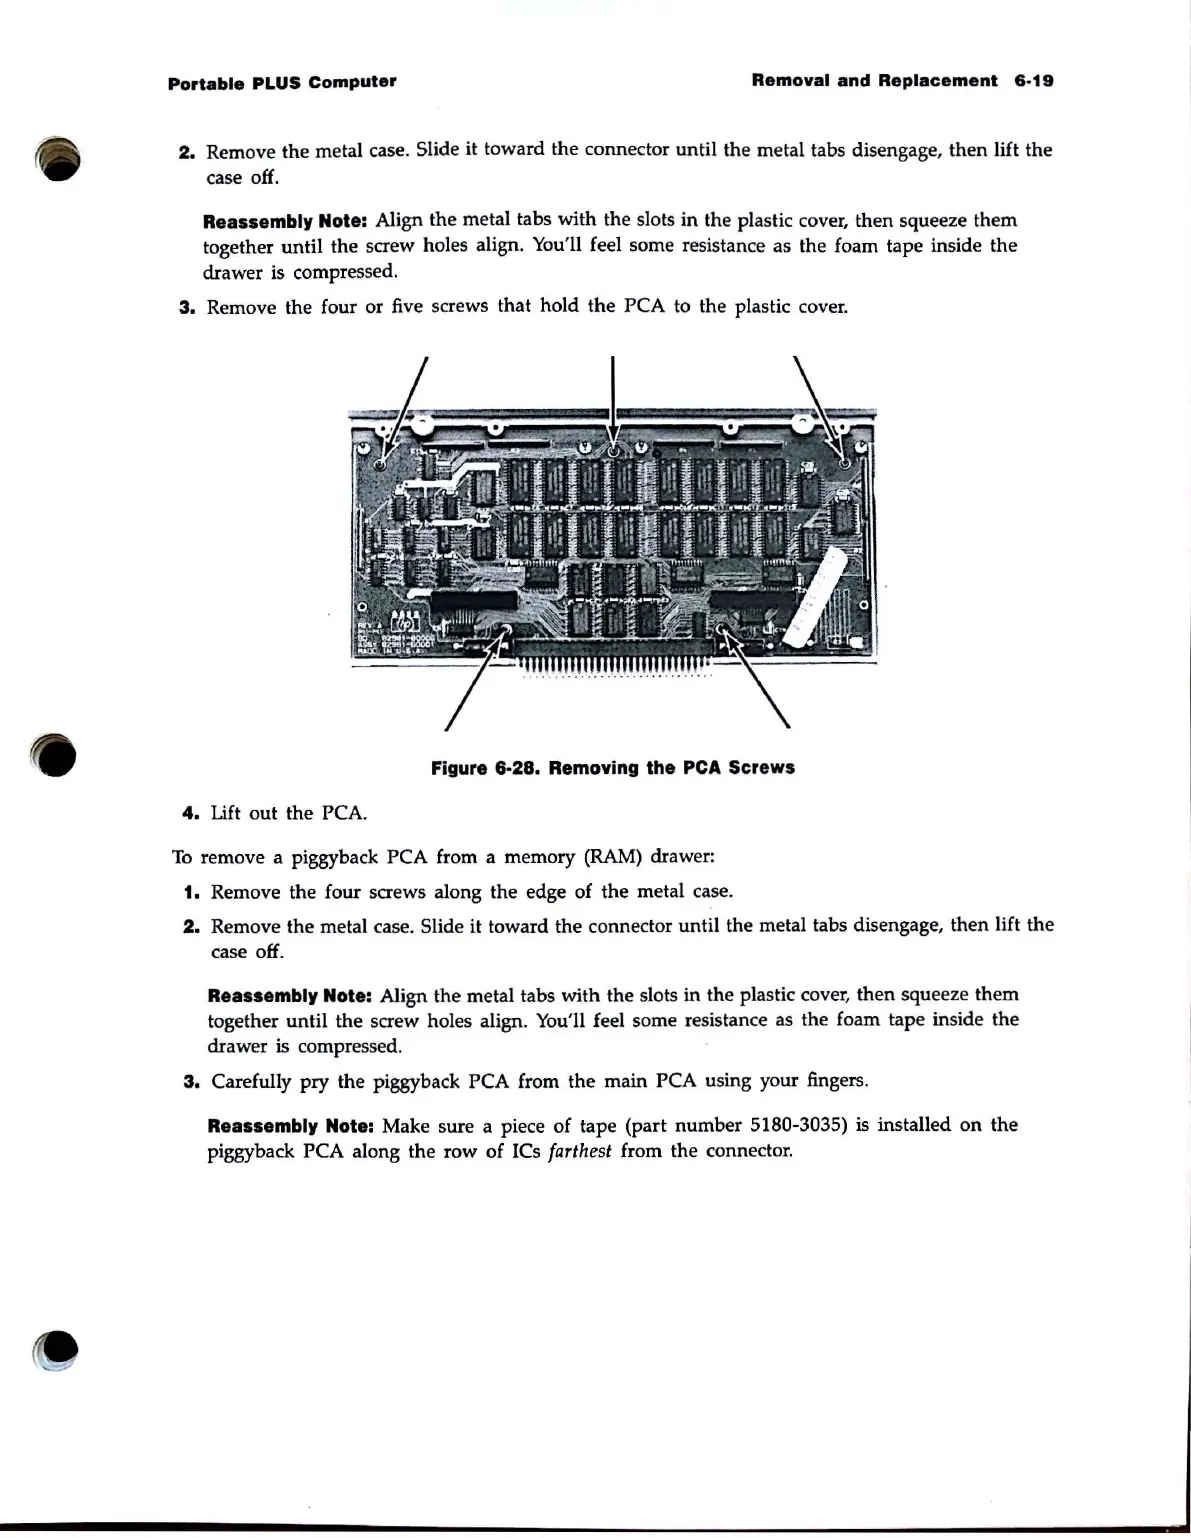
3.
Remove the four or five screws that hold the PCA to the plastic cover.
Figure
6·28.
Removing the
peA
Screws
4.
Lift out the PCA.
To
remove a piggyback PCA from a memory
(RAM)
drawer:
1. Remove the four screws along the edge of the metal case.
2.
Remove the metal case. Slide
it
toward the connector until the metal tabs disengage, then lift the
case off.
Reassembly Note: Align the metal tabs with the slots in the plastic cover, then squeeze them
together until the screw holes align. You'll feel some resistance as the foam tape inside the
drawer
is compressed.
3.
Carefully pry the piggyback PCA from the main PCA using your fingers.
Reassembly Note: Make sure a piece of tape (part number 5180-3035) is installed
on
the
piggyback
PCA along the row of ICs farthest from the connector.