Portable
PLUS
Computer
Troubleshooting
8-5
7. Save the Edisc.
If
the
customer has files stored in the computer's Electronic disc, copy the entire
contents of the Edisc to
an
external disc. (The diagnostic RAM tests corrupt
part
of the Edisc.)
Copy the contents using the File Manager program's
-Copy File' option. (The procedure for copy-
ing
the
entire Edisc is explained in chapter 5 of
Using
the
Portable
PLUS
.)
•
If
the copy succeeds, go to step 8.
•
If
this step doesn't work, check that the "External Disc Drives' field is set to 1 in the System
Configuration screen.
If
this step still
doesn't
work, skip
to
step
9.
8.
If
the
customer indicates a problem
that's
not related to the HP-IL function, skip
to
step
14
.
9. Turn Off Computer, Disconnect Peripherals.
If
the computer is
turned
on,
turn
it
off
by
pressing
00
in the main
PAM
screen or by holding
down
@ (the contrast key) for approximately
15
seconds.
If
there is
no
response to the contrast
key,
press the reset
button
located in
the
battery
compartment.
Built-In Diagnostic Tests:
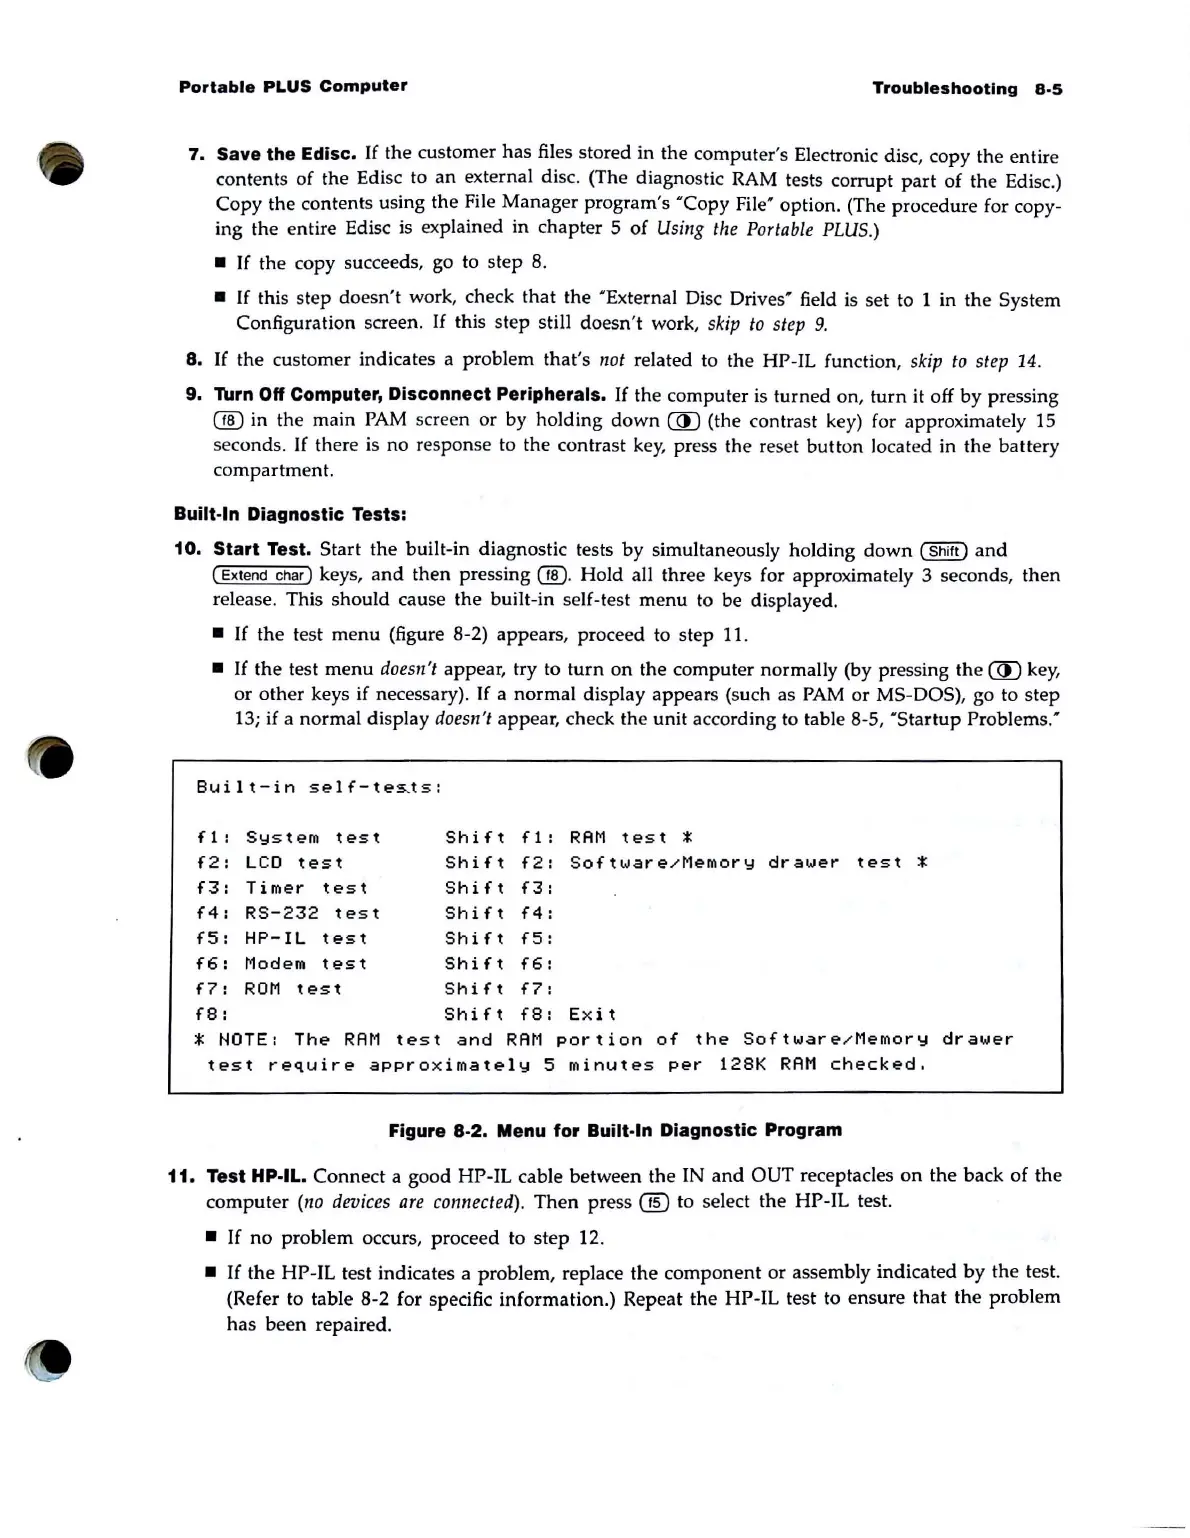
10.
Start
Test. Start
the
built-in diagnostic tests
by
simultaneously holding
down
(Shift)
and
(Extend char) keys,
and
then
pressing 00. Hold all three keys for approximately 3 seconds,
then
release. This should cause
the
built-in self-test
menu
to be displayed.
•
If
the
test
menu
(figure 8-2) appears, proceed to step
11
.
•
If
the
test
menu
doesn't appear, try to
turn
on the computer normally (by pressing the @ key,
or
other
keys if necessary).
If
a normal display appears (such as
PAM
or MS-DOS), go to step
13; if a normal display
doesn
't appear, check
the
unit according to table 8-5, '
Startup
Problems:
Built-in
sel
f-
tes..ts:
f1:
System
test
Shift
f 1 :
RAM
t
es
t *
f2:
LCD
test
Shift
f2:
Software/Memory
drawer
test
*
f3:
Timer
test
Shift
f3:
f4:
RS-232
test
Shift
f4:
f5:
HP-IL
test
Shift
f5:
f6:
Modem
test
Shift
f6:
f7:
ROM
test
Shift
f7:
f8:
Shift
f8:
Exit
* NOTE:
The
RAM
test
and
RAM
portion
of
the
Software/Memory
drawer
test
require
appro
x
imately
5
minutes
per
128K
RAM
checked.
Figure 8-2. Menu for Built·ln Diagnostic Program
11. Test
Hp·IL. Connect a good HP-IL cable between the IN
and
OUT receptacles
on
the
back of
the
computer
(no
dl?Vices
are
connected).
Then
press
(ill
to select
the
HP-IL test.
•
If
no
problem occurs, proceed to step 12 .
•
If
the
HP
-
IL
test indicates a problem, replace
the
component
or assembly indicated
by
the
test.
(Refer to table
8·2
for specific information.) Repeat
the
HP-IL test to ensure
that
the
problem
has
been repaired.