Installing a CPU
NOTE: HP recommends that you do not swap processors (CPUs) from one system board to another.
If installing a second CPU, it must be of the same type as the first CPU.
1. Disconnect power from the workstation (see Predisassembly procedures on page 73).
2. Remove the side access panel (see
Removing the side access panel on page 75).
3. Remove the memory fan assembly (see
Removing the memory fan on page 122).
4. Remove the CPU heatsink (see
Removing the CPU heatsink on page 139).
5. Remove the CPU (see
Removing a CPU on page 142).
6. Using extreme care, fully raise the CPU socket lever and cover.
CAUTION: The CPU socket contacts are delicate. To avoid bending the contacts, use extreme
care when installing the CPU in the socket.
7. If you are adding a second CPU to a single-processor system, remove the plastic cover from the
second CPU socket.
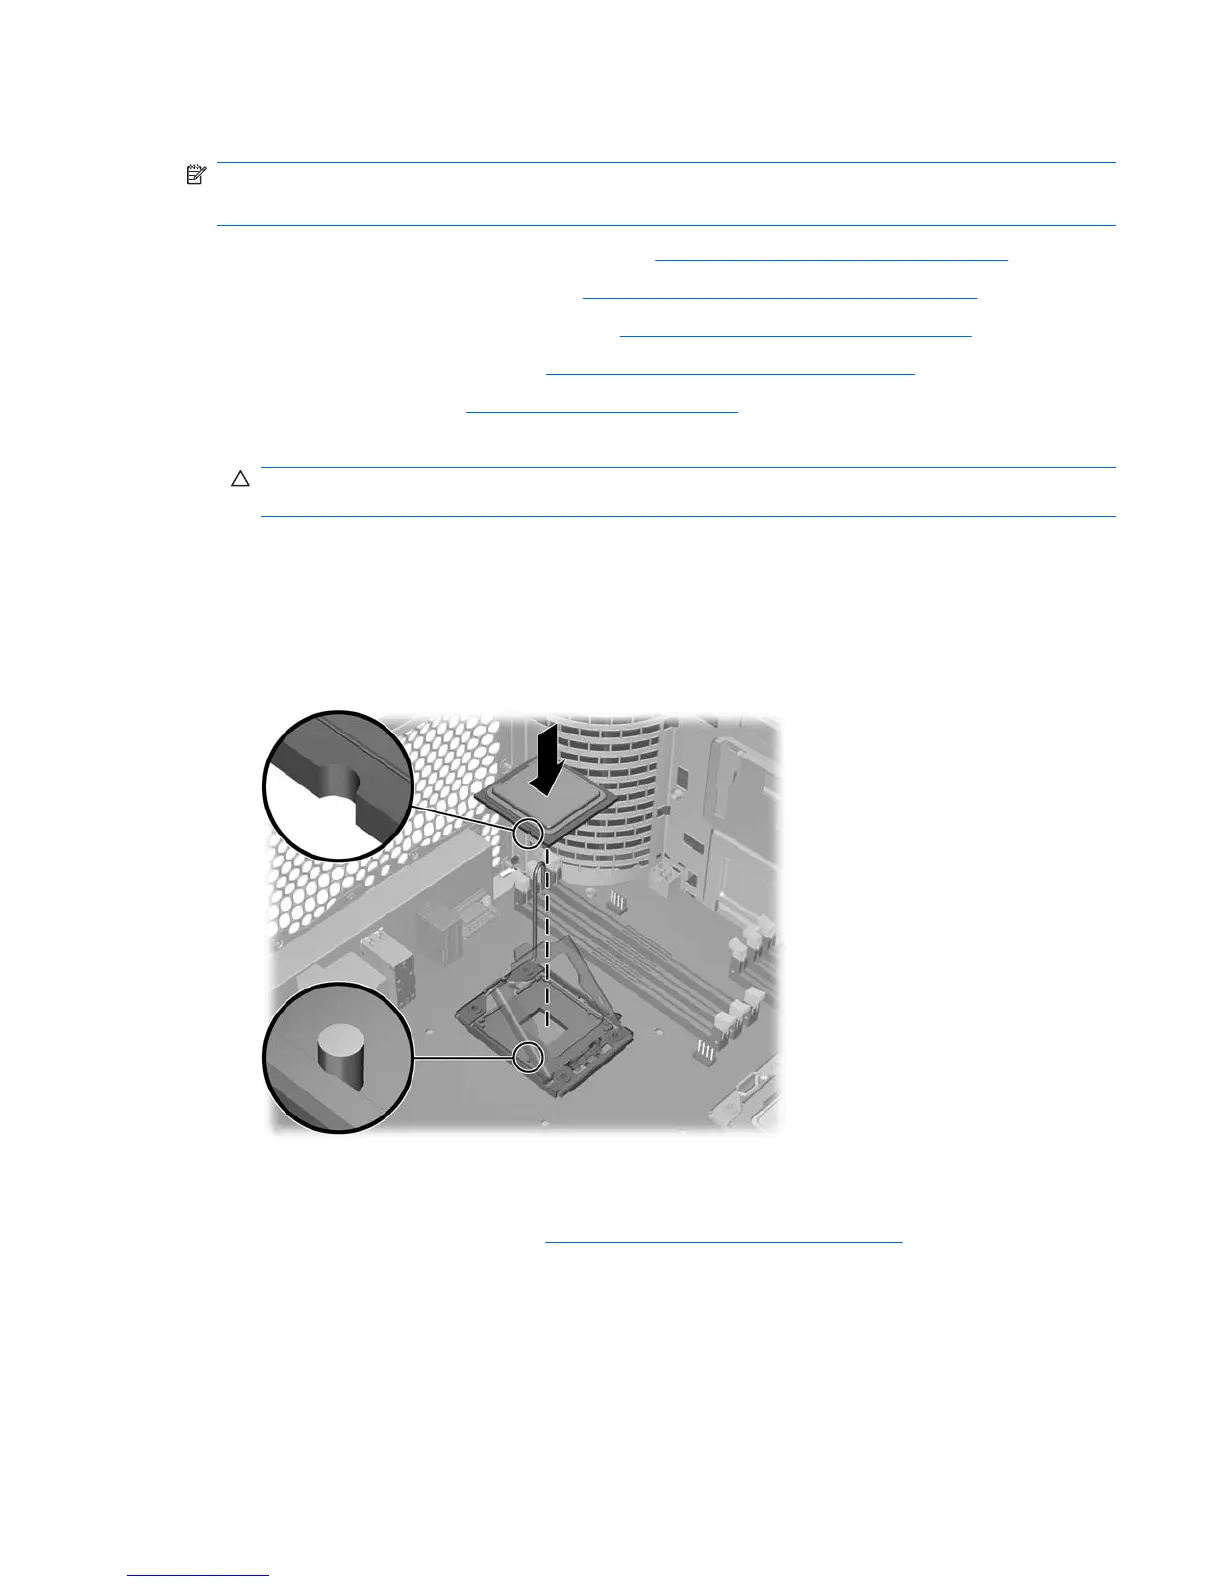
8. Align the notches in the CPU base with the tabs on the socket as shown in the following figure.
Seat the CPU into the socket. Ensure that the underside of the CPU is level with the top of the CPU
socket.
9. Close the CPU cover plate by lightly pressing down on the CPU cover plate while closing the socket
lever.
10. Replace the CPU heatsink (see
Installing the CPU heatsink on page 140 for installation details.)
11. Reinstall all removed components and reconnect all cables that have been disconnected.
ENWW Removing and installing components 143