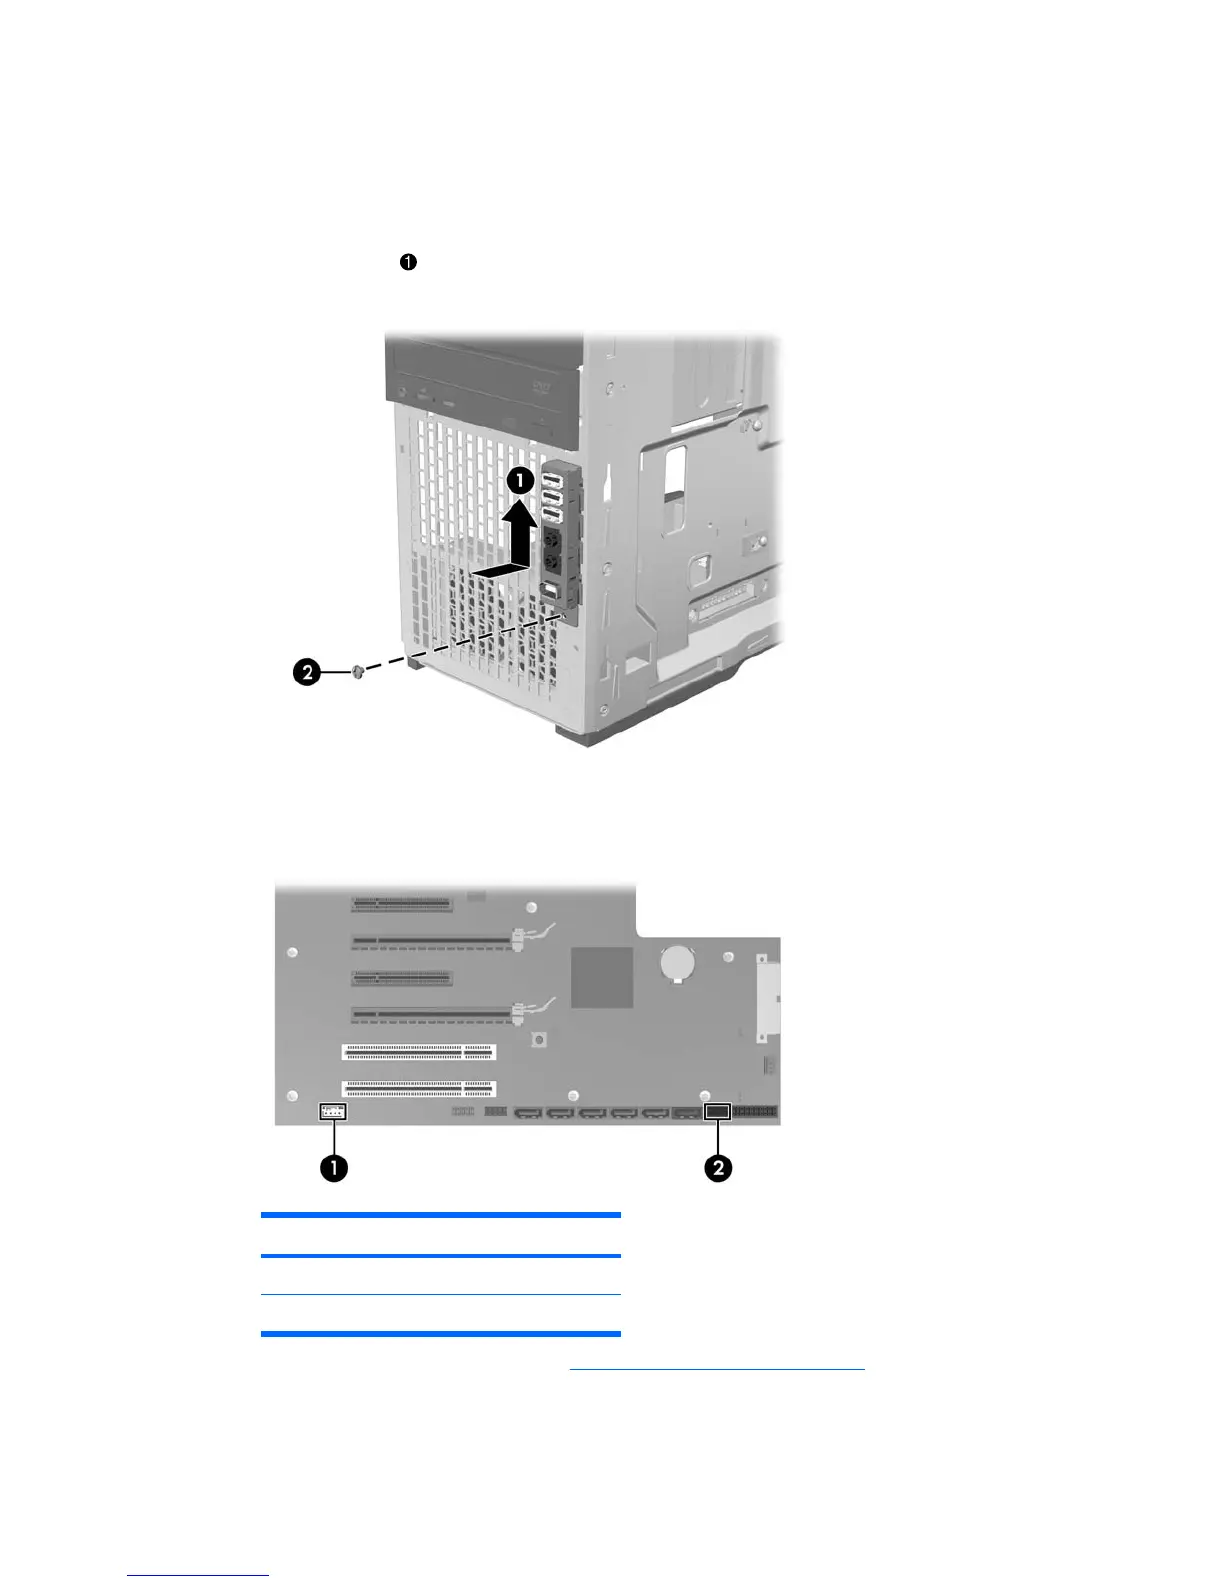
Installing the front panel I/O cable assembly
1. With power removed and the chassis open, guide the front panel I/O cable assembly cables through
the chassis openings from which they were removed.
2. Place the front panel I/O cable assembly in the chassis and guide it into position as shown in the
following figure
. Install the screw
2
.
Figure 5-15 Installing the front panel I/O cable assembly
3. Connect the front panel I/O cable assembly cables to the system board as shown in the following
figure.
Figure 5-16 Connecting the front panel I/O cable assembly cables
Table 5-6 Front panel I/O cable assembly connectors
Item Description
1 Front audio
2 Front USB
4. Reconnect the speaker cable (see Installing the speaker on page 80), and replace the tie wraps
that secure the front panel I/O cables to the chassis.
5. Reinstall all removed components and reconnect all cables that have been disconnected.
ENWW Removing and installing components 87