(1) No. 1 disk installation position (2) No. 0 disk installation position
4. Push the disk to slide the two preinstalled screws into the small holes of the
cucurbit holes.
Figure 5-18 Installing a hard disk
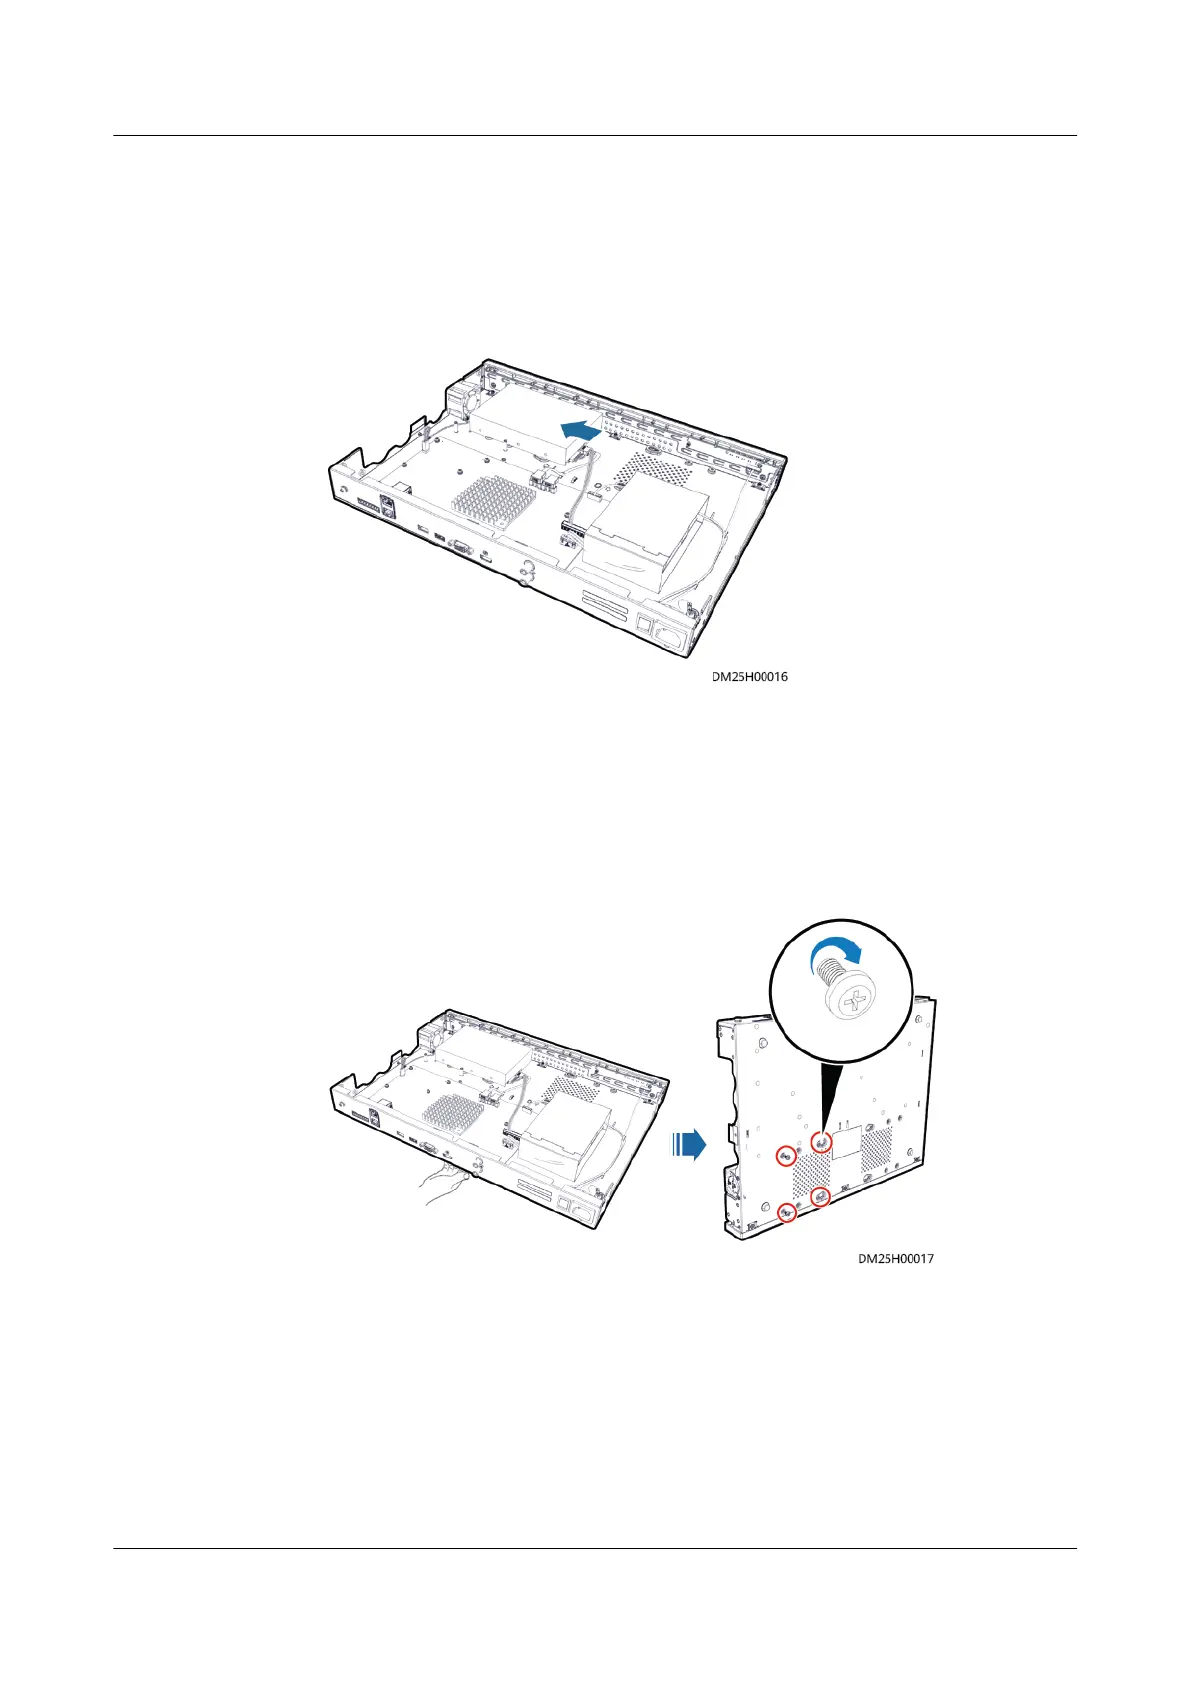
5. Hold the disk with one hand, turn the device 90 degrees with the other hand,
and tighten the preinstalled screws from the rear panel of the device. Take
another two screws removed from the disk. Insert them into another two
holes on the disk (for a disk with six holes, you are advised to install the
screws into the two holes that are far away from the cable outlet) and
tighten them.
Figure 5-19 Installing a hard disk
6. Hold the disk with one hand, turn the device 90 degrees with the other hand,
and tighten the preinstalled screws from the rear panel of the device. Take
another two screws removed from the disk. Insert them into another two
holes on the disk (for a disk with six holes, you are advised to install the
screws into the two holes that are far away from the cable outlet) and
tighten them.
7. Install the upper cover of the chassis. Place the upper cover of the chassis.
Fasten the three screws on the bottom cover of the chassis and the six screws
on the left and right sides of the chassis to
x the upper cover of the chassis.
FusionModule2000 Smart Modular Data Center
Maintenance Guide (Fusion Module Actuator) 5 Parts Replacement
Issue 01 (2020-12-25) Copyright © Huawei Technologies Co., Ltd. 75