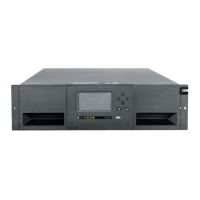
3. Install the module into the rack. See “Installing modules in a rack” on page 56.
4. Align and connect the modules. See “Aligning and connecting modules” on page 60.
5. Connect the components and cables. See “Replacing the Module components and cables” on page
159.
6. Connect the power cords, power on the library, and complete “Verifying Library Module installation
and conguration” on page 159.
7. Add tape cartridges to the new module.
Replacing a module: Overview
To replace the module, you will
1. Update the library rmware to the minimum code level of 1.2.1.0-A00 or higher.
2. Save the library conguration. See “Saving the conguration” on page 155.
3. Remove tape cartridges and power off the library. See “Removing the magazines and cartridges” on
page 155 and “Powering off the library” on page 156.
4. Remove all the components from the module and disconnect the power cords and cables. See
“Removing the Module cables” on page 156.
5. Remove the module from the rack. See “Removing the Module from a rack” on page 157.
6. Install the replacement module into the rack. See “Installing the Module into a rack” on page 159.
7. Replace the components and cables. See “Replacing the Module components and cables” on page
159.
8. Connect the power cords, power on the library, and complete “Verifying Library Module installation
and conguration” on page 159.
9. Replace the tape cartridges.
You need a T-10 Torx screwdriver to remove the drive bay covers and a small flat head screwdriver. Have
several static safe bags available for the boards that are moved to the replacement chassis.
Before the replacement procedure is begun
• Ensure that the rack is level side to side and front to back.
• Verify that any applications that are using the library are idle.
Attention: If the temperature in the room where the replacement module is installed varies by 15
C (59 F) from the room where it was stored, allow it to acclimate to the surrounding environment
for at least 12 hours before it is unpacked from the shipping container.
Saving the conguration
See “Locating Management functions” on page 79 for instructions on saving conguration settings to a le
or an FAT32 formatted USB flash drive with the Management GUI or with the Operator Panel. This action
is needed only for the Base chassis module and only as an extra safety precaution for both chassis and
controller card replacement.
Note: Do not do a Save Conguration on a library that is in a failed state. Save the conguration on a
working library only.
Removing the magazines and cartridges
For detailed instructions, see “Locating Management functions” on page 79 to open the magazines.
Note: As a best practice, complete this procedure while applications are idle. While the magazine is pulled
or removed, the library robotic assembly cannot move media.
IBM Condential
Chapter 6. Upgrading and servicing155

 Loading...