Programming manual
Programming terminals 39
4. After pressing the button that corresponds to the desired setting, it is necessary to
press one of the buttons , , , or
to configure its type.
If an “unused” terminal is configured as I, O, H or D and the keypad emits a “BOP” sound, it
means that the maximum number of terminals available on the control panel has been
reached. If you wish to employ the terminal concerned, you must first configure another
terminal as “Unused”
5. Press the OK button in correspondence with any terminal, provided that it is not an
“Unused” terminal, to access directly the Type programming parameters of the selected
terminal, be it a zone or an output.
Via softwareBy clicking on the System Layout button on the menu on the left, a graphical representation
of the control panel board and a list of the configured peripherals will be shown in the section
on the right (refer to the software manual, paragraph 5-2 Preparing a system layout).
The control panel and device terminals can be programmed in these sections and reached by
right clicking in correspondence with the terminal symbol on the device image.
By right clicking on any one of the PCBs you can assign a configuration common to all the
terminals on the selected board. Right clicking on a single terminal allows it to be configured
separately.
Double clicking on the icon of a terminal with an already assigned configuration will open a
window where you can configure all the parameters of the selected terminal.
The section menu bar provides the Rename the CCCs in sequential mode button. This
button starts an operation that reassigns the Contact-ID code of each zone in such a way that
they are all in sequential order.
The section also provides an Data export for supervisor button for the creation of an
interface file with monitoring software, such as INIM's SmartLook.
6-1
Zones/Inputs
The terminal the zone is connected to must be configured as an “input”.
Via keypad
Type in Code
(Installer)
, PROGRAMMING Terminals,
select the terminal concerned configured as input
(“
I
”)
or
Type in Code
(Installer),
PROGRAMMING Zones,
select the zone concerned
Via softwareTo program the zone, click on the System Layout button and, in the section on the right,
select the device (control panel or peripheral) to which the terminal to be configured belongs.
Here, by right clicking on the icon of the terminal you can configure it as a “zone”. Instead, by
double clicking you access the programming phase.
or
By clicking on the Zones button on the menu on the left, the section on the right will show a
list of all the available zones and their parameters. Selecting one of the options will allow you
to configure the parameters of the single zone by clicking on the button.
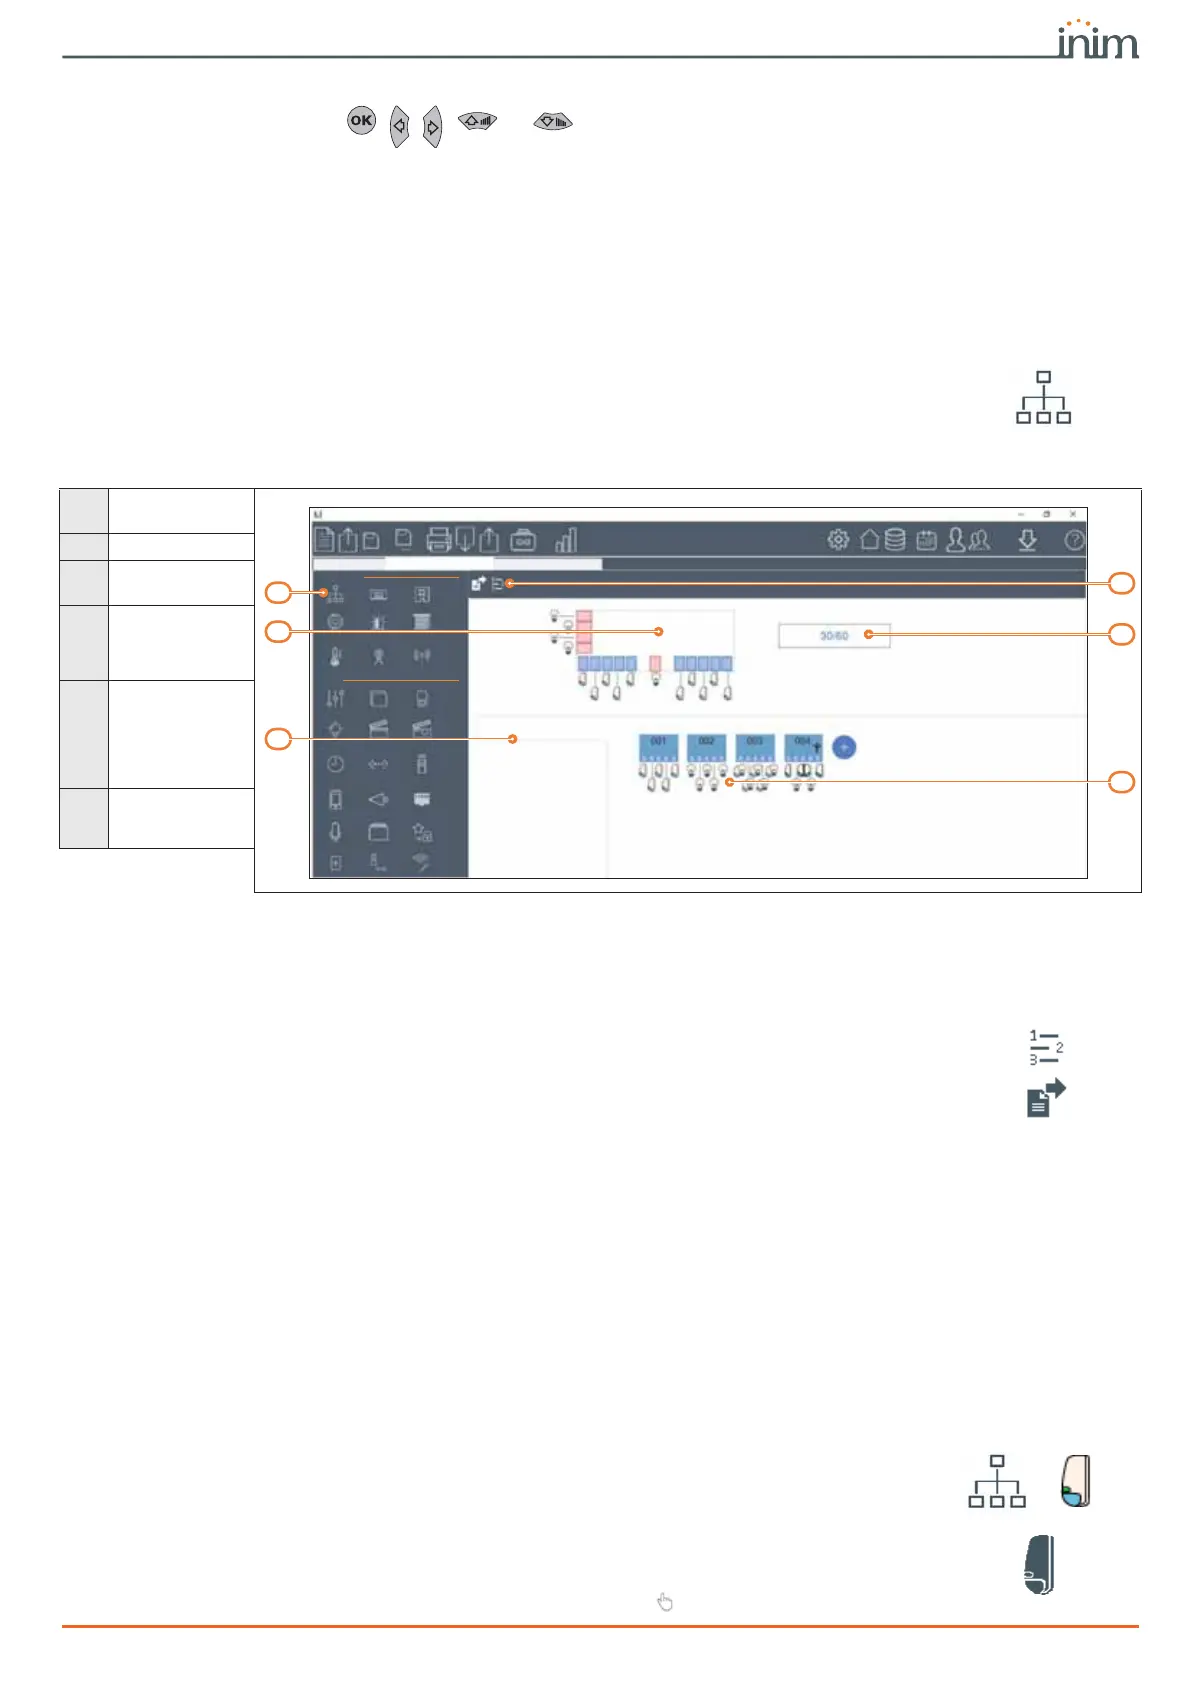
Table 6-2: Example of terminals undergoing programming
A
“System Layout”
section button
B
Section menu bar
C
Control panel ter-
minals
D
Number of termi-
nals used out of
the maximum
number
E
List of peripheral
categories with
relative number of
terminals used out
of the maximum
number
F
Terminals of the
selected peripher-
als
6WDUWSDJH 3ULPHV\VWHP 3ULPHZHELQDU
3ULPH678',2
7(50,1$/6$9$,/$%/(727$/
$'''(9,&(21%86
3HULSKHUDOV
.(<3$'6
5($'(56
+20($8702'8/(6
9,578$/7(50,1$/6
6281'(56
(;3$16,216
1(;86
3DQHO
6
6
4
3
5
7