EasyManua.ls Logo

Intel Arria 10 FPGA User Manual

Intel Arria 10 FPGA
118 pages
To Next Page IconTo Next Page
To Previous Page IconTo Previous Page
Page #16 background image
Table 7. SW3 DIP PCIe Switch Default Settings (Board Top)
Switch Board Label Function Default Position
1 x1 ON for PCIe x1 ON
2 x4 ON for PCIe x4 ON
3 x8 ON for PCIe x8 ON
4 OFF for 1.35 V MEM_VDD power rail OFF
2. If all of the resistors are open, the FMCA and FMCB VCCIO value is 1.2 V. To
change that value, add resistors as shown in the following table.
Table 8. Default Resistor Settings for the FPGA Mezzanine Card (FMC) Ports (Board
Top)
Board Reference Board Label Description
R1083 1.35V 1.35 V FMCB V
CCIO
select
R1082 1.5V 1.5 V FMCB V
CCIO
select
R1081 1.8V 1.8 V FMCB V
CCIO
select
Note: A 0 Ohm resistor is installed by default.
R1084 1.35V 1.35 V FMCA V
CCIO
select
R1085 1.5V 1.5 V FMCA V
CCIO
select
R1086 1.8V 1.8 V FMCA V
CCIO
select
Note: A 0 Ohm resistor is installed by default.
3. Set DIP switch bank (SW4) to match the following table.
Table 9. SW4 JTAG DIP Switch Default Settings (Board Bottom)
Switch Board Label Function Default Position
1 ARRIA 10 OFF to enable the Arria 10 in the JTAG chain OFF
2 MAX V OFF to enable the MAX V in the JTAG chain OFF
3 FMCA ON to bypass the FMCA connector in the JTAG chain ON
4 FMCB ON to bypass the FMCB connector in the JTAG chain ON
4. Set DIP switch bank (SW5) to match the following table.
Table 10. SW5 DIP Switch Default Settings (Board Bottom)
Switch Board Label Function Default Position
1 MSEL0 OFF for MSEL0 = 1; for FPP standard mode OFF
2 MSEL1 ON for MSEL1 = 0; for FPP standard mode ON
3 MSEL2 ON for MSEL2 = 0; for FPP standard mode ON
4 VIDEN
OFF for enabling VID_EN for the Smart Voltage ID (SmartVID)
feature
ON
5. Set DIP switch bank (SW6) to match the following table.
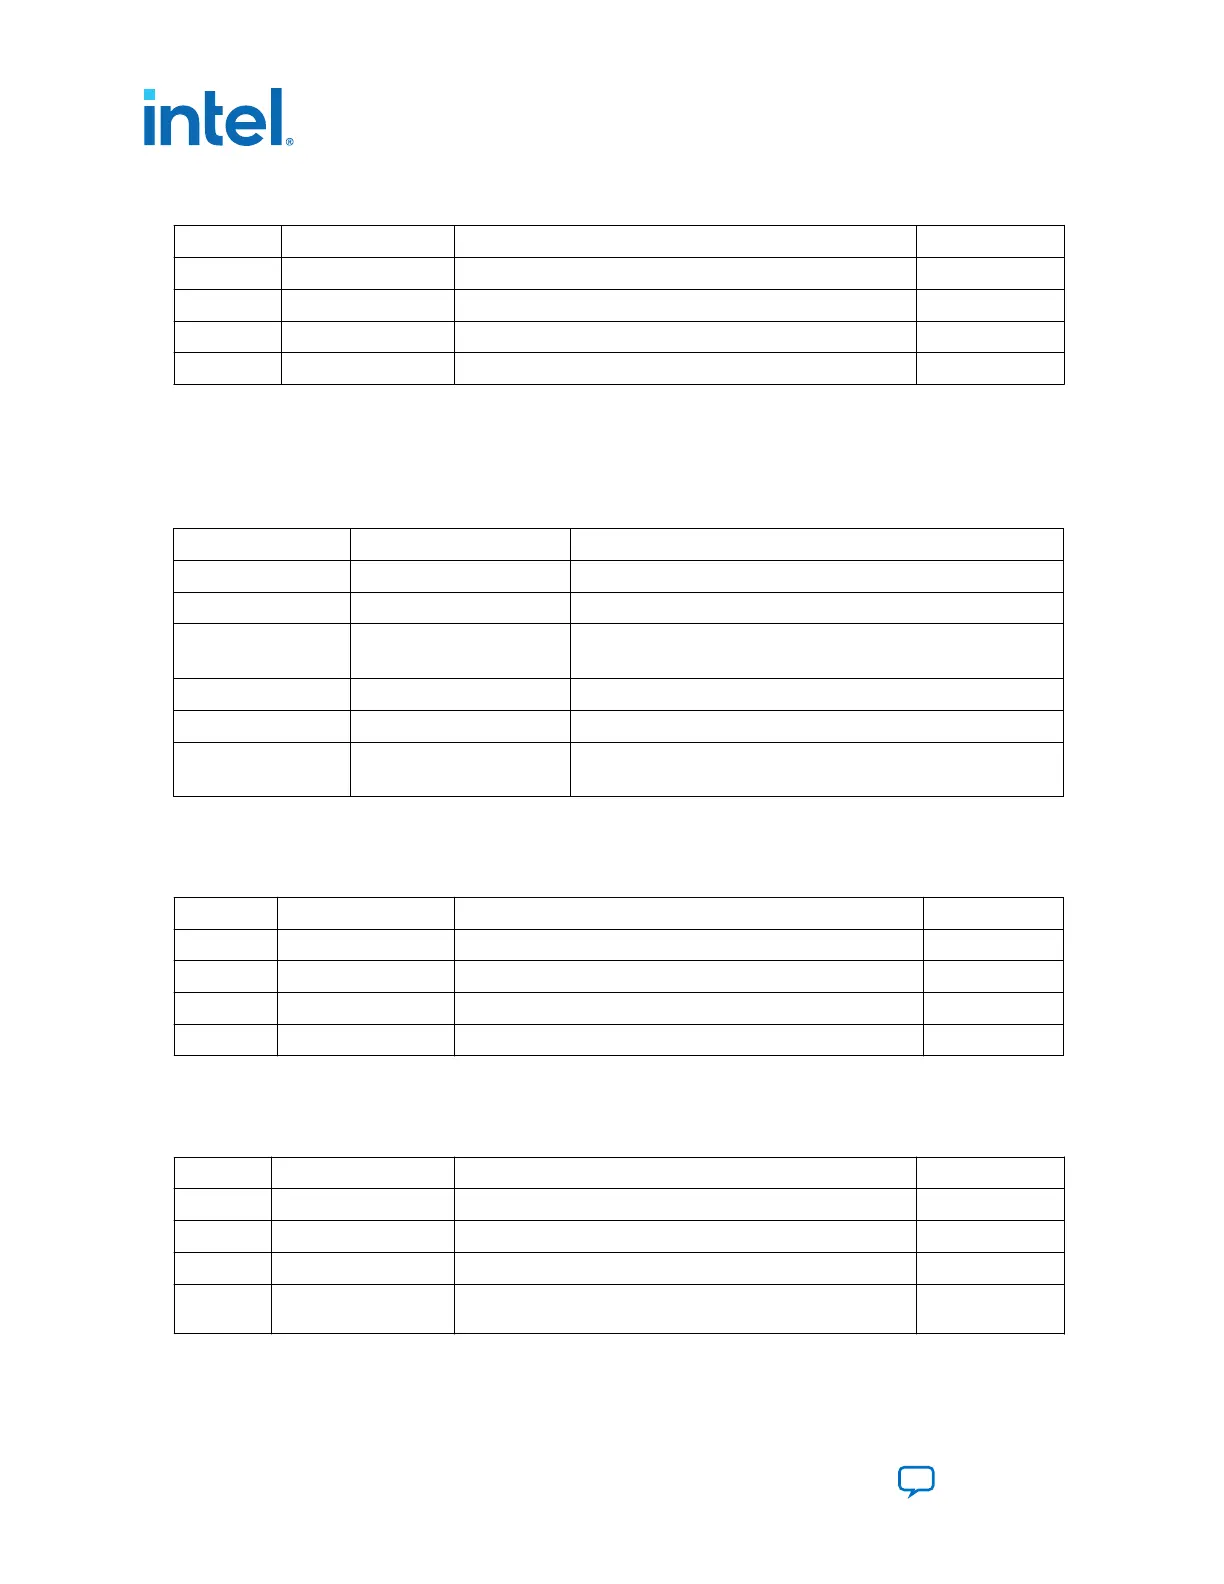
3. Development Board Setup
683526 | 2023.07.12
Intel
®
Arria
®
10 FPGA Development Kit User Guide
Send Feedback
16

Table of Contents

Question and Answer IconNeed help?

Do you have a question about the Intel Arria 10 FPGA and is the answer not in the manual?

Intel Arria 10 FPGA Specifications

General IconGeneral
FamilyArria 10
CategoryFPGA
Technology Node20 nm
Core Voltage0.9 V
ALMsUp to 427, 200
Package OptionsVarious
Power ConsumptionVaries by configuration and usage

Summary

Intel Arria 10 FPGA Development Kit Overview

1.1. General Description

Provides an overview of the Arria 10 GX FPGA development board's block diagram.

1.2. Recommended Operating Conditions

Specifies the recommended ambient operating temperature range and other parameters.

1.3. Handling the Board

Provides guidelines for safely handling the development board, emphasizing static discharge precautions.

Getting Started

2.1. Installing the Subscription Edition Software

Details the process of installing the Quartus Prime Standard Edition software and activating the license.

2.2. Development Kit Package

Details the contents and directory structure of the development kit package.

2.3. Installing the USB-Blaster Driver

Instructions for installing the necessary driver for the on-board USB-Blaster II.

Development Board Setup

3.1. Applying Power to the Board

Steps to connect power and turn on the development board.

3.2. Default Switch and Jumper Settings

Explains the default settings for board switches and jumpers.

3.3. Default Switch and Resistor Settings

Details default switch and resistor configurations for board functionality.

3.4. Factory Reset

Procedures for restoring the development board to its factory default state.

Board Test System

4.1. Preparing the Board

Instructions for preparing the development board before running tests.

4.2. Running the Board Test System

Steps to launch and operate the Board Test System GUI application.

4.3. Version Selector

Guide to selecting the correct Arria 10 silicon version for testing.

4.4.1. Using the Configure Menu

How to select and load test designs onto the FPGA using the Configure menu.

4.4.2. The System Info Tab

Details about the System Info tab for viewing board configuration and status.

4.4.3. The GPIO Tab

Interacting with board components like LCD, LEDs, switches, and buttons via the GPIO tab.

4.4.4. The Flash Tab

Reading and writing flash memory contents on the development board.

4.4.5. The XCVR Tab

Performing loopback tests on QSFP, SFP, SMA, and SDI ports.

4.4.6. The PCIe Tab

Running PCIe loopback tests and measuring PCIe transmit signal eye diagrams.

4.4.7. The FMC A Tab

Performing loopback tests on the FMC A port.

4.4.8. The FMC B Tab

Performing loopback tests on the FMC B port.

4.4.9. The DDR3 Tab

Reading and writing DDR3 memory on the development board.

4.4.10. The DDR4 Tab

Reading and writing DDR4 memory on the development board.

4.4.11. The Power Monitor

Measuring and reporting current power information from the board.

4.4.12. The Clock Control

Setting programmable oscillators for various frequencies.

Board Update Portal

5.1. Connecting to the Board Update Portal Web Page

Instructions to connect to the Board Update Portal web page.

Board Components

6.1. Board Overview

Provides an annotated board image and major component descriptions.

6.2. MAX V CPLD System Controller

Details the functions and pin-out of the MAX V CPLD System Controller.

6.3. FPGA Configuration

Explains how to configure the FPGA using Quartus Programmer.

6.4. Status Elements

Describes the status LEDs on the Arria 10 GX FPGA development board.

6.5.1. User-Defined Push Buttons

Details the function of user-defined push buttons on the development board.

6.5.2. User-Defined DIP Switch

Explains the functionality and settings of user-defined DIP switches.

6.5.3. User-Defined LEDs

Describes the behavior and purpose of user-defined LEDs on the board.

6.5.4. Character LCD

Information on the character LCD interface and its usage.

6.5.5. DisplayPort

Details the DisplayPort connector and its associated signals.

6.5.6. SDI Video Input/Output Ports

Describes the SDI video ports and their supported standards.

6.6.1. On-Board Oscillators

Details the on-board oscillators, their frequencies, and FPGA pin assignments.

6.6.2. Off-Board Clock I/O

Describes how to drive input and output clocks to/from the board.

6.7.1. PCI Express

Details the PCI Express interface, its speeds, and pin assignments.

6.7.2. 10/100/1000 Ethernet PHY

Information on the Ethernet PHY, its interface, and signal names.

6.7.3. HiLo External Memory Interface

Describes external memory interface support and pin assignments.

6.7.4. FMC

Details FMC connector pin assignments and signaling for FMC modules.

6.7.5. QSFP

Covers QSFP pin assignments and functions for the QSFP module.

6.7.6. SFP+

Details SFP+ pin assignments and signal names for the SFP+ port.

6.7.7. I2C

Explains I2C communication and signals for accessing PLLs and clocks.

6.8.1. Flash

Details the flash memory devices, their map, and pin assignments.

6.8.2. Programming the Flash Using Quartus Programmer

Steps to program the flash memory using Quartus Programmer.

6.9.1. Board Power Supply

Describes the development board's power supply and its capabilities.

6.9.2. Power Measurement

Explains how to measure voltage, current, and wattage using on-board sensors.

6.10.1.1. DDR3L

Block diagram and details for the DDR3L x 72 SDRAM interface.

6.10.1.2. DDR4

Block diagram for the DDR4 x 72 SDRAM interface.

6.10.1.3. RLDRAM 3

Block diagram for the RLDRAM 3 x 36 controller.

6.10.1.4. QDR-IV

Block diagram for the QDR-IV x 36 SRAM devices.

6.10.1.5.1. High Pin Count (HBC)

Details FMC High Pin Count (HPC) connections per Vita57.1 standard.

6.10.1.5.2. Low Pin Count (LPC)

Details FMC Low Pin Count (LPC) connections per Vita57.1 standard.

Additional Information

A.1. Document Revision History

Provides a log of changes made to the document across different versions.

A.2. Compliance and Conformity Statements

Contains statements related to board compliance and conformity with standards.

Related product manuals