1-9
Basic Operations
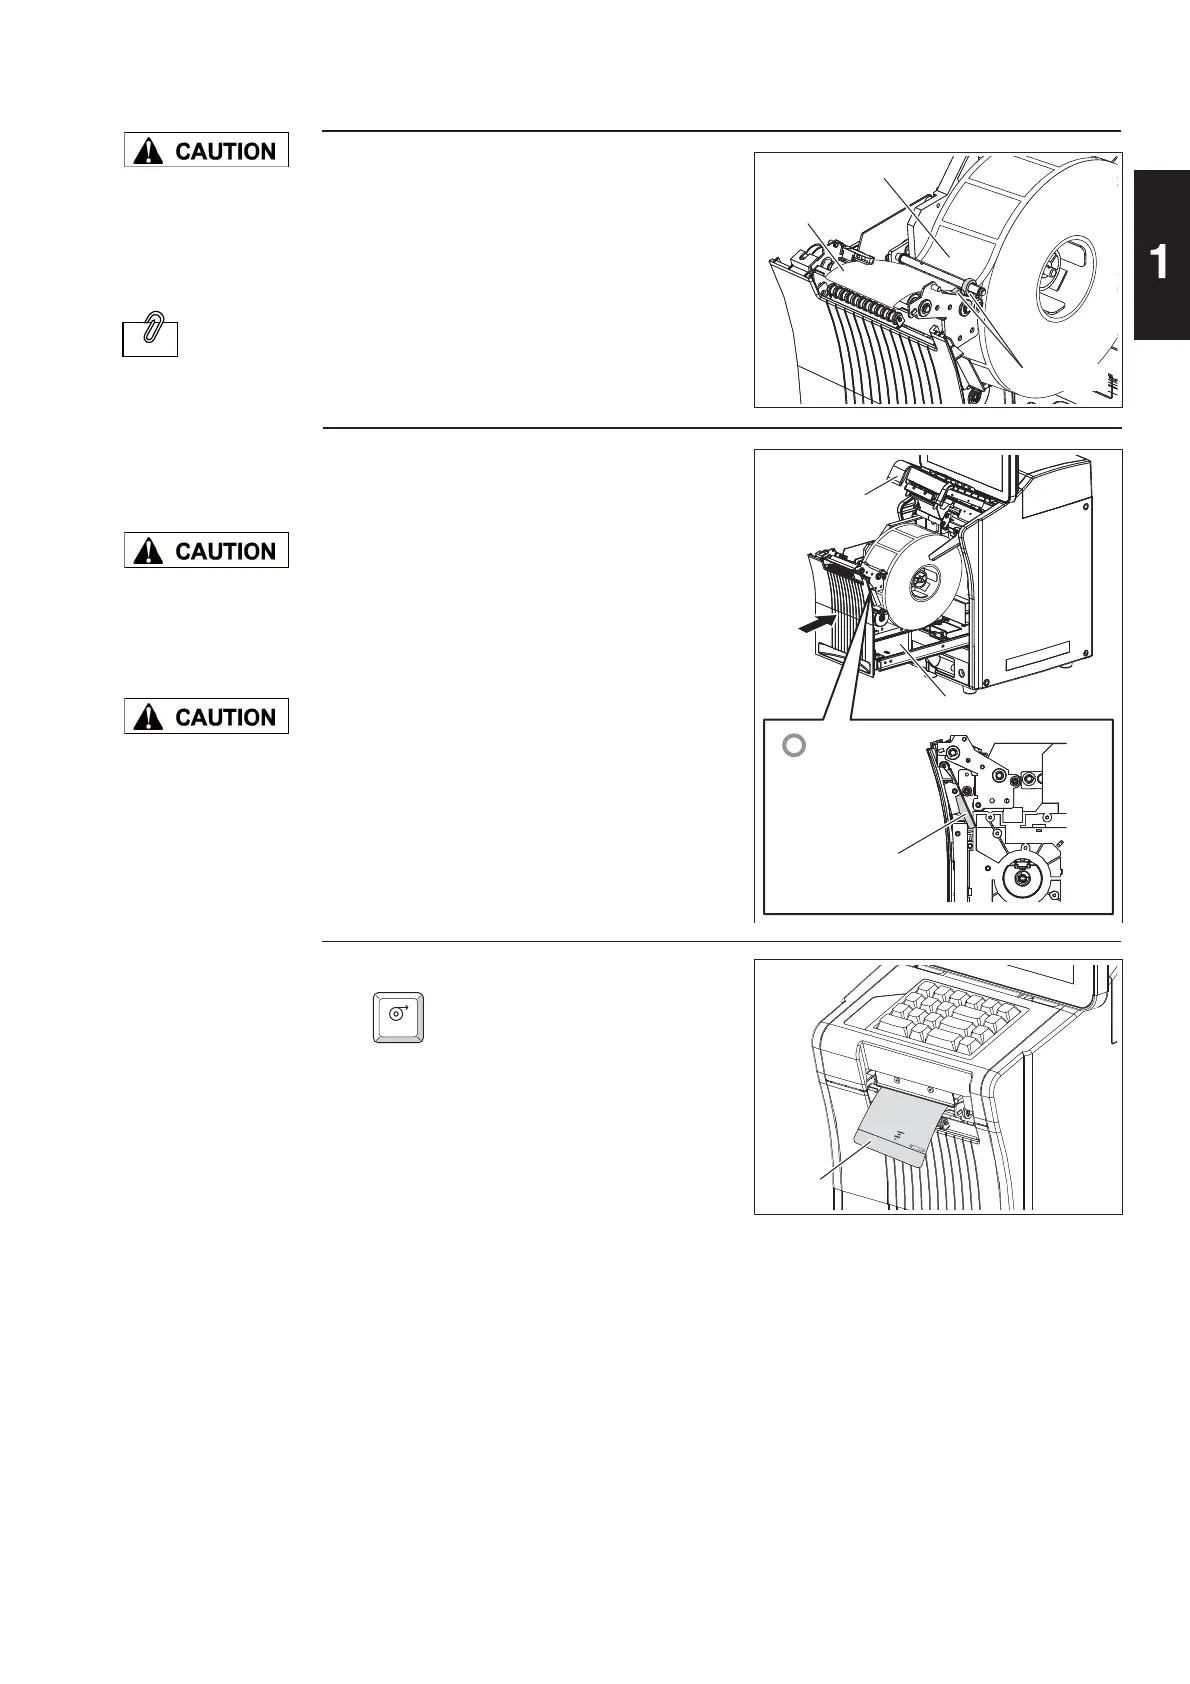
5.
Adjust the width of the label
guide.
Slide the label guide to fi t the width of
the label backing paper.
Press the [FEED] key.
A label is fed and the peeling position is
determined.
Press the FEED key several times when
one label is not completely peeled off.
Note: Confi rm that the backing paper is
smoothly wound.If the backing
paper is not normally wound,
reconfi rm the way of threading the
label paper, label stop position by
the backing paper stopper, and
width of the label guide.
6.
Push the label set unit into the
main body until it clicks into
place.
Push the label set unit straight into the
machine.
Note: If the cassette cannot be normally
inserted when pushing the label
set unit into the machine, check
that the auxiliary roller is released.
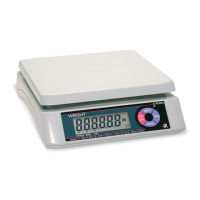
7.
Make the space
between the label
guide and the label
backing paper as
small as possible.
Push the label set unit
into the machine after
making sure that the
roll stopper has been
completely lowered.
Push the label printer
carefully so as not to
get your fi ngers, etc.
caught between the
label set unit and the
main body.
When the fi rst label is
set at the position as
shown in the fi gure on
the right,
the number of labels
issued at the time of
feeding is reduced.
FEED
Label backing
paper
The first label
Label guide
Thermal head
cover
Label set unit
Auxiliary roller
Released state
Label
INFORMATION