8.6 SETTING
8 – 48
.
...
....
8
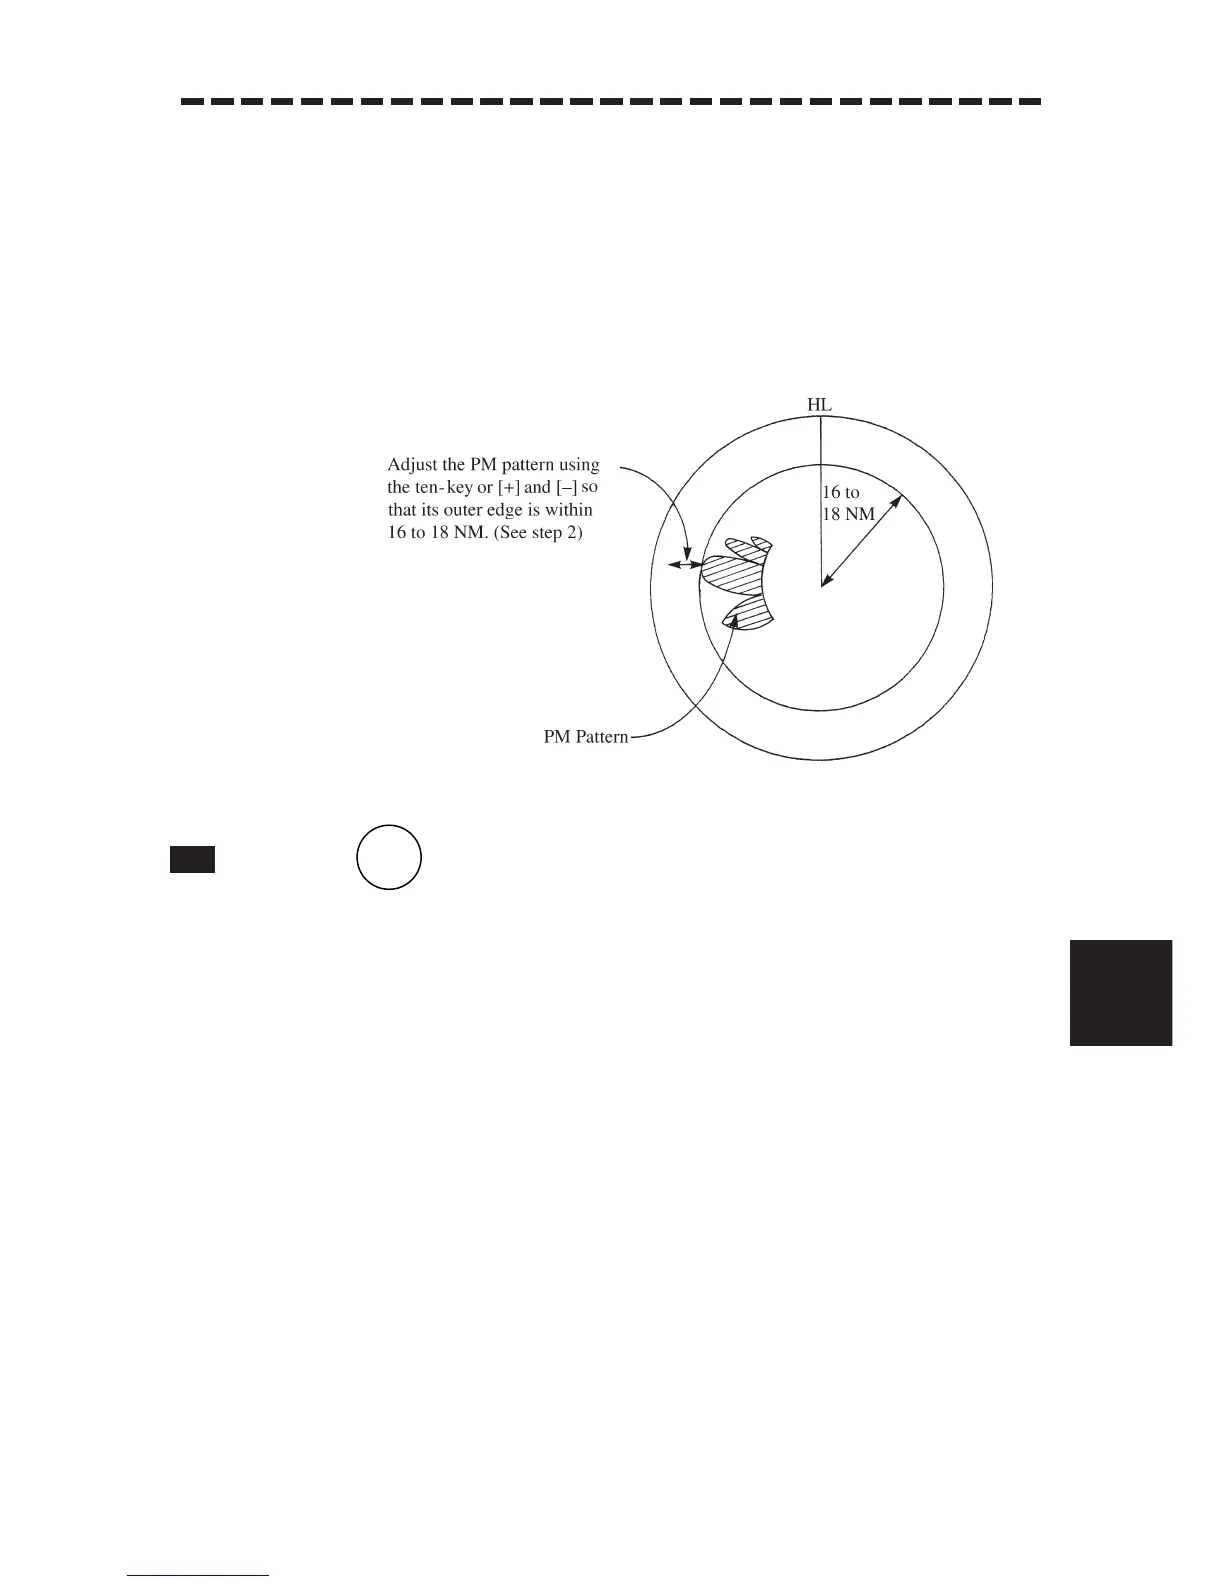
5 Affix the INFORMATION LABEL as supplied with the Performance Monitor to a
suitable position of the board side of the Display Unit.
6 Write down the value of the “PM” indicator in the TEST Menu and the date of
checking in the INFORMATION LABEL.
1 Press .
The ADJUST Menu will be closed, returing to the state before test.
Note: • All target acquisitions by ARPA functions will be cancelled.
The target acquisition cancelled when PM is ON will not be recovered.
• The radar image is suppressed to make the PM image easier to see.
Therefore, the ADJUST MENU should be always opened after PM check is
completed.
 Loading...