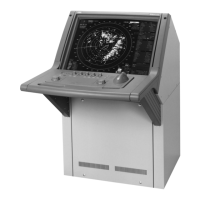
2 – 3
q [PWR] (Power Supply) Switch
When this switch is set to ON, the lamp lights to start the system.
w [TX/STBY] (Operation) Switch
The STANDBY will appear at the upper left of the radar display about 3 minutes after
the [PWR] switch is set to ON. Then, press this switch, and transmission will be started.
Pressing the switch during transmission sets the equipment to the standby state.
e [BRILL] (Video Brilliance) Control
Controls the brilliance of the entire display panel.
r [TUNE] (Tuning) Control
Tunes the target signals to display the targets most clearly on the radar display.
t [RAIN] (Rain/Snow Clutter Suppression) Control
Diminishes the clutter echo from rain or snow.
y [SEA] (Sea Clutter Suppression) Control
Diminishes the clutter echo from the sea surface.
u [GAIN] (Receiving Sensitivity) Control
Controls the radar receiving sensitivity.
i [PWR ACK] (Power Alarm Acknowledgment) Switch
Acknowledges the alarm in case of power trouble.
o [PANEL] (Operation Panel Brilliance) Switch
Controls the brilliance for the controls and switches on the operation panel.
!0 [TRAILS] (Trails Display) Switch
Press the switch to display the trails of other ships.
!1 [ALARM ACK] (Alarm Acknowledge) Switch
Press this switch to acknowledge an failure, target approach or collision alarm.
!2 [TGT DATA] (Target Data Setup) Switch
Sets up a target under tracking to read its numeric data.
!3 [ACQ MANUAL] (Manual Acquisition) Switch
Sets the manual target acquisition mode to ON/OFF.
!4 [ACQ AUTO] (Automatic Acquisition) Switch
Sets the automatic target acquisition mode to ON/OFF.
!5 [ACQ CANCEL] (Acquisition Cancel) Switch
Cancels the symbol and vector of a target under tracking and stops tracking the target.
!6 [HL OFF] (Heading Line Off) Switch
The ship’s HL (heading line) can be cancelled as long as the switch is being depressed.
!7 [RANGE + / - ] (Range Scale Select) Switch
Selects a range scale from 0.125 to 96 (or 120) nautical miles.
!8 [EBL1] (Electric Bearing Line 1) Switch
Selects and displays EBL1.
!9 [EBL2] (Electric Bearing Line 2) Switch
Selects and displays EBL2.
@0 [EBL] (Electric Bearing Line) Control
Rotates the bearing of an EBL.
@1 [VRM1] (Variable Range Marker 1) Switch
Selects and displays VRM1.
@2 [VRM2] (Variable Range Marker 2) Switch
Selects and displays VRM2.
@3 [VRM] (Variable Range Marker) Control
Adjusts the range of a VRM.
@4 [TEST] (Test) Switch
Checks the operational status of the radar equipment.
 Loading...