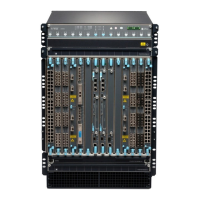
Unpacking and Mounng the EX9214 Switch
IN THIS SECTION
Unpacking the EX9200 Switch | 148
Unpacking a Line Card Used in an EX9200 Switch | 149
Parts Inventory (Packing List) for an EX9214 Switch | 150
Register Products—Mandatory to Validate SLAs | 153
Installing and Connecng an EX9214 Switch | 154
Installing a Mounng Shelf in a Rack or Cabinet for an EX9214 Switch | 155
Moving the Mounng Brackets for Center-Mounng an EX9200 Switch | 158
Mounng an EX9200 Switch on a Rack or Cabinet Using a Mechanical Li | 160
Unpacking the EX9200 Switch
The switch is shipped in a wooden crate. A wooden pallet forms the base of the crate. The switch
chassis is bolted to this pallet. Quick start installaon instrucons and a cardboard accessory box are
also included in the shipping crate.
NOTE: The switch is maximally protected inside the shipping box. Do not unpack it unl you are
ready to begin installaon.
Ensure that you have the following parts and tools available:
• Phillips (+) screwdrivers, number 1 and 2
• 1/2-in. or 13-mm open-end or socket wrench to remove bracket bolts from the shipping pallet
• Cover panels to cover any slots not occupied by a component
To unpack the switch:
1. Move the shipping crate to a staging area as close to the installaon site as possible, where you
have enough room to remove the components from the chassis. While the chassis is bolted to the
pallet, you can use a forkli or pallet jack to move it.
148

 Loading...