KACO blueplanet 3.0 NX3 M2 KACO blueplanet 5.0 NX3 M2 KACO blueplanet 8.0 NX3 M2 KACO blueplanet 10.0 NX3 M2
KACO blueplanet 15.0 NX3 M2 KACO blueplanet 20.0 NX3 M2 Page 7
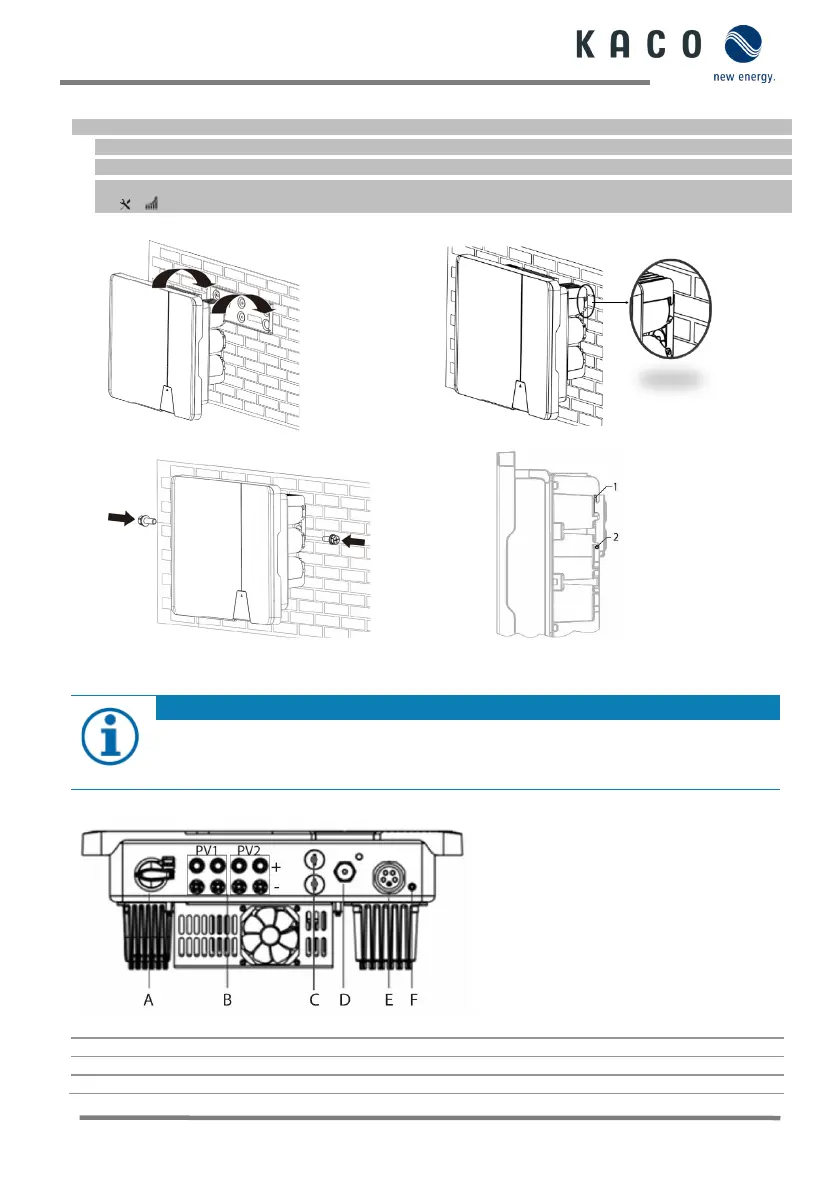
Lifting and installing the device
1 Lift the device using the grip recesses (see Fig. 3.2). Observe the centre of gravity!
2 Hook the device into the mounting plate (see Fig. 6 and Fig. 8.2 – Pos 1.) and check that it is securely seated.
3 Mount the enclosed screws (2x M5x14mm) on both sides of the hole (Fig.8.2 – Pos 2.) to secure against lifting out.
[ P / 2 Nm]
»Device is installed. Proceed with the electrical installation.
Fig. 6: Mounting the inverter to the wall bracket
Fig. 7: Check that the device is secure.
Fig. 8.1: Fasten the inverter Fig. 8.2: Securing the inverter
1.6 Making the electrical connection
Select conductor cross-section, safety type and safety value in accordance with the following basic
conditions:
Country-specific installation standards; power rating of the device; cable length; type of cable installation;
1.6.1 General view inverter from the bottom
Fig. 8.3: Connection site: Legend
A DC integrated isolator switch
COM 3 – Connector for WiFi stick
B DC connector for PV generator
C COM1&2 – RJ45 socket for RS485 connection
 Loading...