Material Spares
Cleaning cloth
Wrench
Precondition The machine is shut down.
The machine is fully vented, the pressure gauge reads 0 psig
Machine is cooled down.
All compressed air consumers are disconnected and the air outlet valves are open.
The negative cable to the battery is disconnected.
➤ Open the right-hand access door.
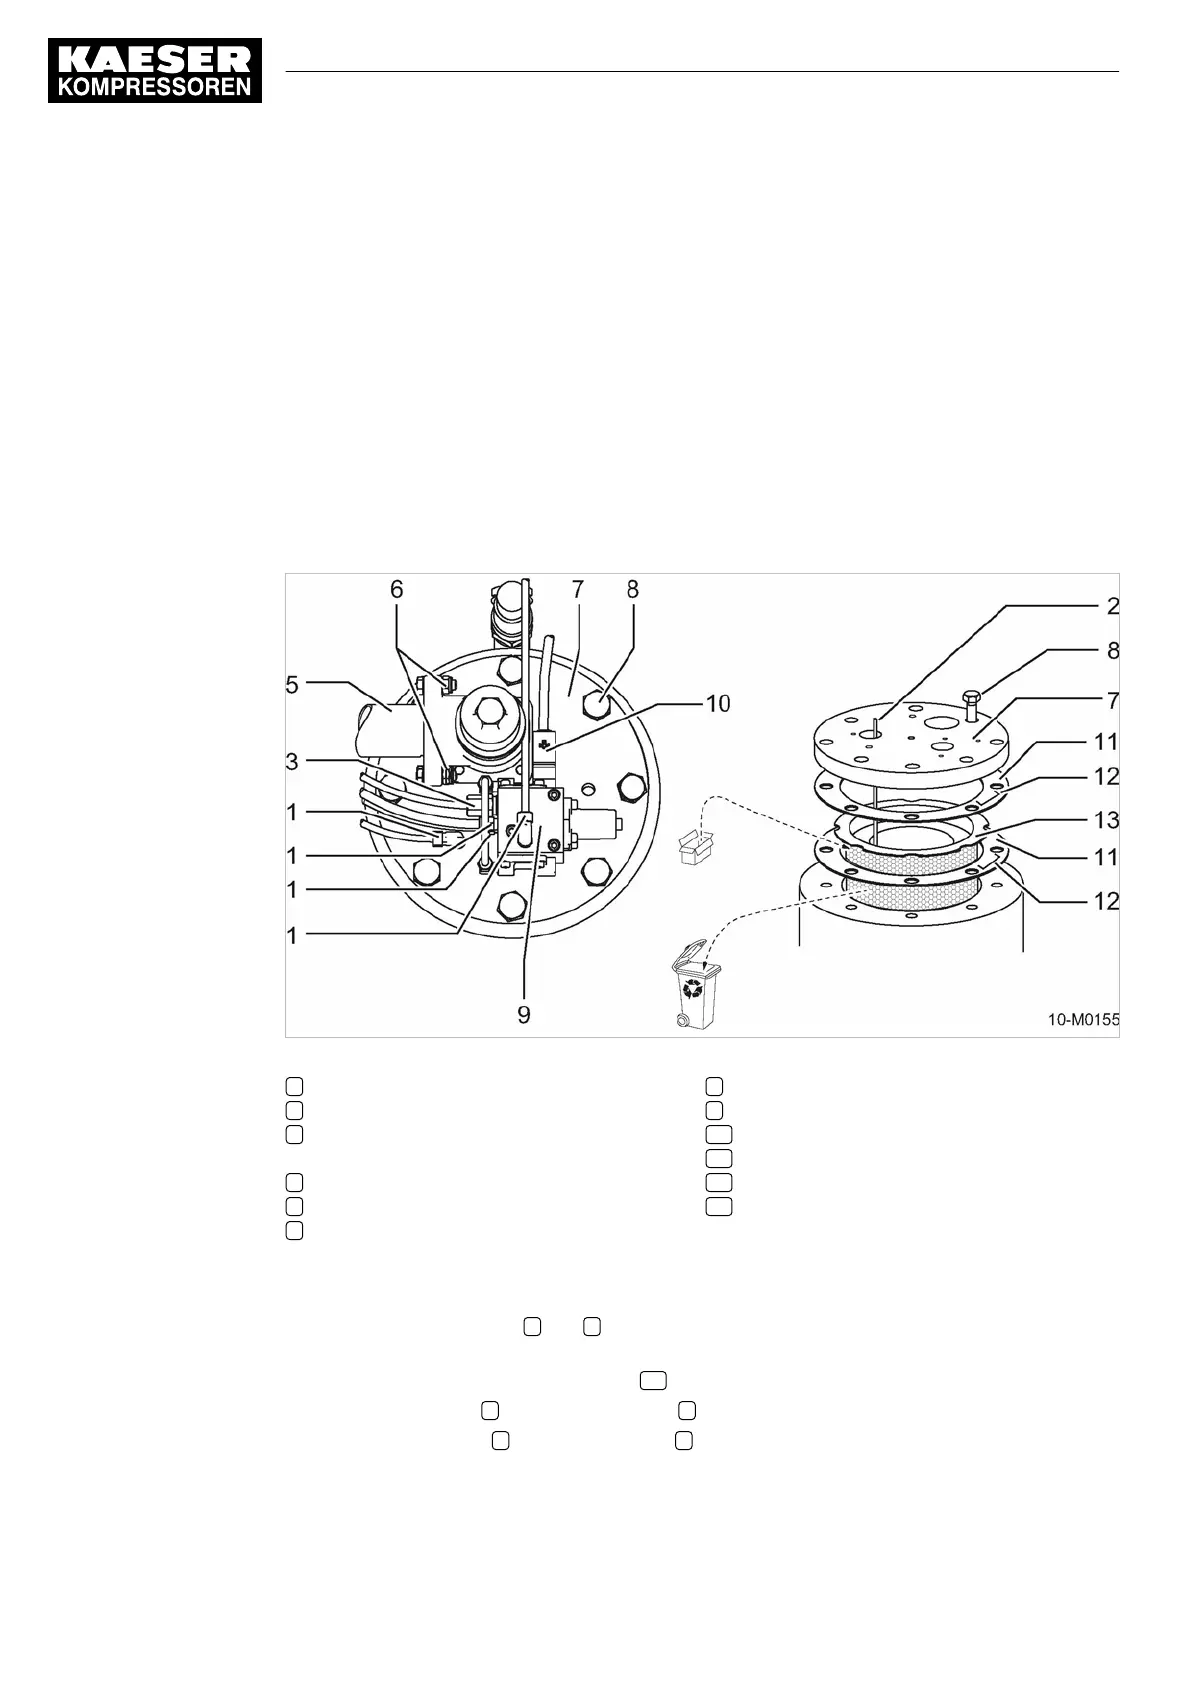
10.4.6.1 Changing the oil separator cartridge
Fig. 69 Changing the oil separator cartridge
1 Control air line union nut
2 Oil scavenge pipe (screwed to the cover)
3 Oil scavenge pipe union nut (screwed to
the dirt trap)
5 Air pipe
6 Pipe fitting
7 Cover
8 Fixing screw
9 Control valve
10 Solenoid valve plug
11 Gasket
12 Metal clip
13 Oil separator cartridge
Changing the oil separator cartridge
1.
Unscrew the union nuts 1
and 3 and place the components with connections carefully to one
side.
2.
Pull out the plug to the solenoid valve 10
and withdraw the cable.
3.
Unscrew the fitting 6
and turn the air pipe 5 to one side.
4.
Remove the screws 8
securing the cover 7 to the tank.
10 Maintenance
10.4 Compressor Maintenance
140
Operator Manual Screw Compressor
M100
No.: 9_6999 23 USE
 Loading...