10.4.6.2 Option ba
Changing the oil separator (machine with low-temperature equipment)
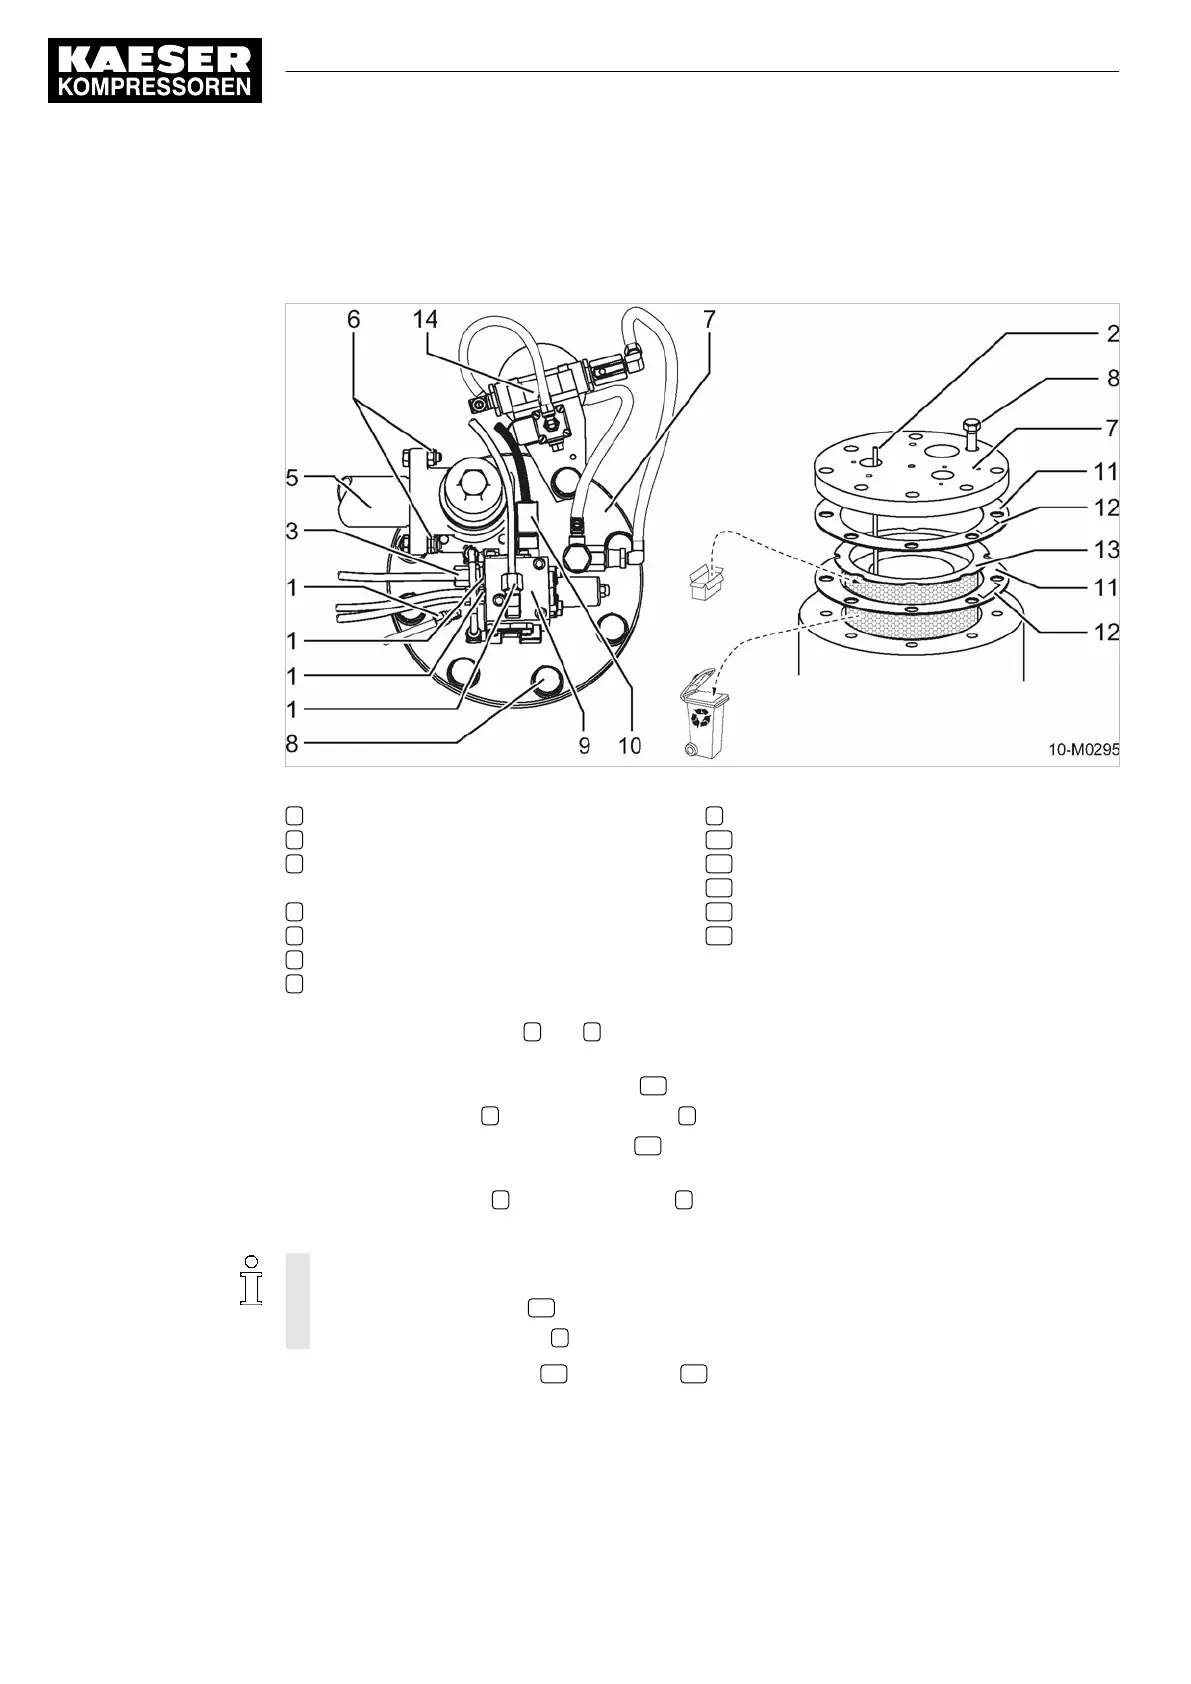
Fig. 70 Changing the oil separator cartridge (Option ba)
1 Control air line union nut
2 Oil scavenge pipe (screwed to the cover)
3 Oil scavenge pipe union nut (screwed to
the dirt trap)
5 Air pipe
6 Pipe fitting
7 Cover
8 Fixing screw
9 Control valve
10 Solenoid valve plug
11 Gasket
12 Metal clip
13 Oil separator cartridge
14 Frost protector
1. Unscrew the union nuts 1 and 3 and place the components with connections carefully to one
side.
2.
Pull out the plug to the solenoid valve 10
and withdraw the cable.
3.
Unscrew the fitting 6
and turn the air pipe 5 to one side.
4.
Loosen the frost protector clamp ring 14
and empty the bowl. See chapter 10.8.5 on frost pro‐
tector maintenance.
5.
Remove the screws 8
securing the cover 7 to the tank.
6.
Carefully lift the cover and put to one side.
Take particular care with the following components:
■
The frost protector 14
connected to the control line,
■
The oil scavenge line 2
screwed to the underside of the cover.
7. Take out the old cartridge 13 and gaskets 11 .
10 Maintenance
10.4 Compressor Maintenance
142
Operator Manual Screw Compressor
M100
No.: 9_6999 23 USE
Option ba
 Loading...