Keysight 16860 Series Portable Logic Analyzer Service Guide 119
Removing, Replacing, or Returning 16860 Series Logic Analyzer Assemblies 6
Removing and Replacing the Acquisition Tray
Ensure that you have:
• completed the tasks listed in the “Before you Start topic.
• removed the cover using the procedure listed in “Removing and Replacing the Hard Drive,
Acquisition Bezel, and Cover" on page 109.
• removed the front panel using the procedure listed in “Removing and Replacing the Front
Panel" on page 112.
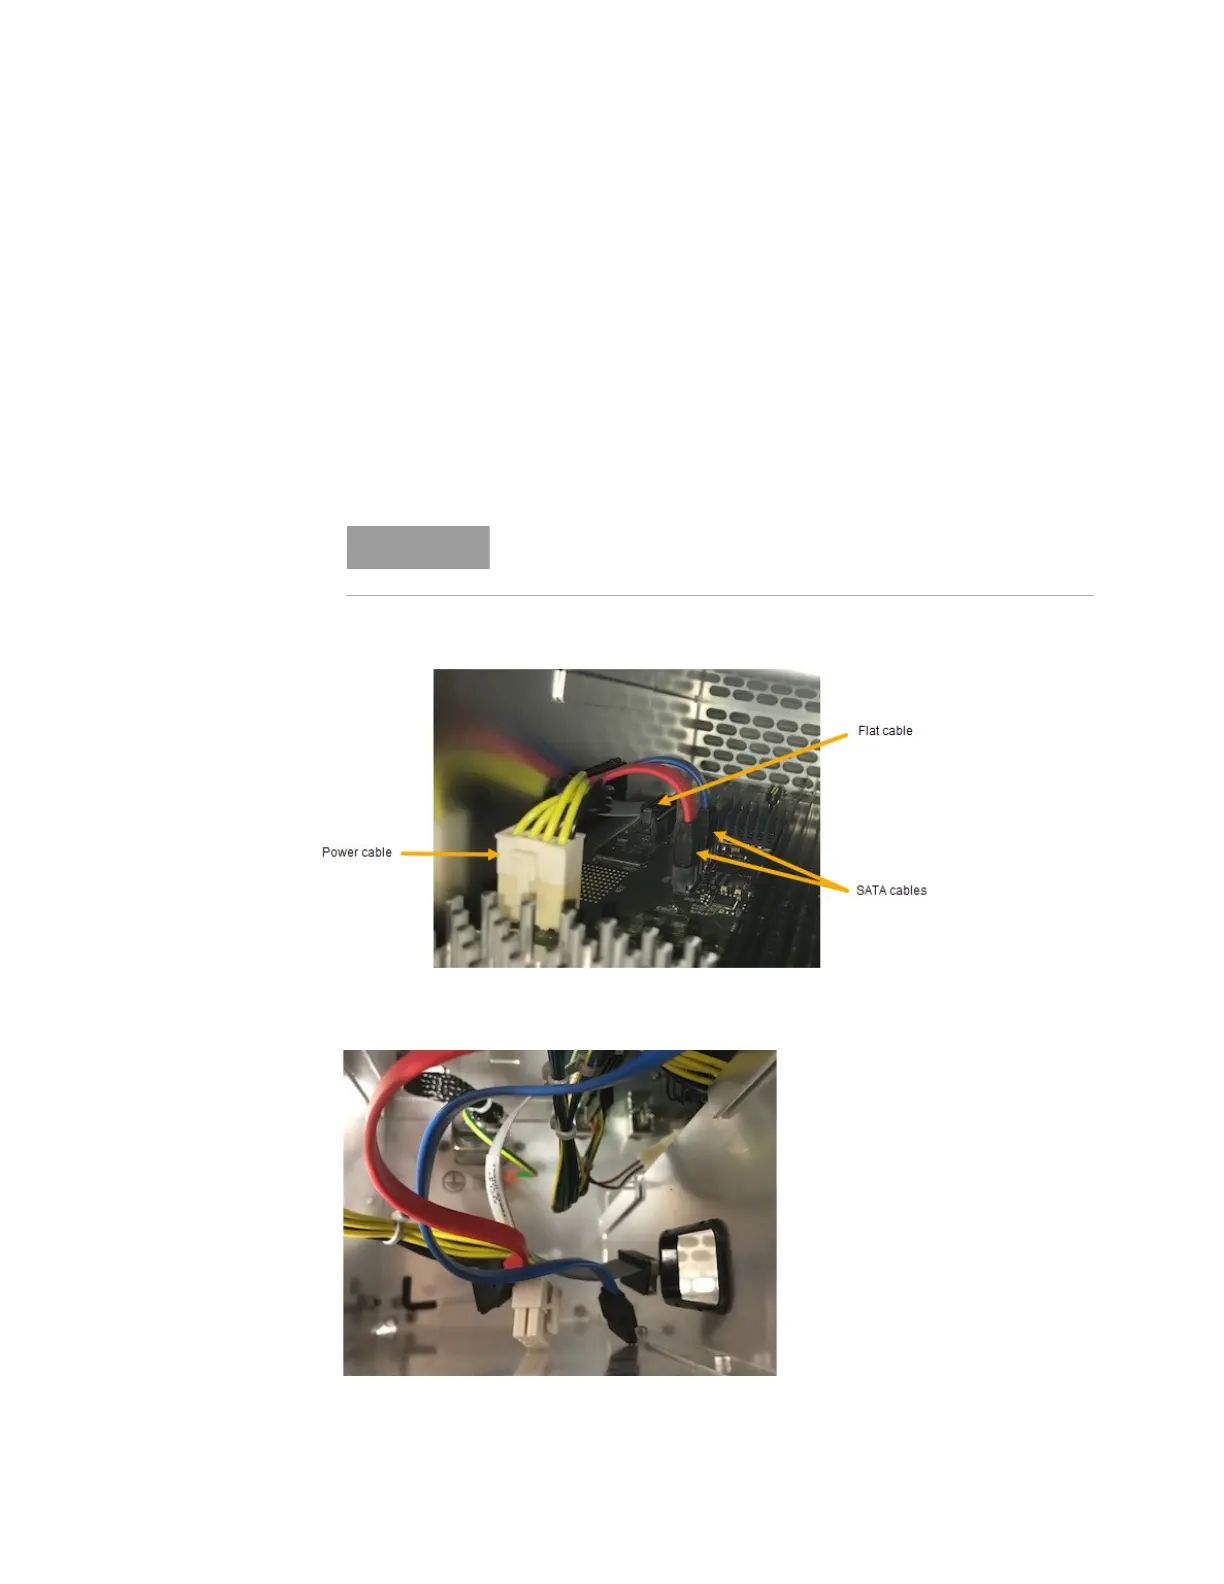
To remove and replace the acquisition tray of 16860 logic analyzer
1 Disconnect the four (Power, SATA, and flat) cables from the acquisition board. These cables are
pointed out in the following photo.
2 Unthread the cables back through the grommeted hole.
3 Using a Torx T10 screwdriver, remove the following screws securing the tray assembly to the
chassis:
For reconnection later, note the relative locations of red and blue SATA
cables.