This window allows the user to enable/disable alarm output on a weekly basis. The table
represents days of the week from Sunday to Saturday located vertically and hours of the day
from 0 to 24 on the horizontal line. Color encoding has two options: White stands for the
time when alarm is disabled, and Red denotes enabled alarm.
To mark the time cells you can click on them individually or click and drag to highlight the
required time span.
To save the changes click OK, to ignore the changes click CANCEL.
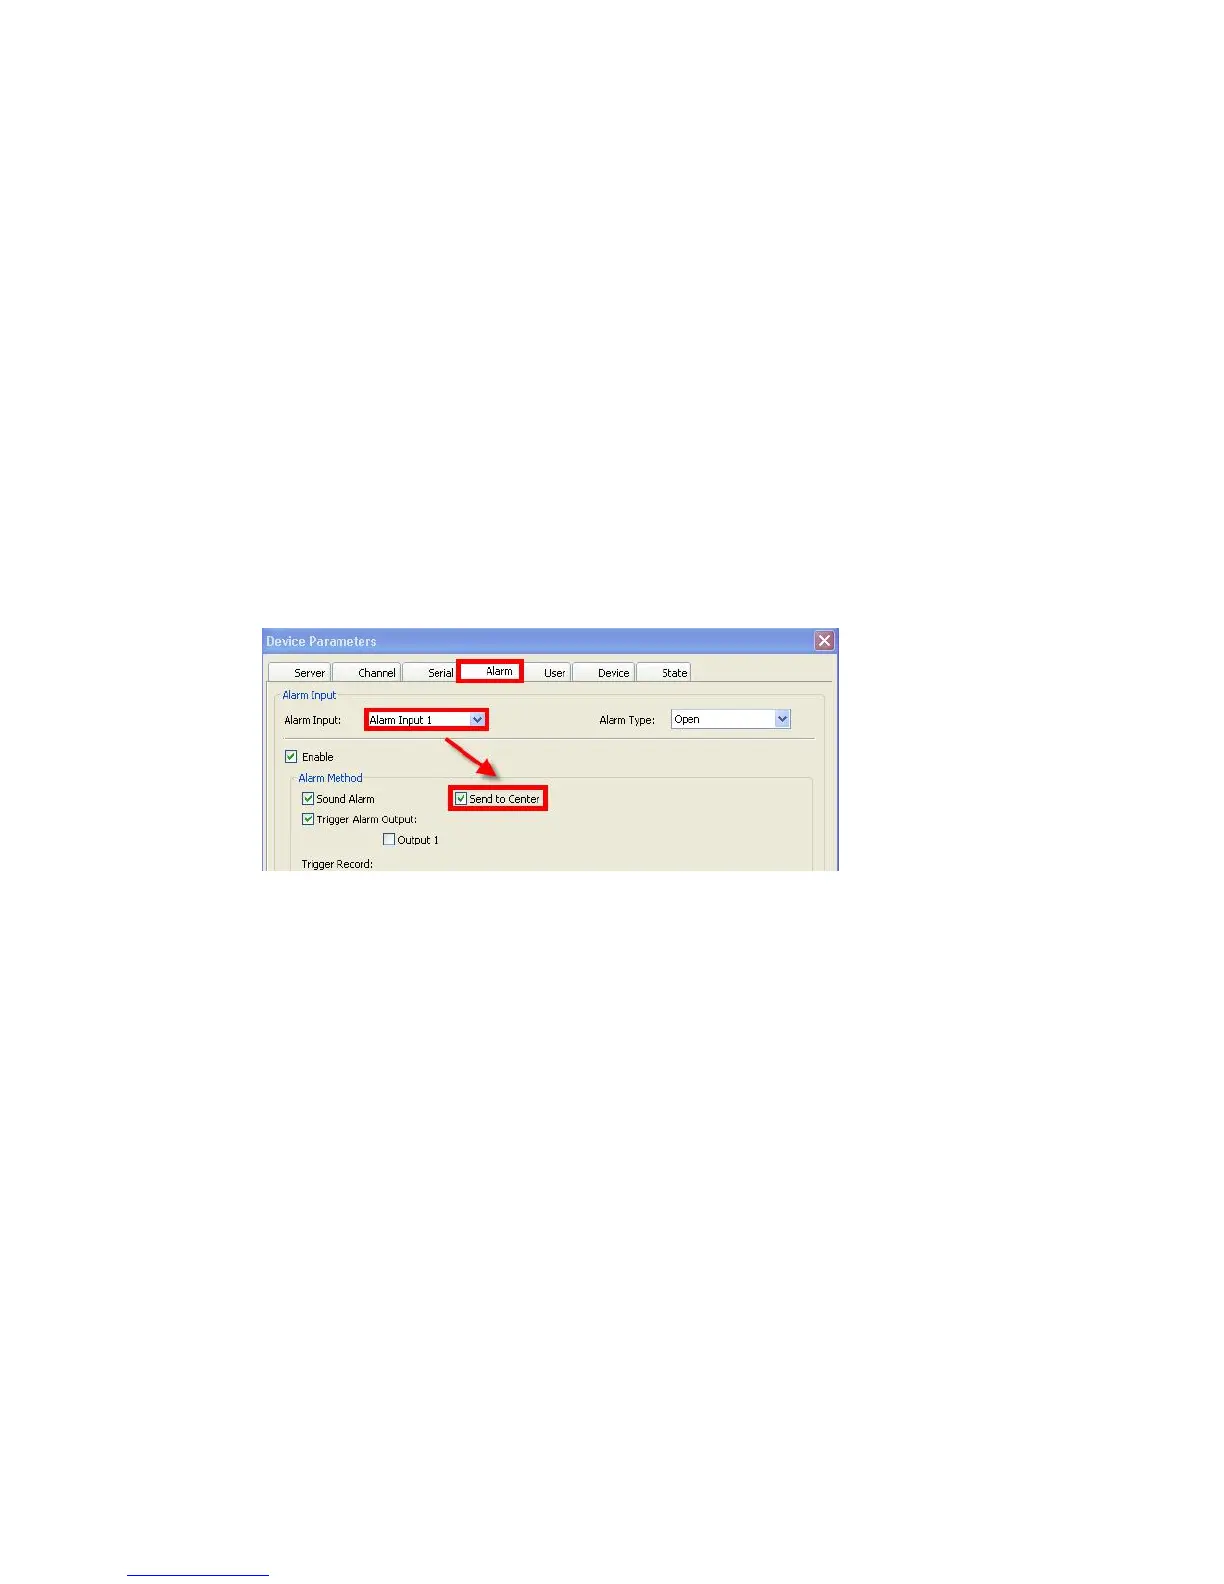
Alarm Method subsection will help you setup system behavior in case of a triggered alarm.
You c an c hoos e amon g t h e followin g options b y checking the res p ect iv e box es: Sound
Alarm, Send to Center, Email Notify and Trigger Alarm Output (checking the latter
option will make available another checkbox Output 1)
If Send to Center is checked, when alarms are triggered on the DVR, in the right top corner
of the main screen you will see an alarm notification with the alarm input number, such as
“Device alarm: IO alarm, IO input X”.
Trigger Record window lets you choose which channels will start recording after an alarm is
initiated. You can choose Channels 1 though 4/8* (depending on the model) individually, or
alternatively, use the All or None buttons located on the right.
PTZ Linkage subsection deals with PTZ control and offers two options:
Joint Channel: if a channel is connected to a PTZ camera, upon alarm, the PTZ camera
will be active. The dropdown menu offers a choice of All Channels or Channels 1 though
4 individually.
Checking the Present Point box will move associated PTZ camera to Preset Point,
making available a dropdown menu with preset points.
The dropdown menu Copy To offers options: All Alarm Input, and Alarm Input 1 through 4
individually. Pressing the Copy button will copy settings from current alarm to All or a
specified alarm input.
The functions of Confirm and Cancel buttons are self-explanatory and refer to the
parameters of this tab. As with all other tabs in the Device Parameters window, you can also
Restore Default values by pressing the first button in the last row, Save the Parameters you
just modified or Exit the window without saving.