PC2/PC2X Disassembly/Assembly
PC2 Keyboard Assembly
4-23
Natural/White Keys
1. Each key has a spring located at the rear of the key. Using needle-nose pliers, slightly pull
up the top portion of the spring to release it from the key.
Caution: Be careful not to pull up too much, which could damage the spring.
2. Unlock the key from the pivot anchoring the key to the keyboard chassis. To do this, insert
a small flat screwdriver at the back end of the pivot and press toward the front edge of the
keyboard. While doing so, lift the back end of the key (where the spring was positioned).
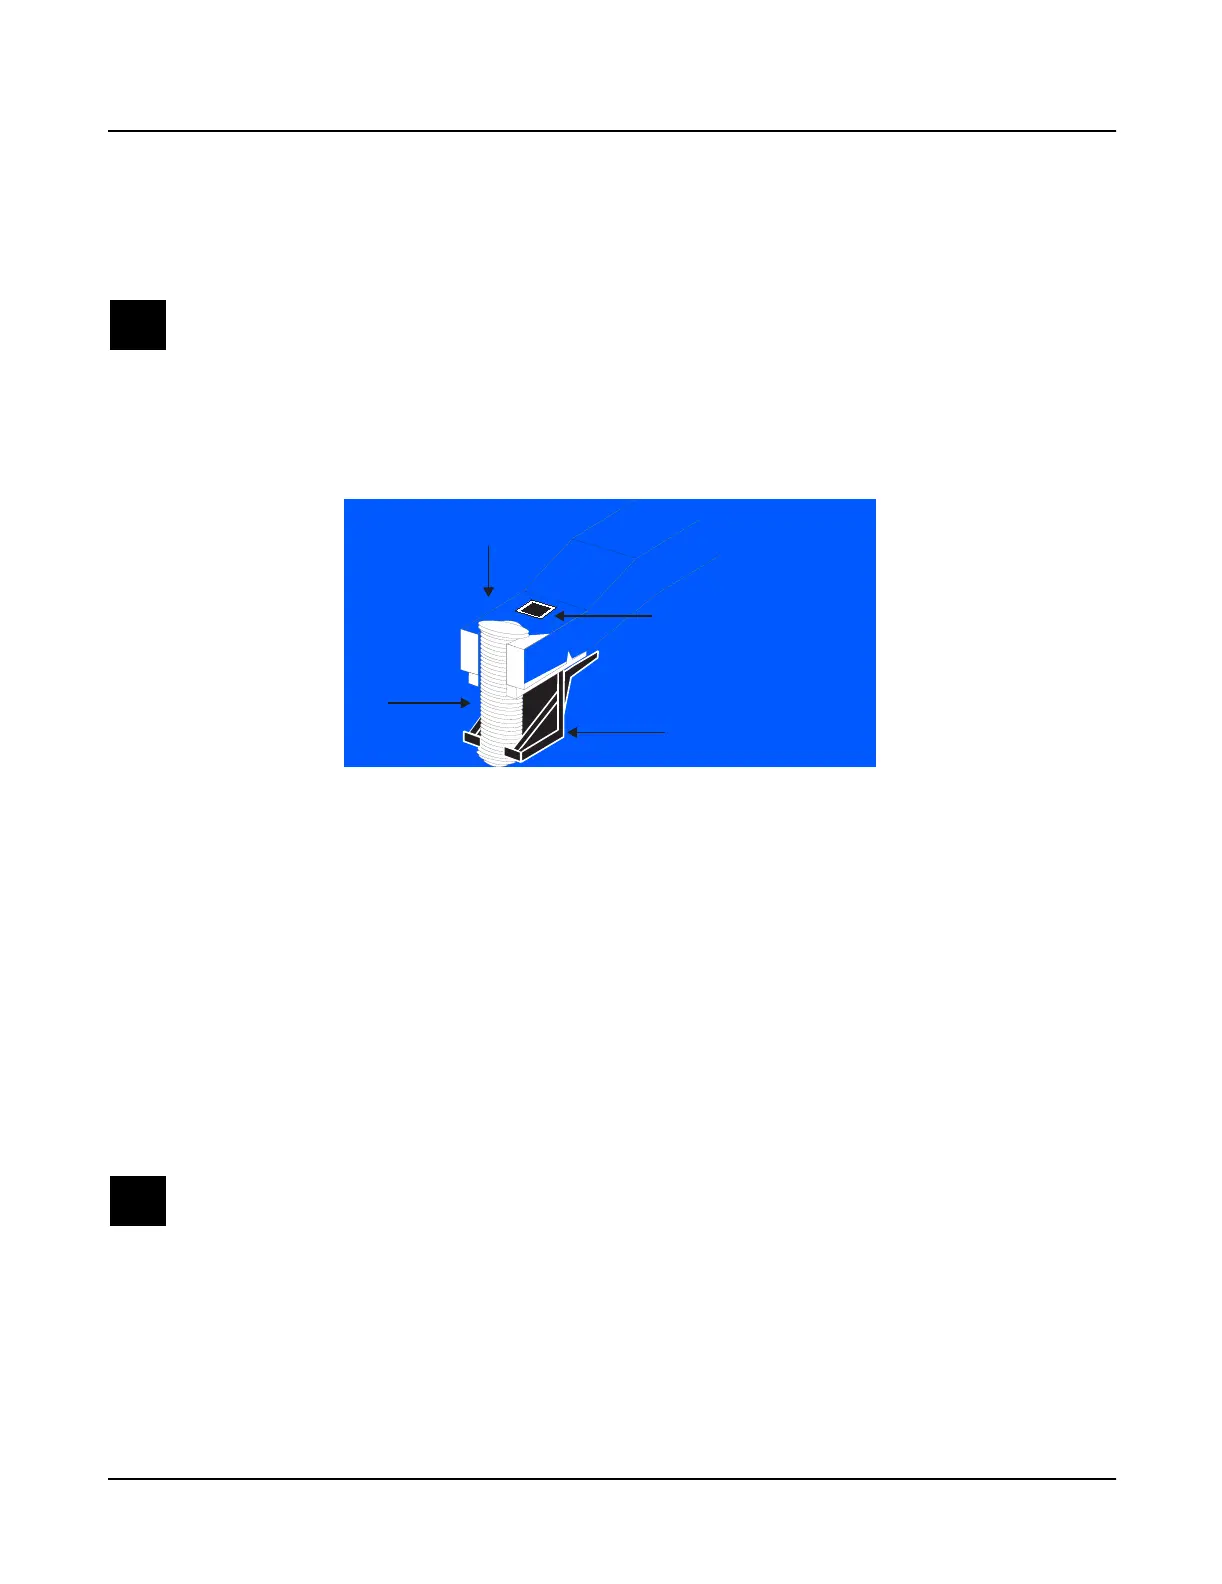
Figure 4-14 Key spring location, 76-note keyboard
3. The key should now be free of the pivot. Remove the screwdriver.
4. Lift the key up slightly, then forward. You should be able to feel when the key is free of the
pivot. A portion of the key hooks onto the keyboard chassis (see Figure 4-12). Lifting the
back end of the key forward unhooks the key from the keyboard chassis.
Sharp/Black Keys
1. To remove a sharp key, first remove the adjacent natural keys, as described in the previous
procedure.
2. Each key has a spring located at the rear of the key. Using needle-nose pliers, slightly pull
up the top portion of the spring to release from the key.
Caution: Be careful not to pull up too much, which could damage the spring.
3. Unlock the key from the pivot anchoring the key to the keyboard chassis. To do this, insert
a small flat screwdriver at the back end of the pivot and press toward the front edge of the
keyboard. While doing so, lift the back end of the key (where the spring was positioned).
4. The key should now be free of the pivot. Remove the screwdriver.
5. Lift the key up slightly, then forward. You should be able to feel when the key is free of the
pivot. A portion of the key hooks onto the keyboard chassis (see Figure 4-13). Lifting the
back end of the key forward unhooks the key from the keyboard chassis.
Keyboard
chassis section
Spring
Pivot - After the spring is removed,
insert a small flat screwdriver here
to remove the key.
Use needle-nose pliers to
pull up the top portion of the
spring.

 Loading...


