PC2/PC2X Disassembly/Assembly
PC2X Keyboard Assembly
4-31
Replacing the Bass Contact Board
1. Position the Bass Contact Board on the keyboard chassis. Be sure that the rubber key
contacts line up properly through the holes in the keyboard chassis.
2. Install the 22 screws that secure the board to the keyboard chassis.
3. Connect the small ribbon cable that connects the Bass to the Treble Contact Board.
4. Connect the flat ribbon cable that connects the Bass Contact Board to the Connector Board.
Be sure to reapply the tape to secure the connector.
Removing the Keyboard Contact Strips
1. Place the keyboard upside down on a flat soft surface. Be sure that the keys are resting on
a soft surface to avoid scratching or other damage.
2. Follow the procedure to remove the Bass and Treble Keyboard Contact Boards.
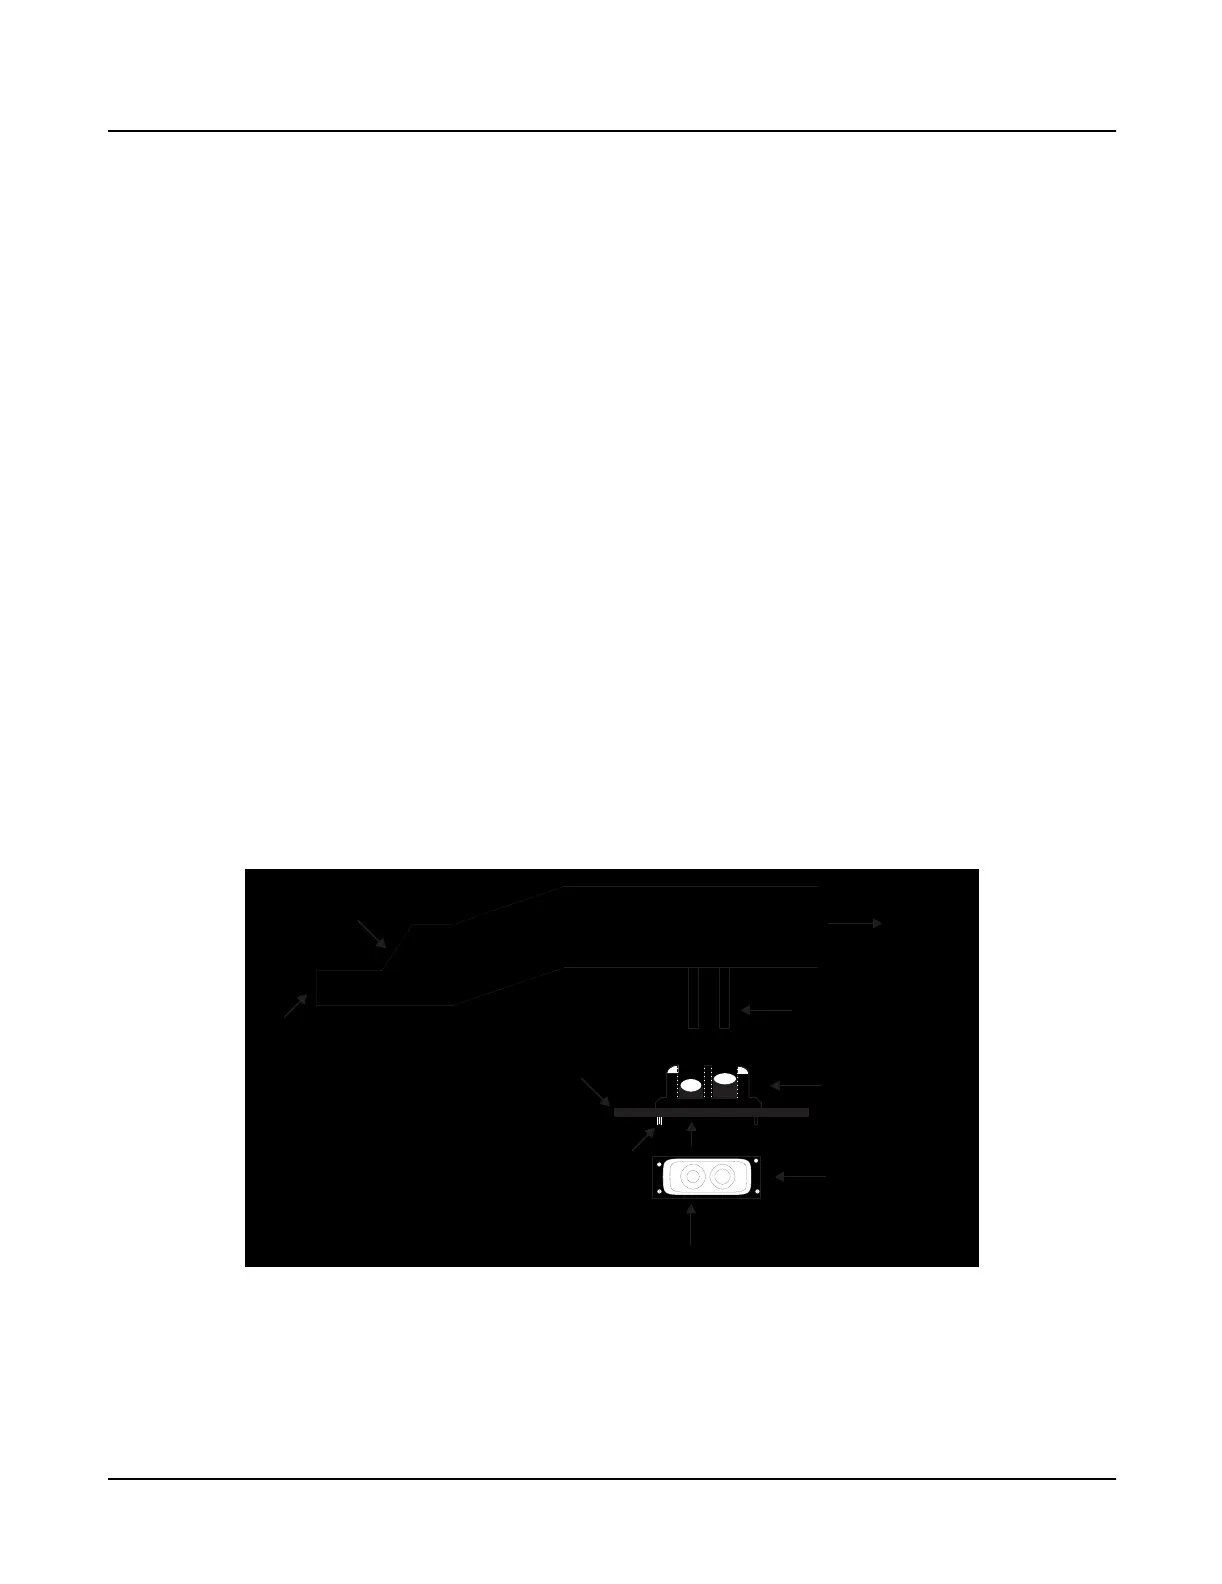
3. Examine the keyboard contact strips and look at the design of an individual contact. The
top portion of the contact has two indentations. One indentation is deeper than the other.
When replacing the keyboard contact strips, the deeper indentation is always positioned
toward the rear of the key.
4. The keyboard contact strips have mounting pegs that secure the contact strips to the
keyboard contact boards.
5. To remove a keyboard contact strip, gently lift and free the strip from its position. Be
careful not to rip or damage any contact in the process.
Figure 4-20 Side view of the natural/white key, 88-note keyboard
Key contacts
(side view)
Deeper contact to back
Mounting pegs
PC board
Key contacts
(top view)
Strikes the front and rear key
contact on key depression
Key spring
location
Pivot
location
Front of key

 Loading...


