9-6
User Authentication and Accounting (User Login, Job Accounting) > Setting User Login Administration
3
Press the [
▲
] or [
▼
] key to select [User Login Set.], and press the [
OK
] key.
4
Press the [
▲
] or [
▼
] key to select [Local User List], and press the [
OK
] key.
5
Press [Menu].
6
Press the [
▲
] or [
▼
] key to select [Add User], and press the [
OK
] key.
2
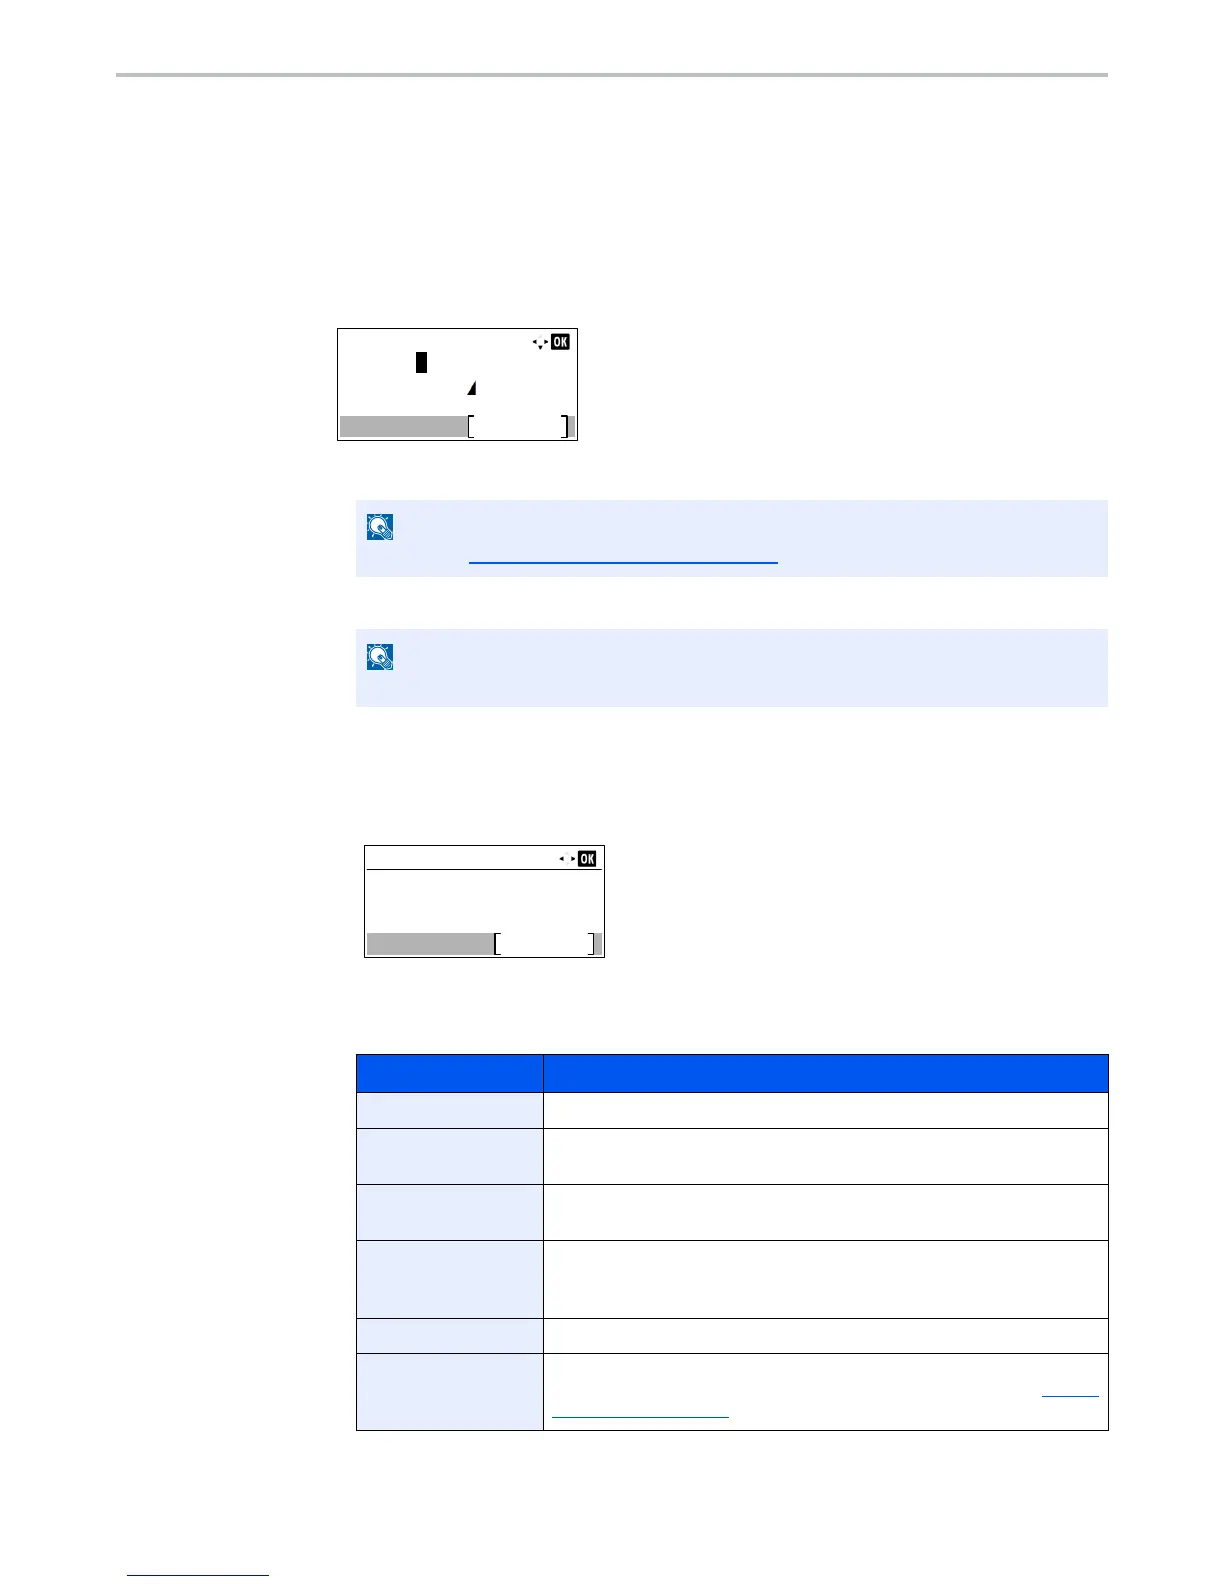
Enter the user information.
1
Enter the name displayed on the user list (up to 32 characters). and press the [
OK
] key.
2
Enter the login user name to login (up to 64 characters) and press the [
OK
] key.
3
To enter detailed user information, press the [
▲
] or [
▼
] key to select [Detail] and then press
the [
OK
] key.
To exit the operation, press the [
▲
] or [
▼
] key to select [Exit] and press the [
OK
] key.
4
Enter the detailed user information.
Press [Edit], [Change] or [Detail] on each item, enter the information and then press the [
OK
] key.
Press the [
►
] key to view the next screen. Press the [
◄
] key to return to the previous screen. The
table below explains the user information to be registered.
The same login user name cannot be registered.
Item Descriptions
User Name
*1
Enter the name displayed on the user list (up to 32 characters).
Login User Name
*1
Enter the login user name to login (up to 64 characters). The same login
user name cannot be registered.
Login Password
Enter the password to login (up to 64 characters) and press the [
OK
] key.
Reenter the same password for confirmation and press the [
OK
] key.
E-mailAddress
The user can register his/her E-mail address. The registered address will
be automatically selected for subsequent operations that need any E-mail
function.
Access Level
*1
Select "Administrator" or "User" for user access privileges.
Account Name
Add an account where the user belongs. The user, who registered his/her
account name, can login without entering the account ID. Refer to Setting
an Account (page 9-25).
 Loading...
