10-36
Troubleshooting > Adjustment/Maintenance
4
Enter the appropriate value.
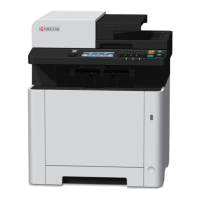
1 Find the location on each chart where 2 lines most closely match. If this is the 0 position,
registration for that color is not required. For the illustration, B is the appropriate value.
2 Select "Color Registration" [Next].
3 Select [Change] for the chart to be corrected.
4 Select [+] or [-] to enter the values read from the chart.
Select [+] to increase the value from 0 to 9. To decrease, select [-].
By selecting [-], the value changes from 0 to alphabetic letters, going from A to I. To move
in the reverse direction, select [+].
5 Repeat steps 3 and 4 to enter the registration values for each chart.
6 Select [Start] after all values have been entered. Color registration begins.
7 Select [OK] after color registration is complete.
Detailed Registration
1
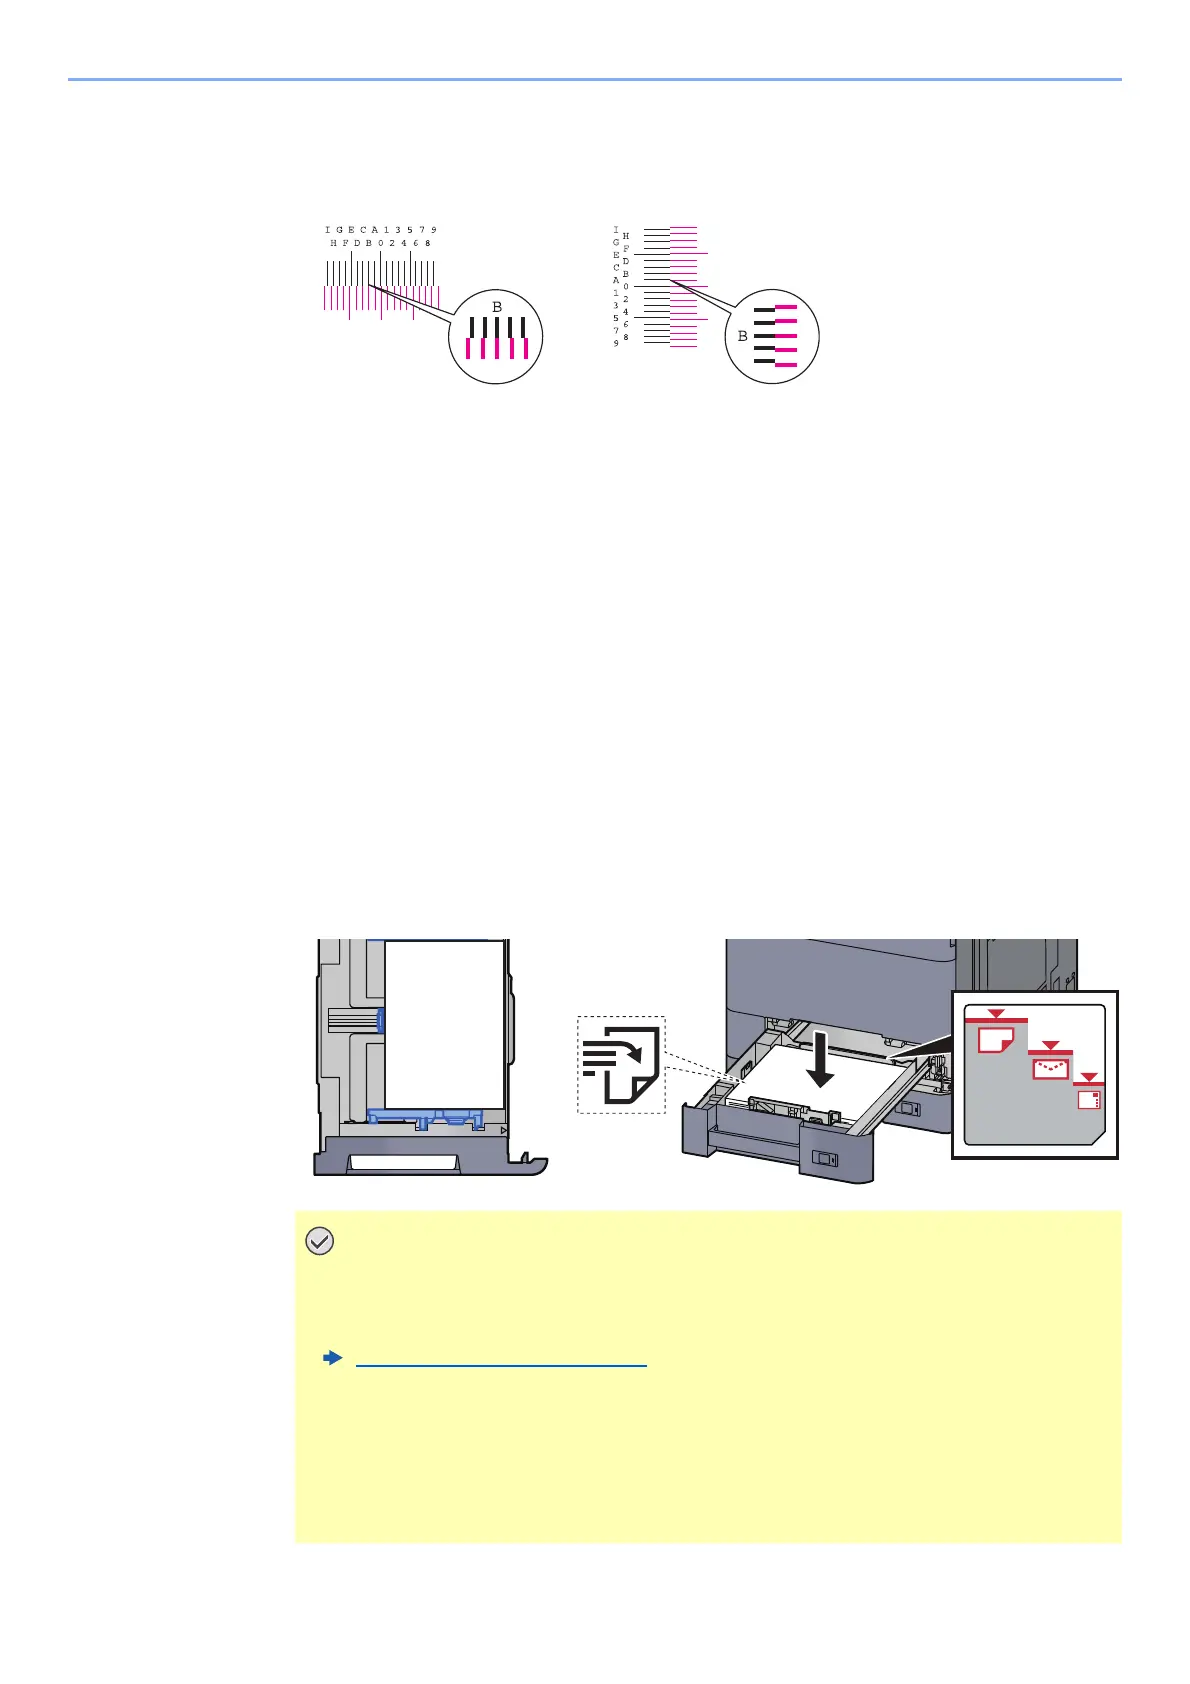
Load paper.
Load A4/Letter paper in the cassette.
• Load the paper with the print side facing up.
• After removing new paper from its packaging, fan the paper before loading it in the
cassette.
Loading in Cassette 1
(page 3-4)
• Before loading the paper, be sure that it is not curled or folded. Paper that is curled
or folded may cause paper jams.
• Ensure that the loaded paper does not exceed the level indicator (see illustration
above).
• If paper is loaded without adjusting the paper length guide and paper width guide,
the paper may skew or become jammed.

 Loading...