Network Printing in a Windows Environment
6
6-19
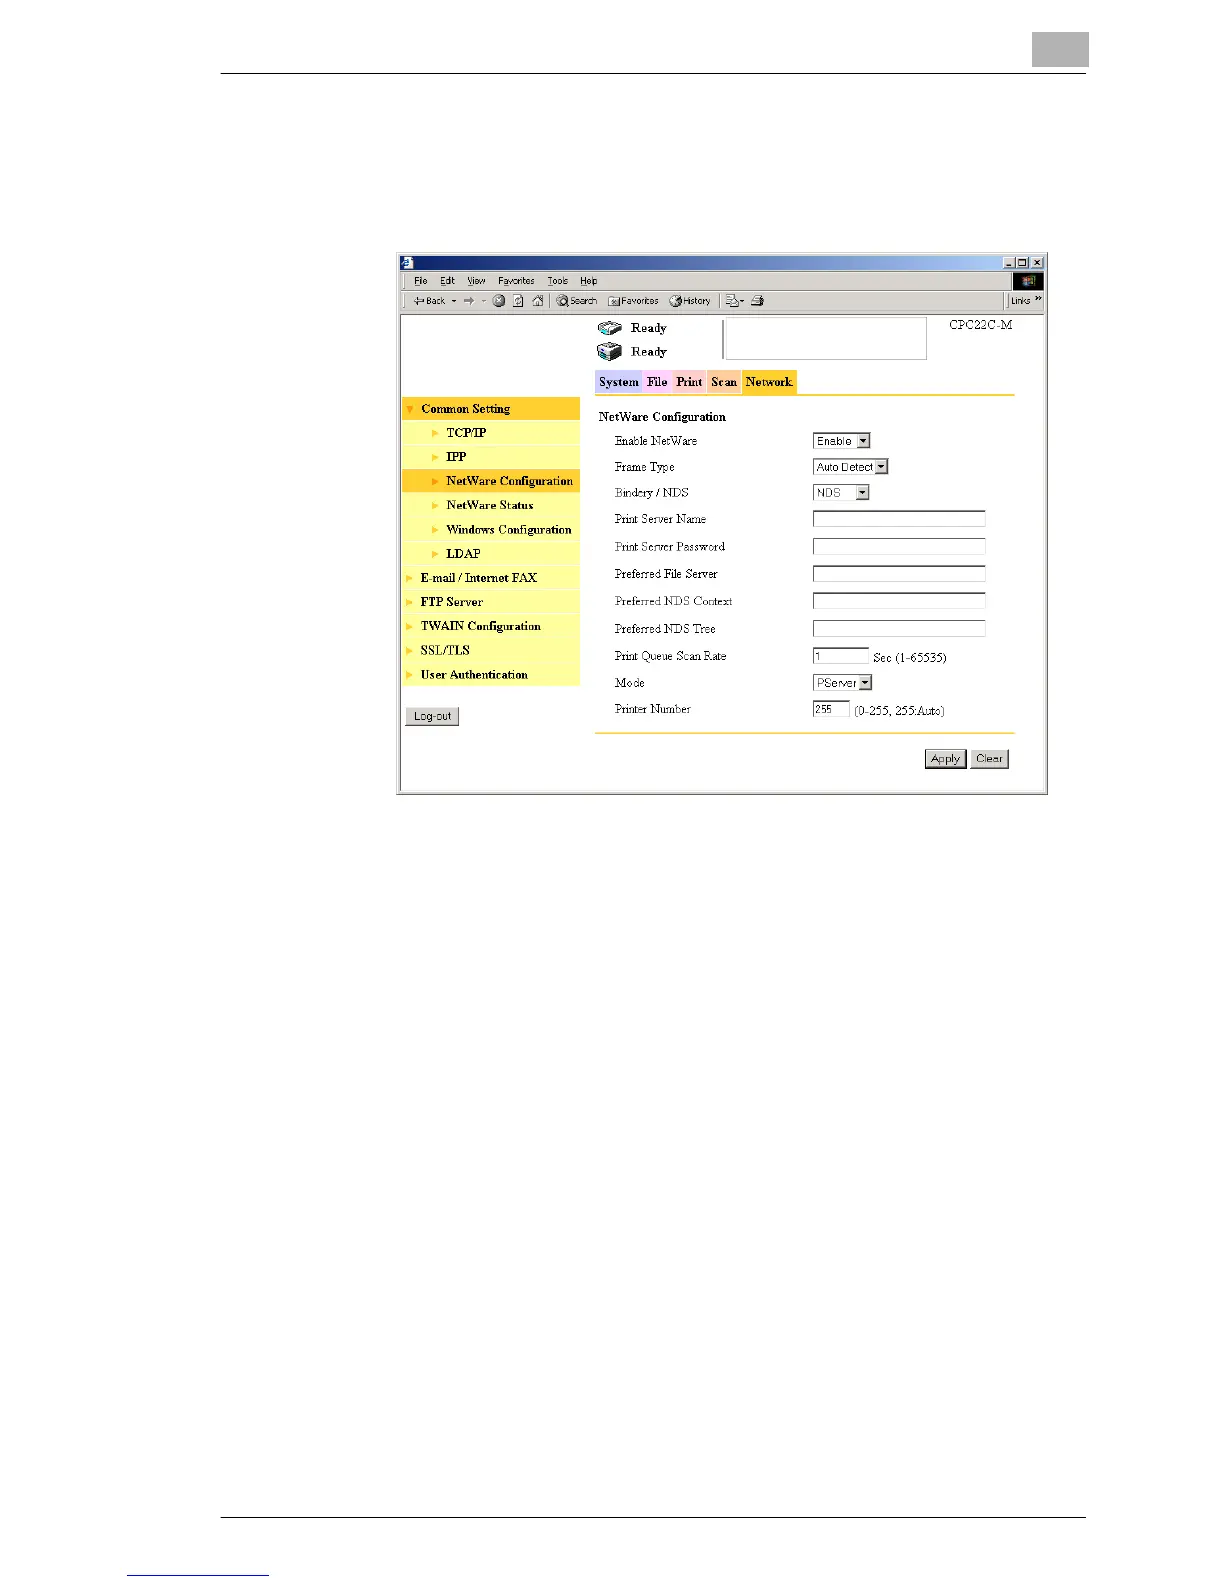
5 In Administration mode of Printer Management Utility, click NetWare
Configuration in the sub-menu that appeared after clicking Common
Setting on the “Network” tab, and then specify the settings for this
machine.
❍ Enable NetWare: Select “Enable”.
❍ Frame Type: Select “Auto Detect”. (Selects the frame type
according to the network environment.)
❍ Bindery/NDS: Select “NDS”.
❍ Print Server Name:
Print server name created in step 4
❍ Print Server Password:
Set only if set on the NetWare Server.
❍ Preferred NDS Context:
Name of context node connecting the PServer
❍ Preferred NDS Tree:
Name of the tree to which PServer logs on
❍ Print Queue Scan Rate:
Enter “1”. (Change as necessary.)
❍ Mode: Select “PServer”.
6 To apply the settings, restart this machine (turn it off, then on again).
7 Use the NetWare Server console to load MONITOR.NLM.
8 Select the connection information, and in the active connection
column, check that the PServer that you created is connected.

 Loading...