18
Vista Pro 6 Server: Viewing Mode
3. Select the checkbox beside Enable schedule Backup on the top left corner of the window.
• Select Enable Concurrent Backup to back up the data in parallel to a separate directory. Then
click Select to choose a save directory. You will have two copies of the file if you enable
Concurrent Backup. Skip to step 9 to complete your setup.
4. Under Backup Device Select, press the Select button. Browse for a directory you wish to save
the backup files. Click OK to save your settings.
5. Select the Overwrite checkbox to enable the hard drive to re-write itself when it is full.
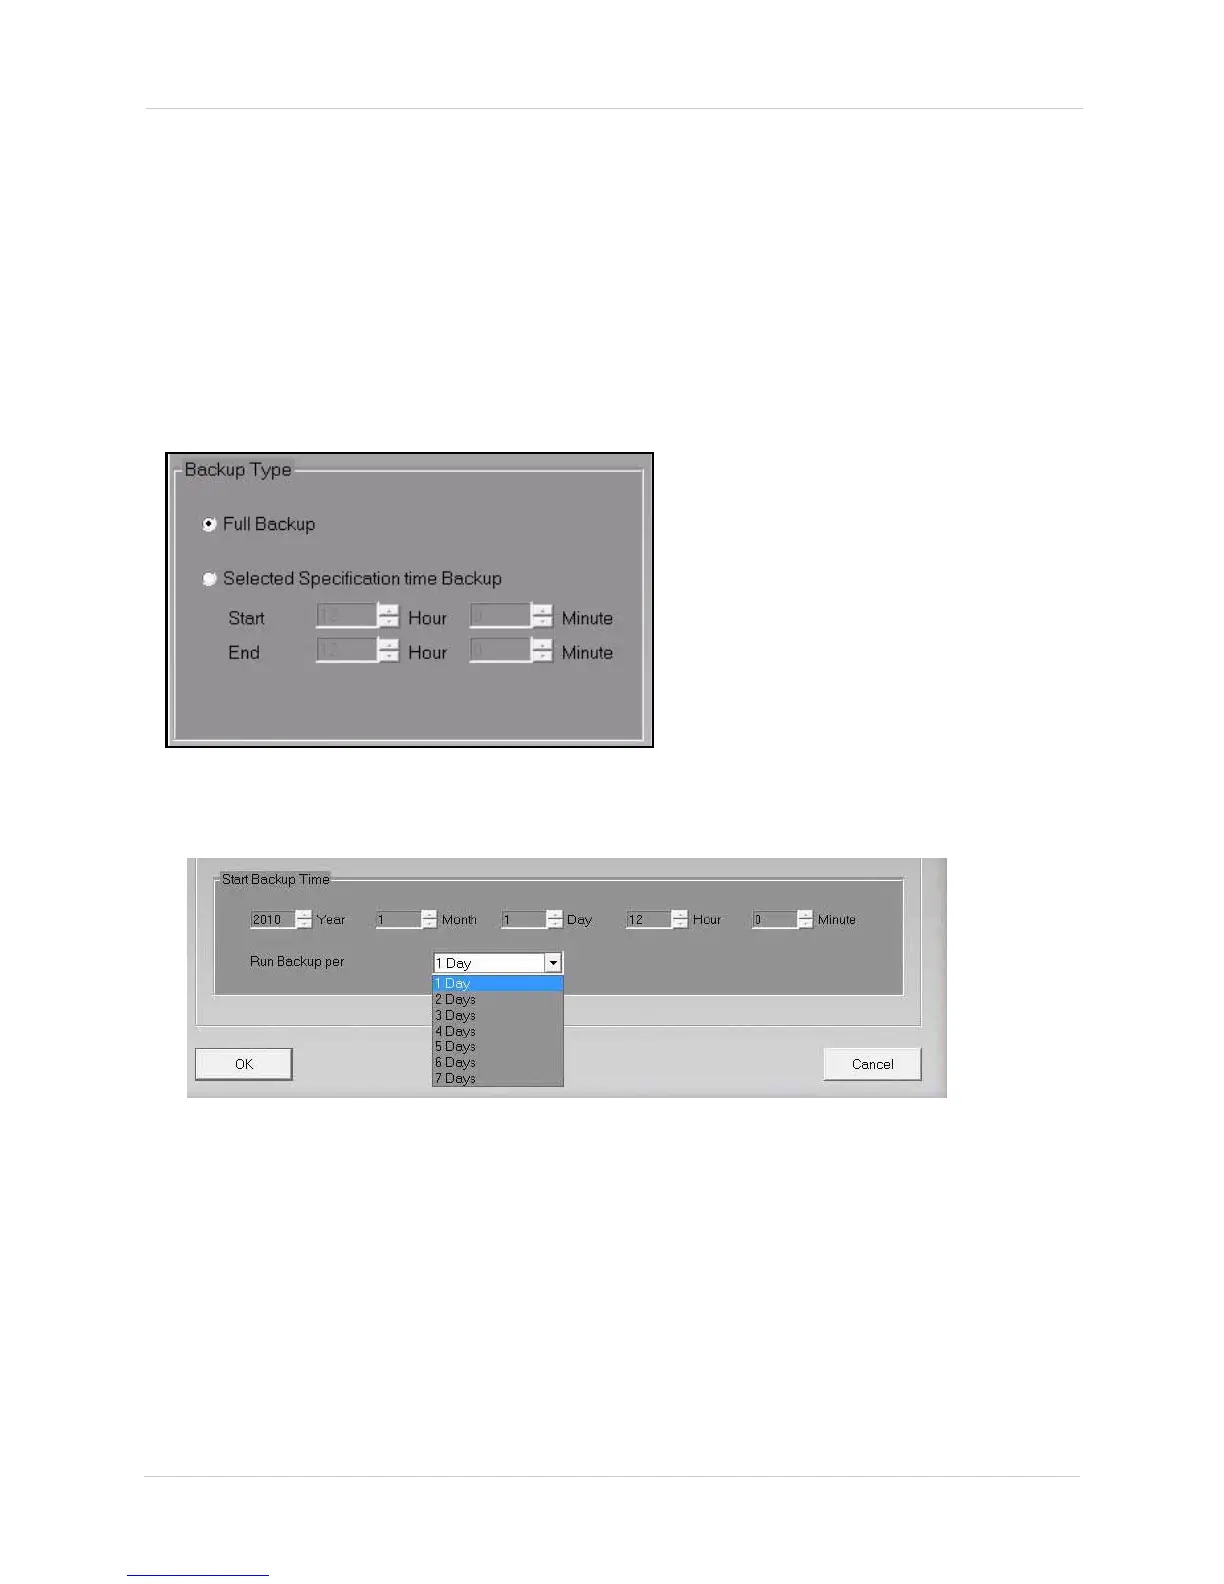
6. Under Backup Type, select Full Backup to back up the entire library of video events.
or
Under Backup Type, select Selected Specification time Backup. Select the start and end time for
the scheduled backup (Figure 5.6).
7. Under Start Backup Time, select the Year, Month, Day, Hour and Minute you want the data to
begin backing up (Figure 5.7)
.
8. Beside the Run Backup Per drop-down menu, select how many days in between you want the
system to perform the backup.
• For example, if you select 2 Days, the system performs a backup of the video content every 2
days.
9. Click OK to save your settings, then click OK again on the bottom of the window Option
window.
Figure 5.6 Backup Type window.
Figure 5.7 Start Backup Time and Start Date