28
Vista Pro 6 Server: Viewing Mode
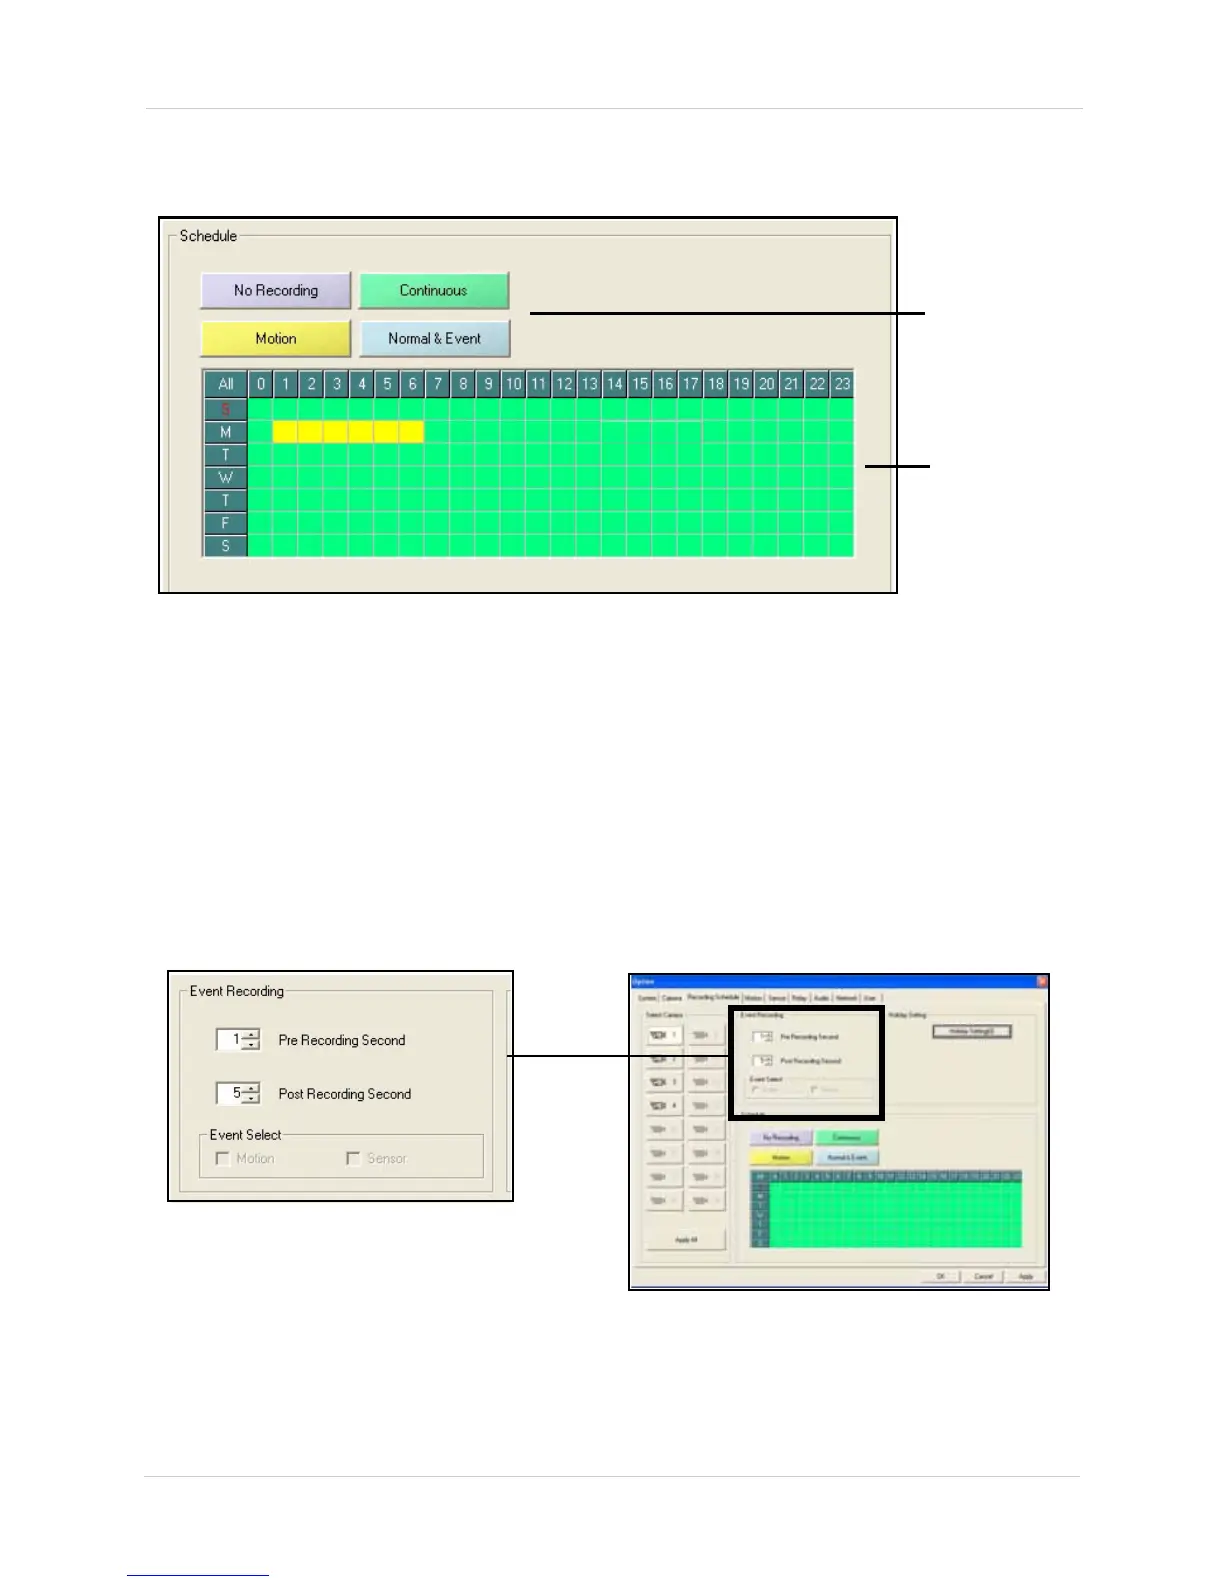
3. Under Schedule, select the type of recording you wish to configure by clicking one of the
Schedule buttons.
Recording Modes
• No Recording: Disables recording.
•
Continuous: Records non-stop, 24-hours a day.
•
Motion: Records when camera detects motion.
•
Normal & Event: Records continuously and records Event recordings. Event recordings can be
a combination of Sensor or Motion.
4. Drag the mouse cursor across the day and time you wish to apply the scheduled recording in
the Date Grid.
5. If required, click another schedule button, and drag the mouse cursor across the Date Grid.
6. Under Event Recording, enter the duration for Pre Recording and Post Recording.
Schedule buttons
Date Grid
Figure 7.1 Scheduled Recording window.
Figure 7.2 Event Recording options.