215585 13 Revision A
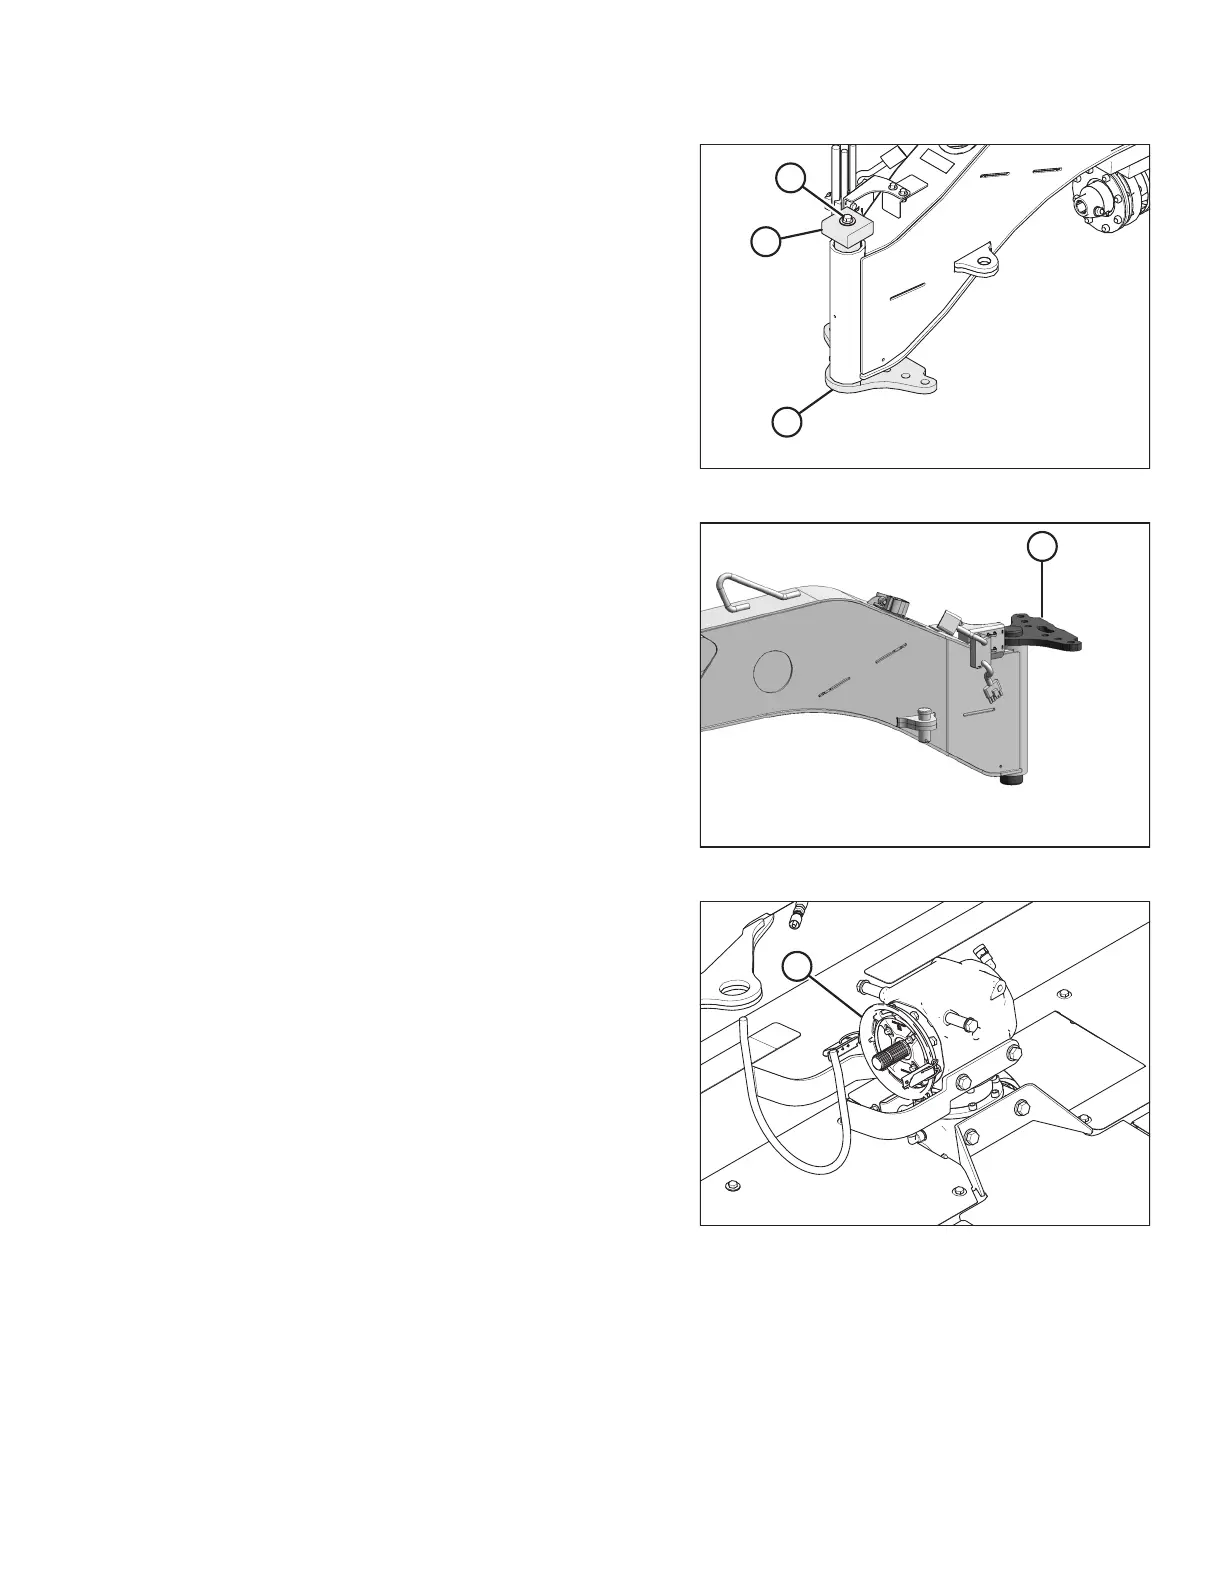
Figure 3.12: Hitch Packing
NOTE:
Hitch pin (C) is heavy. Support it appropriately before
removing bolt (A).
6. Support hitch pin (C), remove bolt (A) and wood block (B)
from top of pin, and remove hitch pin (C).
Figure 3.13: Hitch Pin
7. Install hitch pin (A) fully into hitch.
Figure 3.14: Gearbox
8. Pivot gearbox (A) towards the right side of the header. This
will increase the clearance to the driveline clutch when
installing hitch onto carrier frame.
ASSEMBLING THE ROTARY DISC PULL-TYPE – WITH OR WITHOUT THE DEALER-INSTALLED TRANSPORT