215585 33 Revision A
3.8 Installing Options
Install the following optional kits if they were supplied with your rotary disc pull-type.
3.8.1 Installing Transport System
When installing the transport system (MD #C2002), the main mechanical components are installed first, then the hydraulic
systems, and then the lighting and signage.
Installing Components
This section explains how to install the basic parts of the transport system.
Installing Latch Assembly
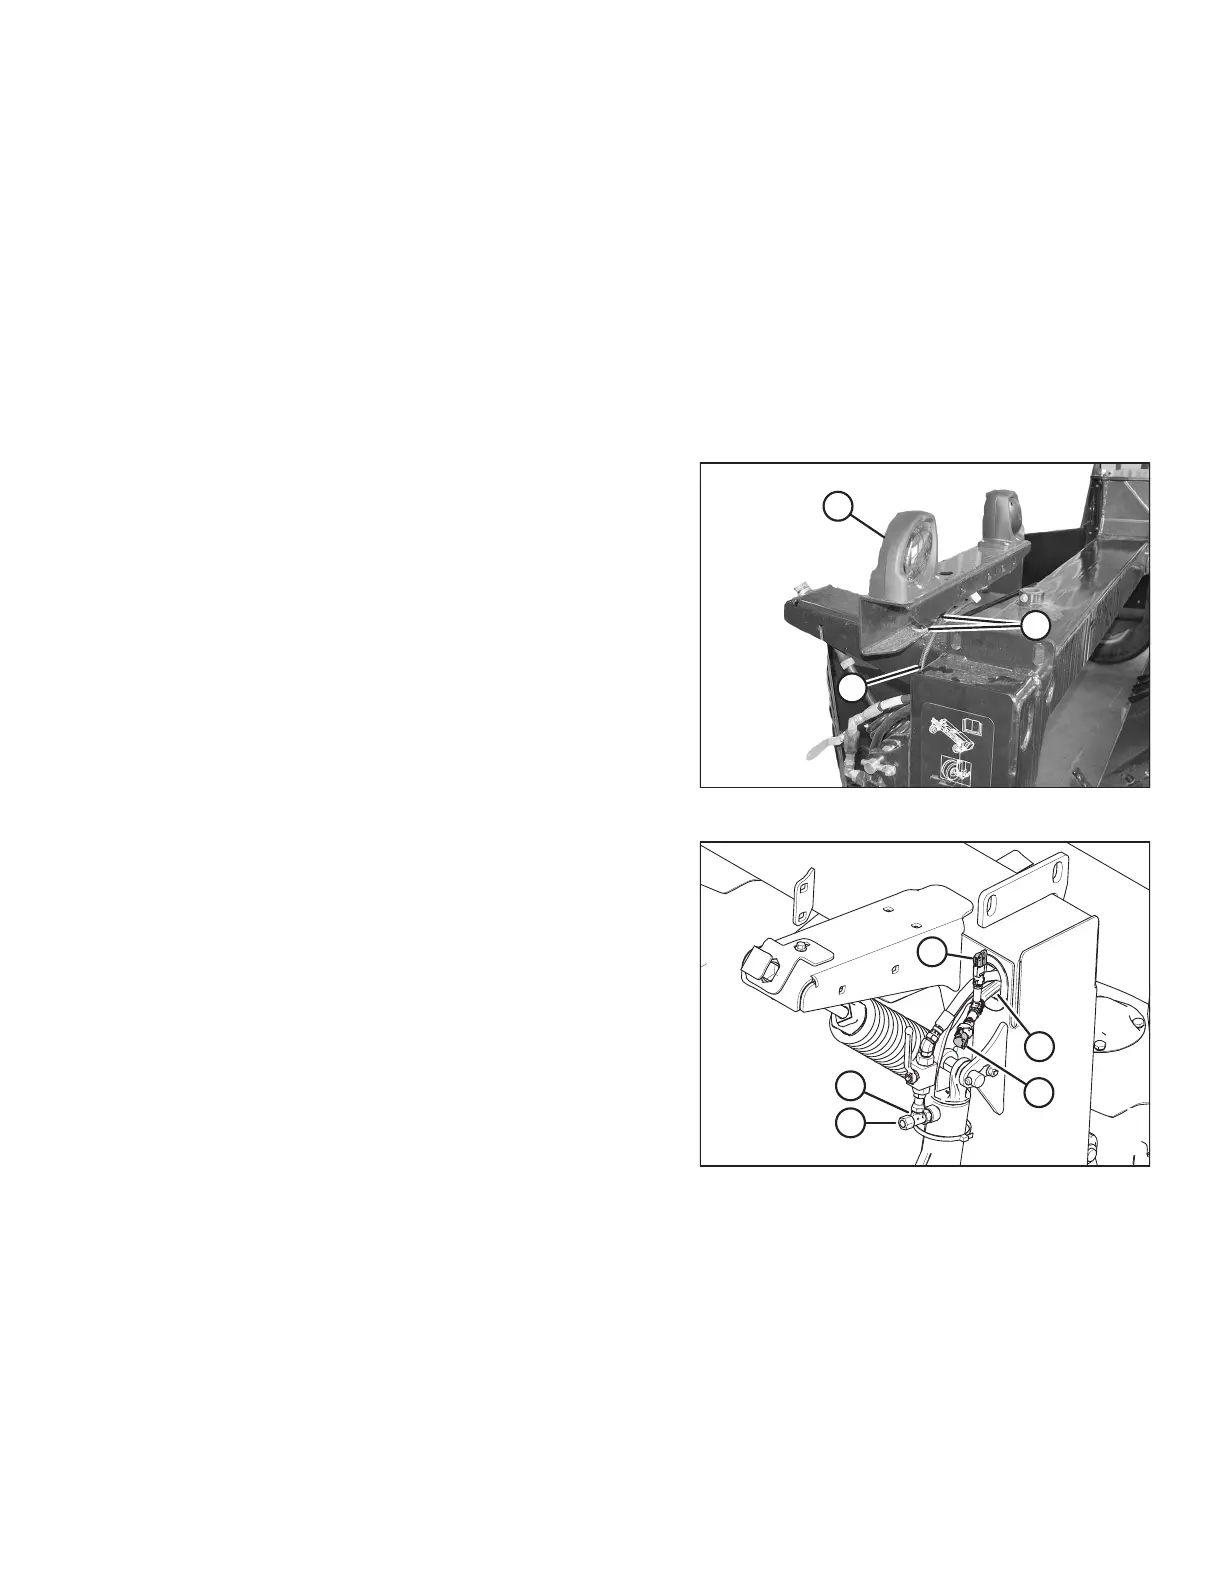
Figure 3.58: Light Bracket
1. Disconnect right light electrical connection (A).
2. Remove two bolts (B) that secure right light assembly (C) to
the carrier frame.
3. Remove light assembly (C). Retain the light assembly and
hardware for installation later.
Figure 3.59: Capped Connectors
4. Cap right light connector P406 with cap (A).
5. Cap right light connector P403 with cap (B).
6. Tuck connectors P406 and P403 into frame (C).
7. Remove cap (D) from tee fitting (E).
ASSEMBLING THE ROTARY DISC PULL-TYPE – WITH OR WITHOUT THE DEALER-INSTALLED TRANSPORT