5
+125.9
±1000
-0.3
+32.9
+0.0
5.1
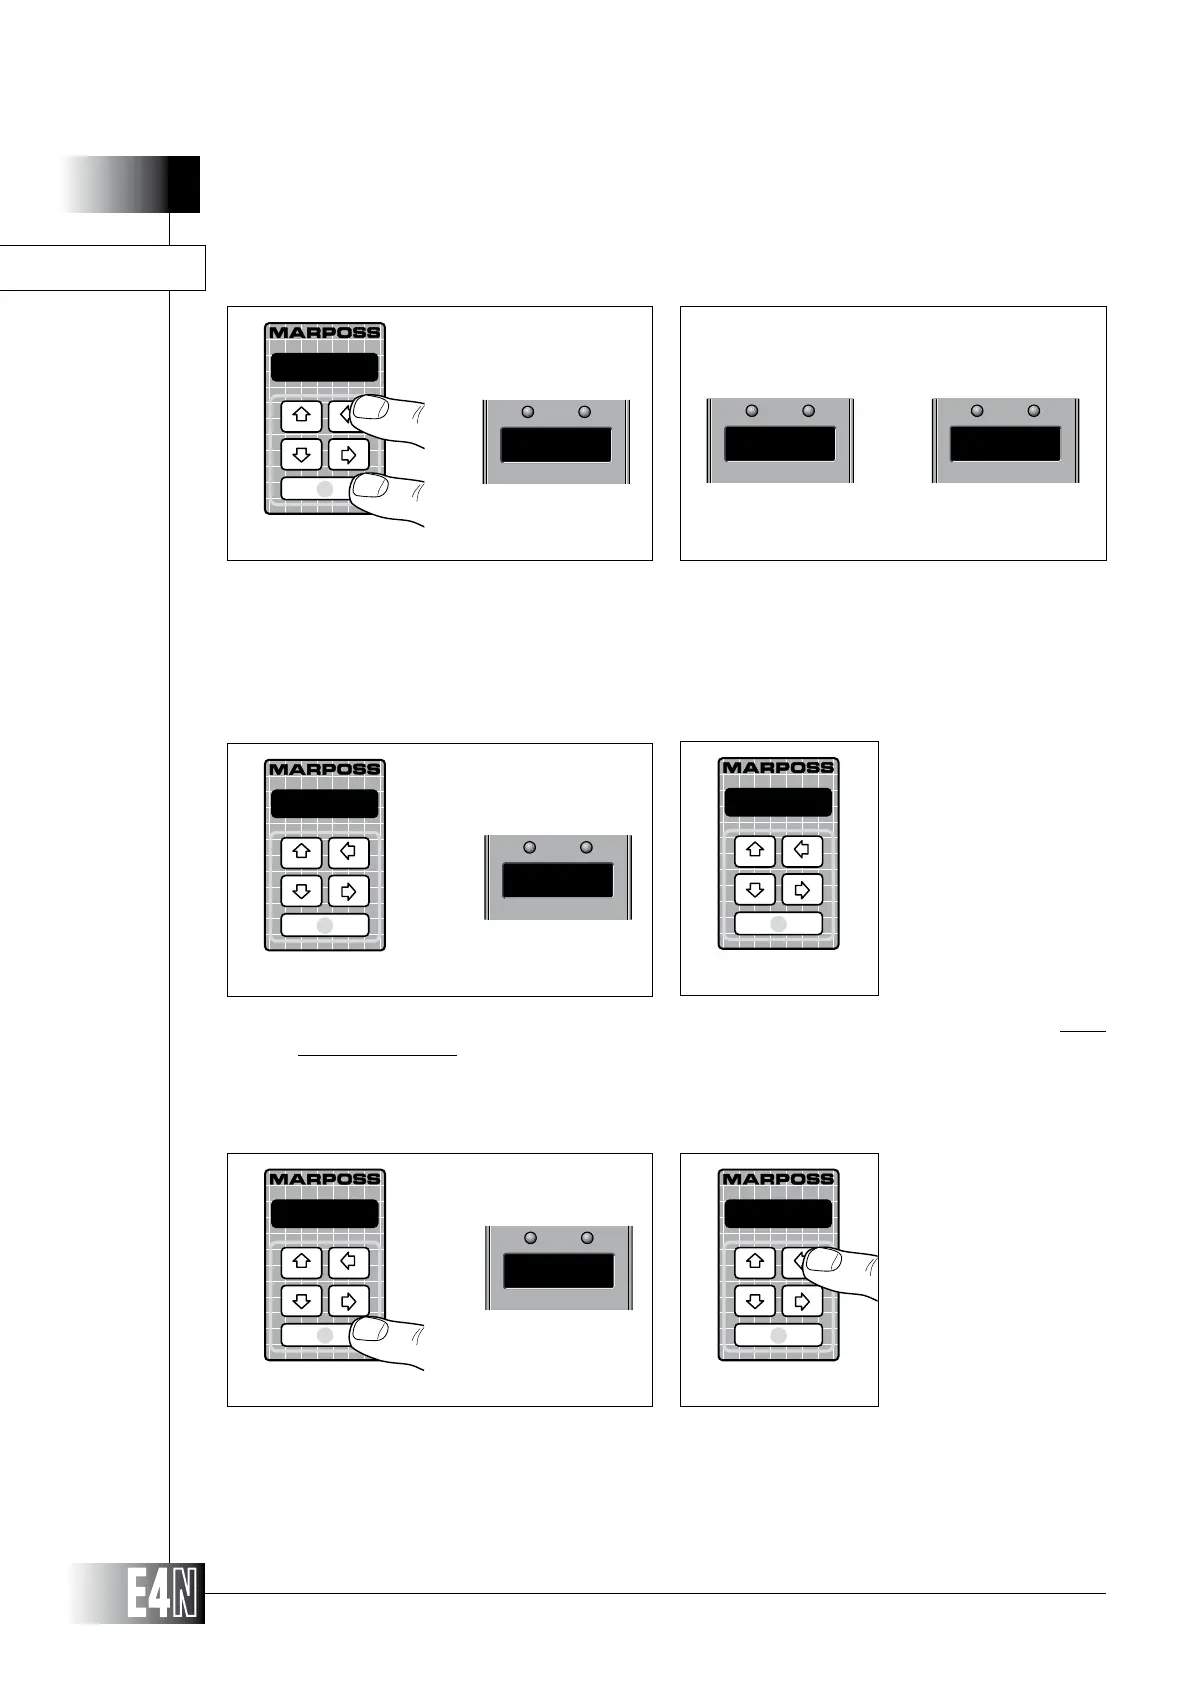
ADJUSTMENT PROCEDURE
Step 1: Press the UP arrow key (CAL) and the ENTER key together for two seconds. The column will
switch to the ADJUSTMENT mode. The message "ADJ" will appear on the alphanumeric display
and the message "ADJ0" will appear on the 7-segment display.
Step 2: Release the keys. If the sensor has not already been adjusted, the messages "CH A" and "o.r."
will be displayed alternatively on the 7-segment display.
Step 1
Step 3: Mechanically adjust the position of the sensor until the deviation shown on the display is as close
as possible to zero. During this step the 7-segment display with alternatively display the channel
Step 4: Lock the sensor in its zero position. Press the ENTER key to pass to adjustment of any other
sensors connected to the column.
ADJUSTING LVDT, HBT AND MRT SENSORS
Step 2
Step 3
Step 6Step 5
Step 4
Step 5: Adjust the other sensor connected to the column in the way described previously for the first
sensor.
Step 6: CAL) to leave the
ADJUSTMENT mode.
A D J
A D J 0
CAN Ao.r.
CH B