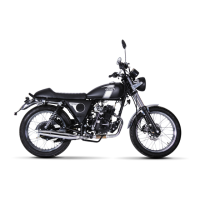
Chapter 6 Chassis section 3 Front and rear brakes
6—9
Remove the rear brake caliper friction plate④ and fixing
screw⑤.
Remove the spring piece.Use air gun to push caliper
piston out.
Warning:
Place a rag on the piston to prevent it from popping
and flying out, and keep your hand away from the
piston.
Watch out for brake fluid that might splash.
Do not use high pressure air. Increase the pressure
gradually.
Remove dust seal ring⑦and piston seal ring⑧.As in
Fig.5.3.9
Note:
Be careful not to scratch the cylinder holes.
Do not reuse the removed piston gasket and dust
gasket.
Caliper to check
Inspect front and rear caliper cylinder walls and piston
surfaces for scratches, corrosion, or other damage.
As Fig. 5.3.10
If you find anything unusual, replace the calipers.
Brake calipers are reinstalled
Reassemble and install brake callipers in the reverse
order of disassembly and disassembly.
In carrying out this work, the following points should be
noted:Clean the brake aperture and piston with specified
brake fluid.Thoroughly clean the dust-proof tank and
piston seal tank.As Fig. 5.3.11.
Brake fluid Specification and classification: DOT4
Note: Clean caliper parts with fresh brake fluid
before reassembly.After cleaning the parts, do not
erase the brake fluid on them.Never use liquids or
cleaners of different brands such as gasoline or
kerosene.Replace with new piston seal and dust
seal.Apply brake fluid to all seals, brake apertures
and pistons before reassembly.
As in Fig.5.3.12 and 5.3.13.
Fig.5.3.9
As in Fig.5.3.10
Fig.5.3.11
Fig.5.3.12
Fig.5.3.13