173
Controls in detail
Control system
Setting daytime running lamp mode
(USA only)
i This function is not available in countries
where the daytime running lamp mode is
mandatory and therefore in a constant mode.
왘
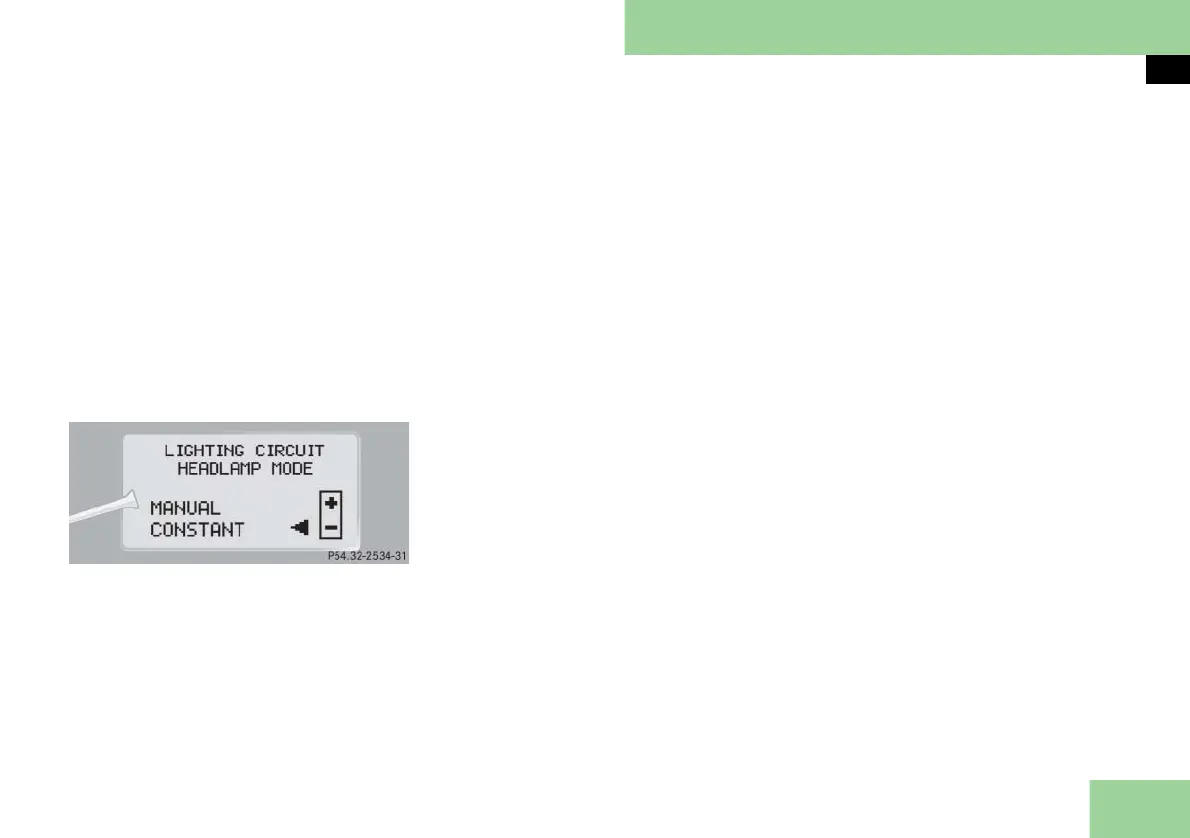
Move the selection marker with
button æ or ç to the
LIGHTING
submenu.
왘 Press button j or k repeatedly
until the message
LIGHTING CIRCUIT
HEADLAMP MODE
appears in the multi-
function display.
The selection marker is on the current
setting.
왘 Press button æ or ç to select
manual operation (
MANUAL
)or daytime
running lamp mode (
CONSTANT
).
With daytime running lamp mode acti-
vated and the exterior lamp switch at po-
sition M or U, the low beam
headlamps are switched on when the en-
gine is running.
In low ambient light conditions the fol-
lowing lamps will switch on additionally:
앫 Parking lamps
앫 Tail lamps
앫 License plate lamps
앫 Side marker lamps
For more information on the daytime
running lamp mode, see “Lighting”
(
컄 page 144).
i For safety reasons, resetting the
LIGHTING
submenu to factory settings (컄 page 170)
while driving will not deactivated the daytime
running lamp mode.
The following message appears in the multi-
function display:
LIGHTING
CANNOT BE
COMPLETELY RESET
TO FACTORY SETTINGS
WHILE DRIVING
.
Setting locator lighting
With the locator lighting feature activat-
ed and the exterior lamp switch in
position U, the following lamps will
switch on during darkness when the ve-
hicle is unlocked using button ‹ on
the SmartKey or SmartKey with
KEYLESS-GO**:
앫 Parking lamps
앫 Tail lamps
앫 License plate lamps
앫 Side marker lamps
앫 Front fog lamps
앫 Exterior rear view mirror lamps
The locator lighting switches off when
the driver’s door is opened.
If you do not open a door after unlock-
ing the vehicle with the SmartKey, the
lamps will switch off automatically after
approximately 40 seconds.
왘 Move the selection marker with
button æ or ç to the
LIGHTING
submenu.
컄컄