415
Practical hints
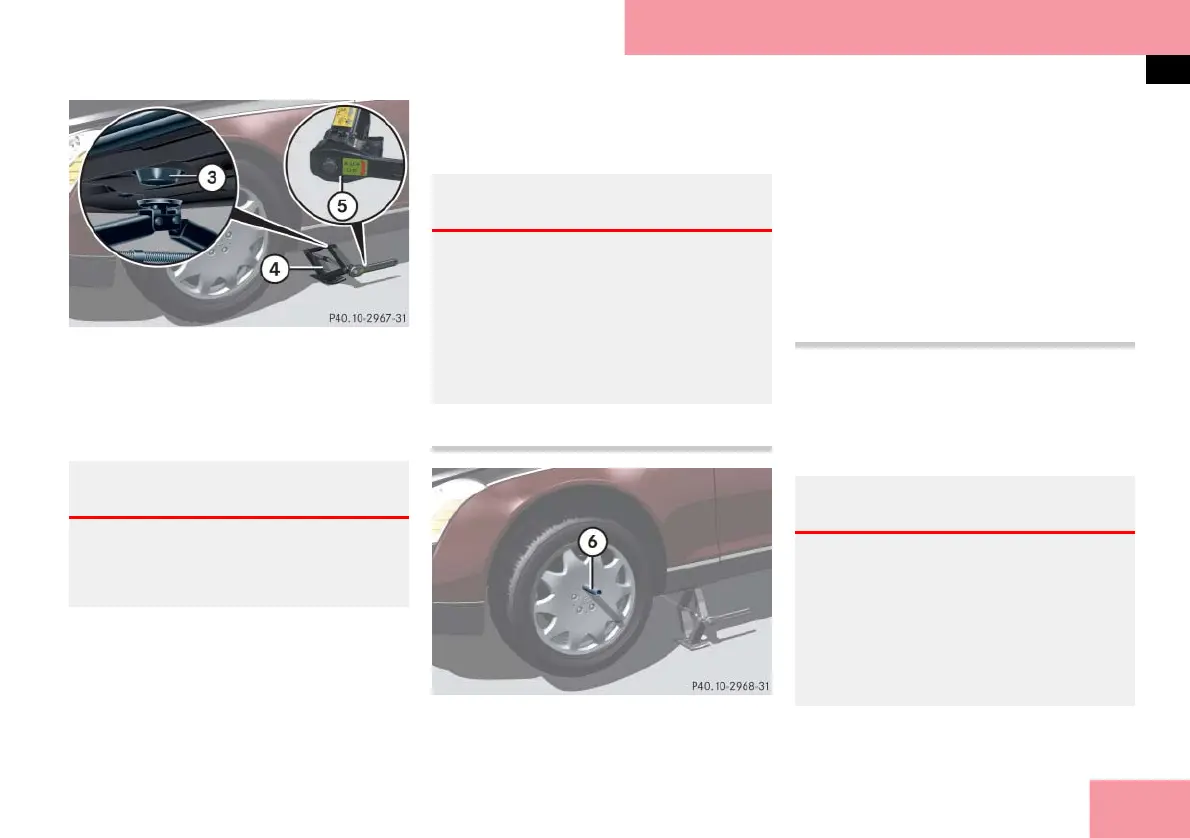
Flat tire
3 Jack
4 Jack support tube hole
5 Ratchet
왘 Insert jack 3 fully into tube hole 4
up to the stop.
왘 Take ratchet 5 out of vehicle tool
kit.
왘 Place ratchet 5 on jack 3 so that
you can see the letters UP.
왘 Crank ratchet 5 up and down until
the tire is a maximum of 1.2 in (3 cm)
off the ground.
Removing the wheel
6 Alignment bolt
왘 Unscrew uppermost wheel bolt and
remove.
왘 Replace this wheel bolt with align-
ment bolt 6 supplied in the tool kit.
왘 Remove the remaining bolts.
! Do not place wheel bolts in sand or dirt.
This could result in damage to the bolt and
wheel hub threads.
왘
Remove the wheel.
Mounting the new wheel
왘 Clean contact surfaces of wheel and
wheel hub.
! To avoid paint damage, place wheel flat
against hub and hold it there while installing
first wheel bolt.
Warning! G
Insert the jack arm fully into the jack sup-
port tube hole up to the stop. Otherwise
the vehicle may fall off the jack and cause
personal injury or damage to the vehicle.
Warning! G
The jack is intended only for lifting the ve-
hicle briefly for wheel changes. It is not
suited for performing maintenance work
under the vehicle.
앫 Never start the engine when the vehi-
cle is raised.
앫 Never lie down under the raised vehi-
cle.
Warning! G
Always replace wheel bolts that are dam-
aged or rusted.
Never apply oil or grease to wheel bolts.
Damaged wheel hub threads should be re-
paired immediately. Do not continue to
drive under these circumstances! Contact
an authorized Maybach Studio or call
Roadside Assistance.
컄컄