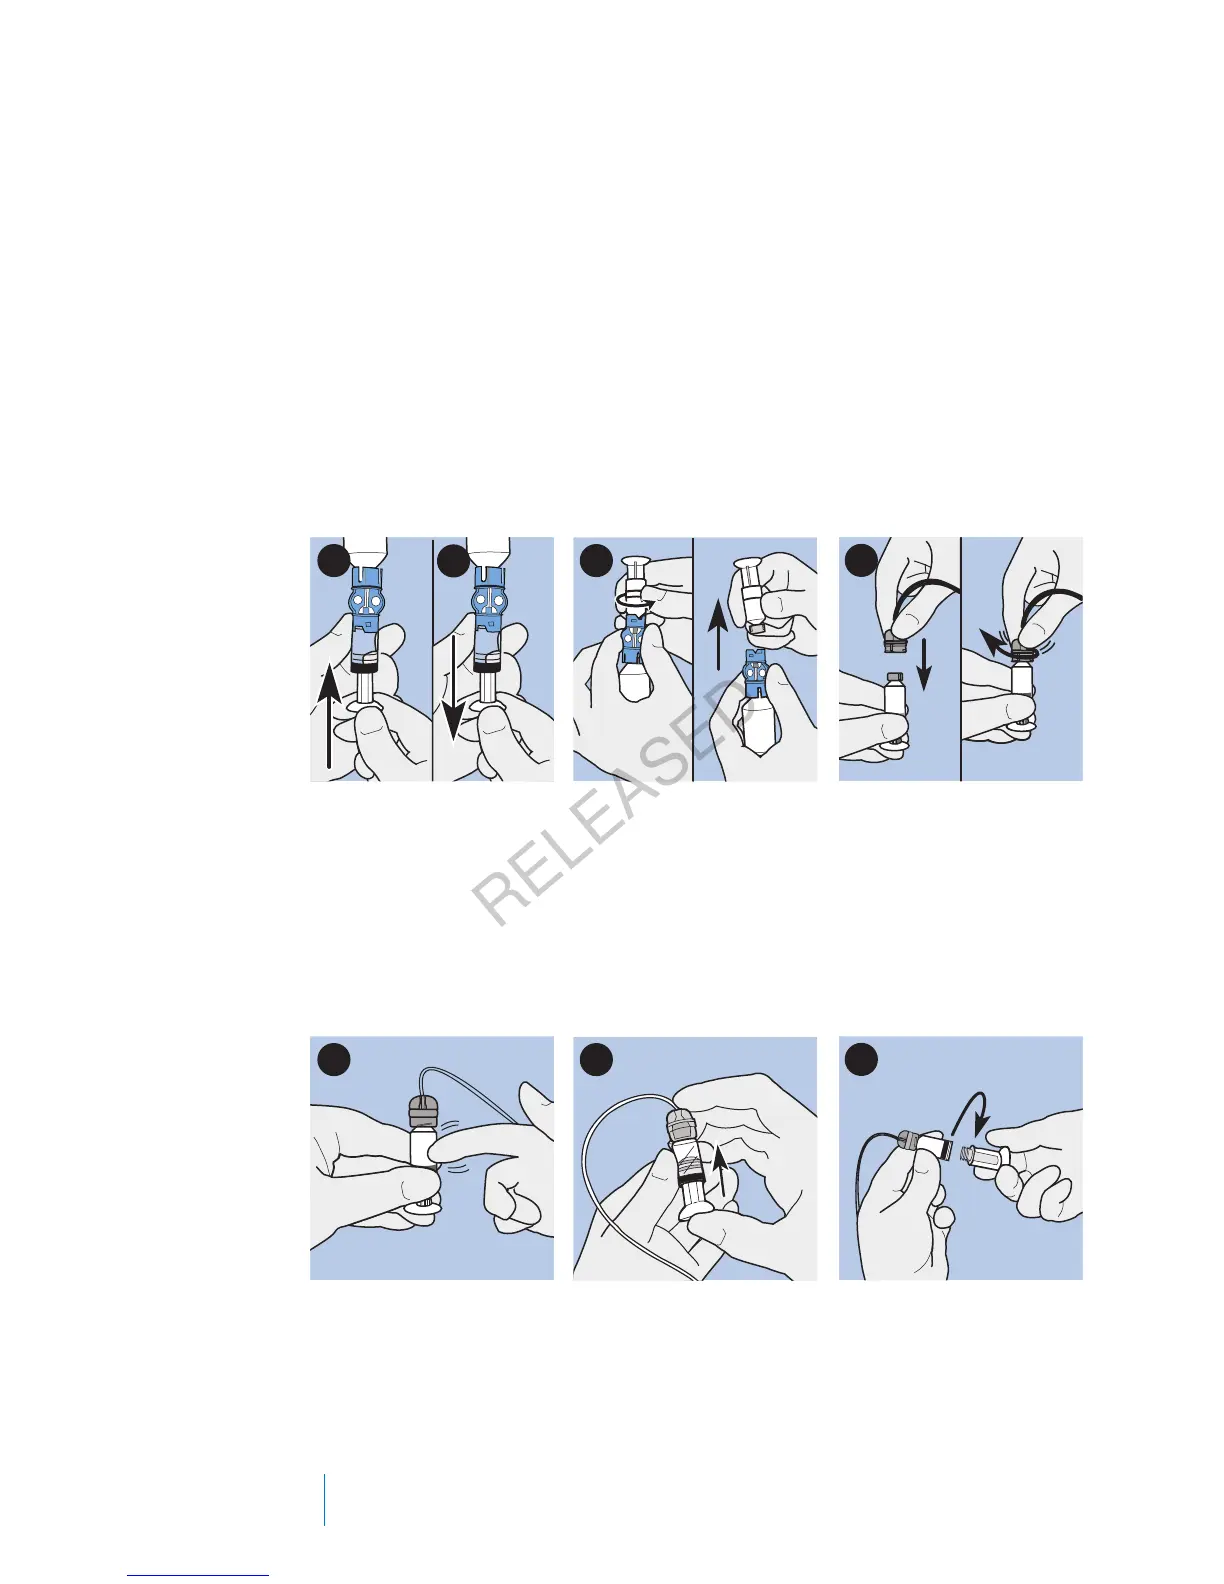
7. Slowly push up on the plunger just enough to remove any air bubbles from
the reservoir.
8. Slowly pull down on the plunger to fill the reservoir to the number of units
desired.
9. To avoid getting liquid on the top of the reservoir, flip the vial over so that it
is upright. Turn the reservoir counter-clockwise, then pull straight up to
remove the reservoir from the transfer guard.
10. Place the tubing connector onto the reservoir. Turn the connector clockwise,
pressing gently against the reservoir until you feel it slide in. Push in and
continue turning until the reservoir and the connector lock with a click.
9
8
10
7
11. Tap the side of the reservoir to remove any air bubbles.
12. To purge air bubbles that have risen to the top of the reservoir, push up on
the plunger until you see insulin in the tubing.
13. Without pulling, turn the plunger counter-clockwise to remove it from the
reservoir.
11 12
13
14. Select Next from the New Reservoir screen.
98 Chapter 5
MP6025957-024 / A
RELEASED