13
2 Basic Operations
No. 99MAM029A
3
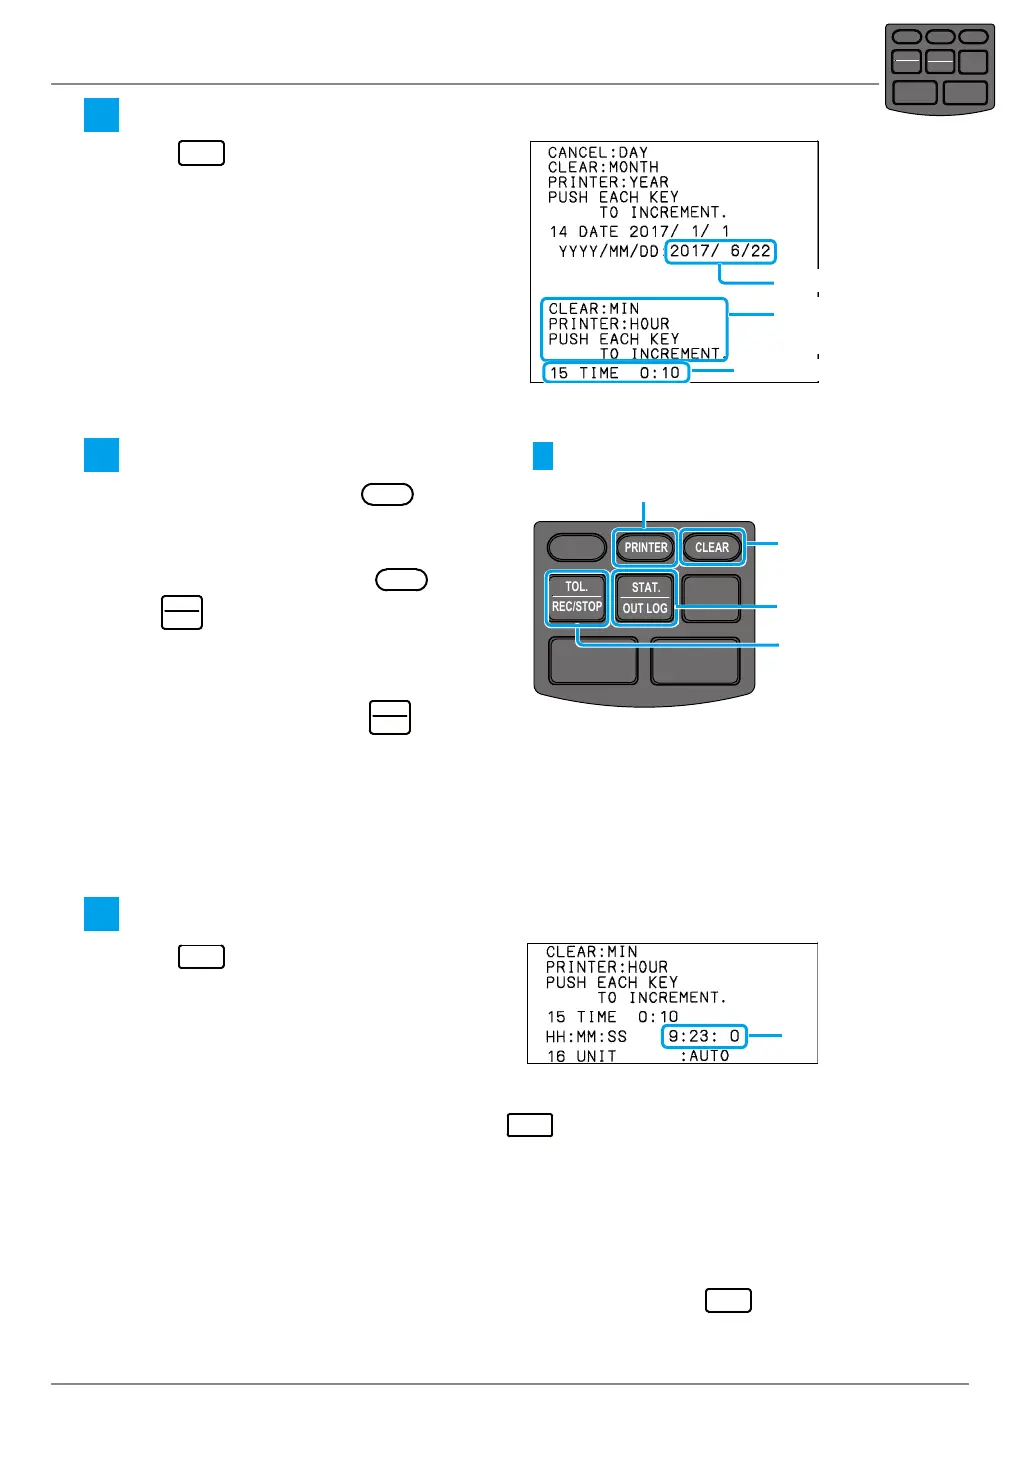
Fix the date.
Press
DATA
once.
» The xed date is printed.
» The explanation on key operation for
time setting, next settings "15 TIME"
and the time currently set are printed as
shown in the right gure.
Tips
If the desired date is not printed, enter the
parameter setup mode again to re-enter it.
Fixed date
Explanation on key
operation for time
setting
Time currently set
4
Input the time. (If change is not required, go to
5
.)
1
Input "Hour" by pressing
PRINTER
the
necessary amount of times from the
current set value.
2
Input "Minute" by pressing
CLEAR
or
TOL.
REC/STOP
the necessary amount of times
from the current set value.
3
Check whether the printed time is the
intended one by pressing
OUT LOG
.
4
When the desired time is not printed,
change it with procedure 1 or 2.
Minute (0 -> 1
->
...
-> 59 -> 0)
Hour (0 -> 1 ->
...
-> 23 -> 0)
Minute (59 -> 58 ->
...
0 -> 59)
The time input is
printed
POWER
TOL.
REC/STOP
PRINTER
CLEAR
STAT.
OUT LOG
CANCEL
DATA
FEED
Tips
Set the time in the 24-hour system format.
5
Fix the time.
Press
once.
» The xed time is printed.
Fixed time
Tips
• If the desired time is not printed by pressing
, enter the parameter setup mode again to
re-enter it.
• Even if the power is turned off after this operation, the date and time set shall be maintained.
However, when the parameters are cleared with "PARAMETER CLEAR" in the parameter, the
date and time is set as "2017/1/1 0:0" and resetting is required.
.
The date and time have been set via the above.
If it is desired to complete parameter setup after the above, press
repeatedly until
parameter setup list is printed.
POWER
TOL.
REC/STOP
PRINTER
CLEAR
STAT.
OUT LOG
CANCEL
DATA
FEED

 Loading...