37
3 Advanced Operations and Useful Functions
No. 99MAM029A
3.4.2 Start/Stop of Logging, Collective Print/Deletion
of Log Data
1
Turn on the power of the product connecting the measuring instrument with Digimatic output.
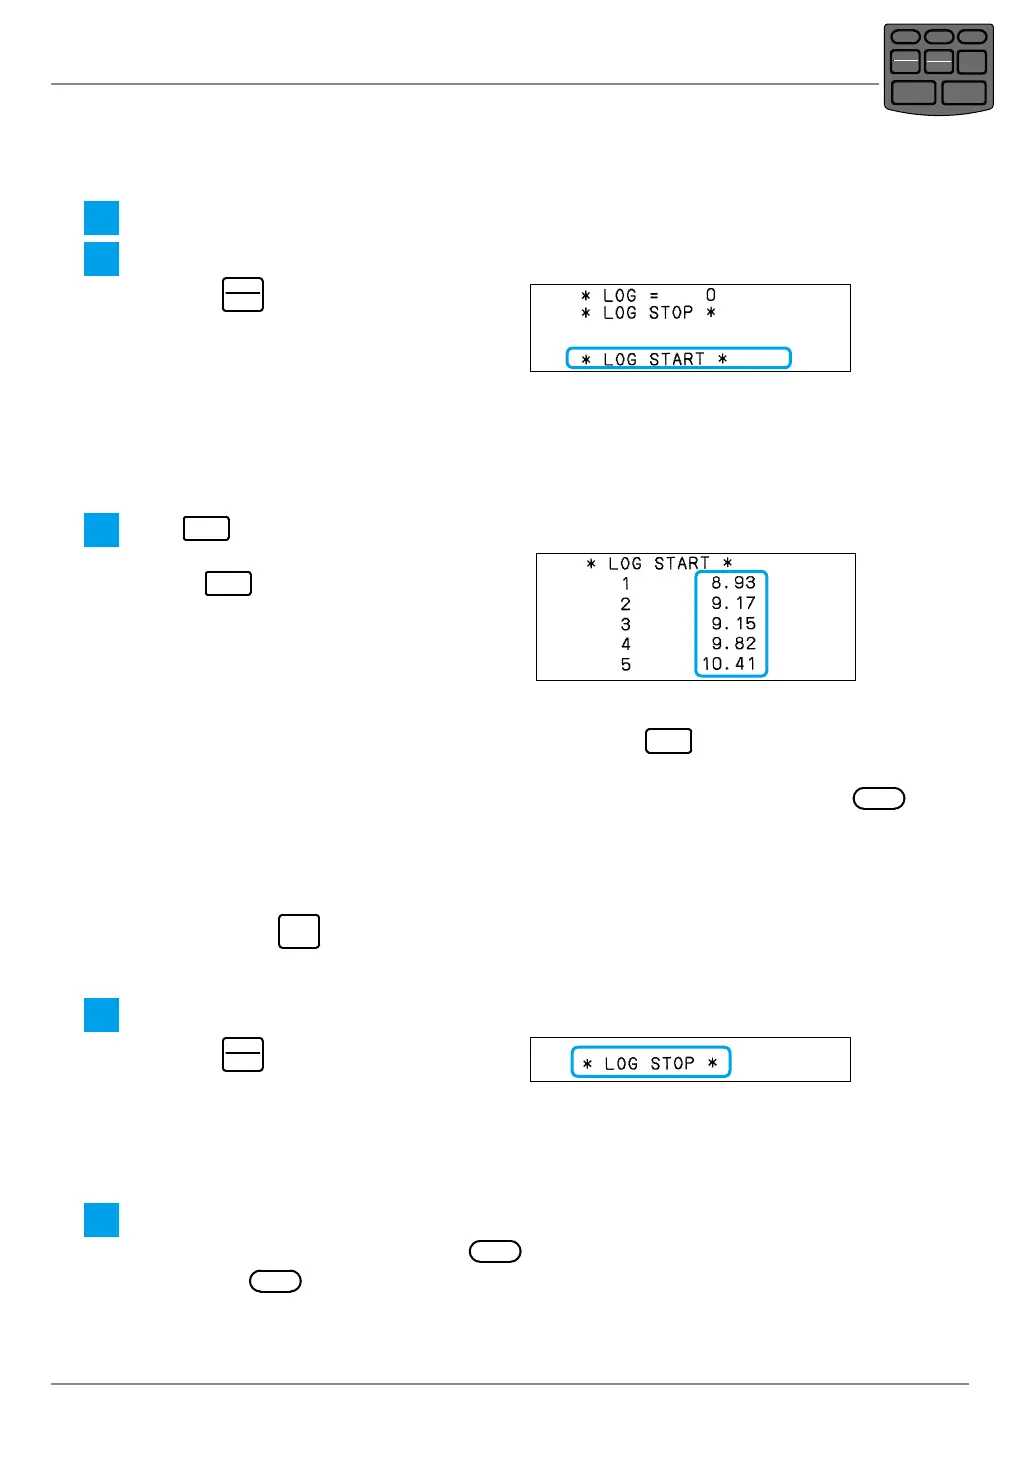
2
Start logging.
Hold down
TOL.
REC/STOP
, and then release a
nger from the key.
» "Û LOG START Û" is printed.
» The logging function starts and waits for
measurement data input.
Tips
If "Û LOG START Û" is printed when power is turned on, this operation is not required.
3
Press
DATA
to input the measurement data.
» The measurement data is printed each
time
DATA
is pressed.
» At the same time, it is stored internally
as log data.
Tips
• Input of the measurement data can be executed not only with
DATA
operation but also with the
foot switch operation, the timer input or the request signal from a PC.
• When printing of the measurement data is not required, turn the printing off by pressing
PRINTER
before inputting the measurement data ("PRINTER ON" or "PRINTER OFF" is printed).
• When the number of log data exceeds 950, a dedicated buzzer sounds warning for each batch
of 10 data from then on. Because up to 1,000 data can be logged, perform the output of the log
data.
• When pressing
CANCEL
after measuring the data, one measurement datum is deleted and one log
datum is deleted at the same time.
4
Stop logging.
Hold down
TOL.
REC/STOP
, and then release a
nger from the key.
» "Û LOG STOP Û" is printed.
Logging is now complete.
Next, output the stored log data.
5
Determine the output destination of the log data.
y In case printing them collectively, press
PRINTER
to check whether the printing function is on.
y If not, press
PRINTER
to turn off the printing function. (Buzzer sounds when measurement data
input.)
y In case outputting them collectively to PC via USB, connect the product to a PC with a
USB cable and activate the software such as Microsoft Excel.
POWER
TOL.
REC/STOP
PRINTER
CLEAR
STAT.
OUT LOG
CANCEL
DATA
FEED