109
Installing the MX-DoorMaster
6. Screw on the ‘door lock unlocked/locked’ door lock sensor (coming from the door):
– First wire to IN2 + terminal
– Second wire to IN – terminal
The device still functions properly if the two wires used
here (operating contact and changeover contact) are
swapped.
7. Screw on the ‘door opened/closed’ door sensor (reed
switch) coming from the door:
– First wire to IN1 + terminal
– Second wire also to IN – terminal
The device still functions properly if the two wires used
here (operating contact and changeover contact) are
swapped.
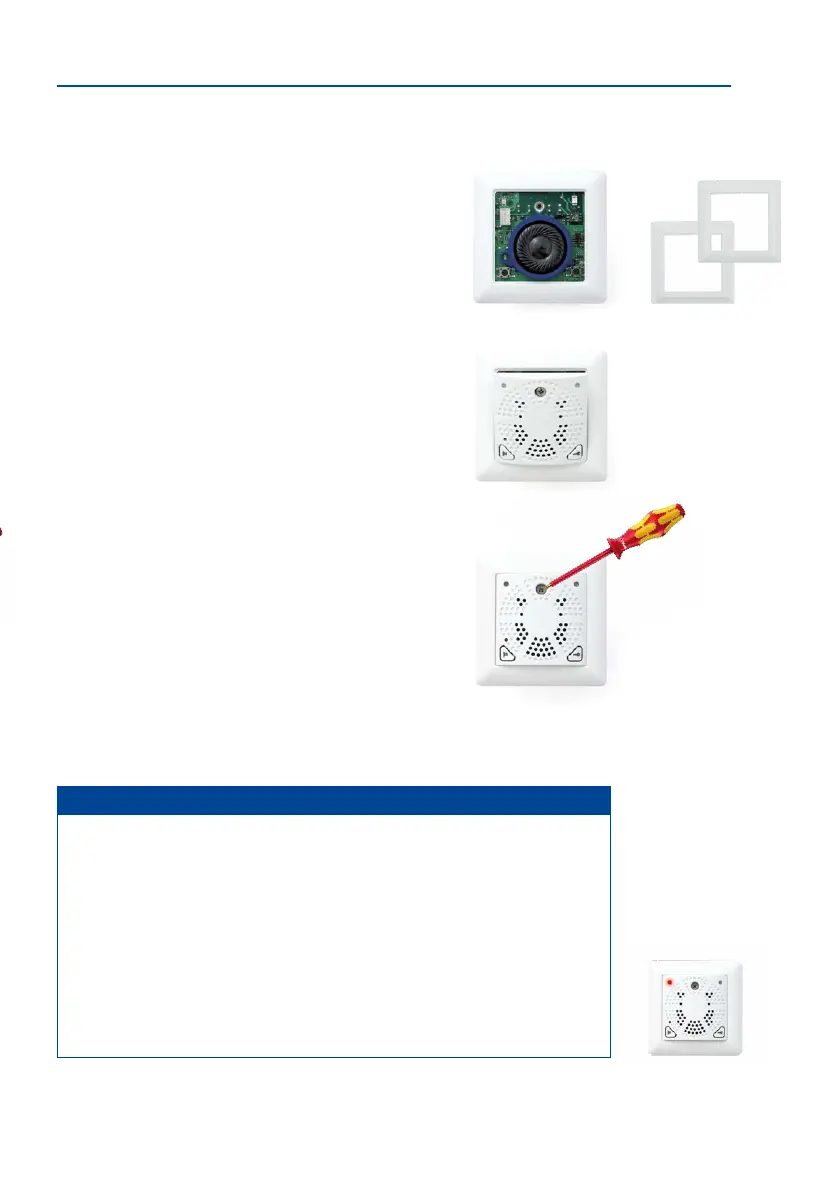
8. Remove the front panel and frame: In order to pro
-
tect the board, the board is attached to the front panel
and frame in the original packaging. To continue with
the installation, however, you must rst separate the
housing and board from the panel and frame. Loosen
the screw in the front panel and li the panel forwards.
Now remove the attached frame from the board. Please
note that you will need the stainless steel screw in the front
panel again later.
9. Insert the housing and circuit board into the socket:
The two cable clamps on the rear of the housing are
located at the top. When using a cavity socket, make
sure you only use the stainless steel screws provided.
Using dierent (larger) screws could damage the board.
Caution
Electrical systems and equipment may only be installed, modied and maintained by
a qualied electrician or under the direction and supervision of a qualied electrician
in accordance with the applicable electrical guidelines.
10. Attach the frame: Place the selected frame (concave, convex or at) onto the board
and press down gently until it automatically snaps into place. MOBOTIX is printed
on the bottom of the frame.
11.
Insert the panel: Hook the front panel onto the bottom
of the frame, as shown in the gure, and then press it
down.
12.
Screw the panel on tightly: Secure the front panel using
the panel’s stainless steel screw.
Notes
Make sure not to block the holes in the front panel (air circulation).
Following installation and inital operation, the MX-DoorMaster batteries should be
charged continuously for the rst 12 hours. This takes place automatically via the
PoE-powered T26 door station using the MxBus two-wire cable. During this time,
the electric door opening function should not be used (except for a short functional
test). This will maximize and extend the battery life of the high-quality NiMH battery
(industry standard) to several years at normal use.
When replacing the batteries, always be sure to use original batteries. You can purchase
these directly from MOBOTIX or your MOBOTIX partner.
Select the type of
frame required
When a battery is almost
completely discharged, a
functional test can only be
carried out aer the red
LED has gone out (aer
approximately 15 minutes)