ioThinx 4510 Series Hardware Installation
Mounting the Unit
In this section, we describe how to mount the device on a DIN rail and how to unmount the device from a
DIN rail.
DANGER
Never install the device while the power source is switched on
.
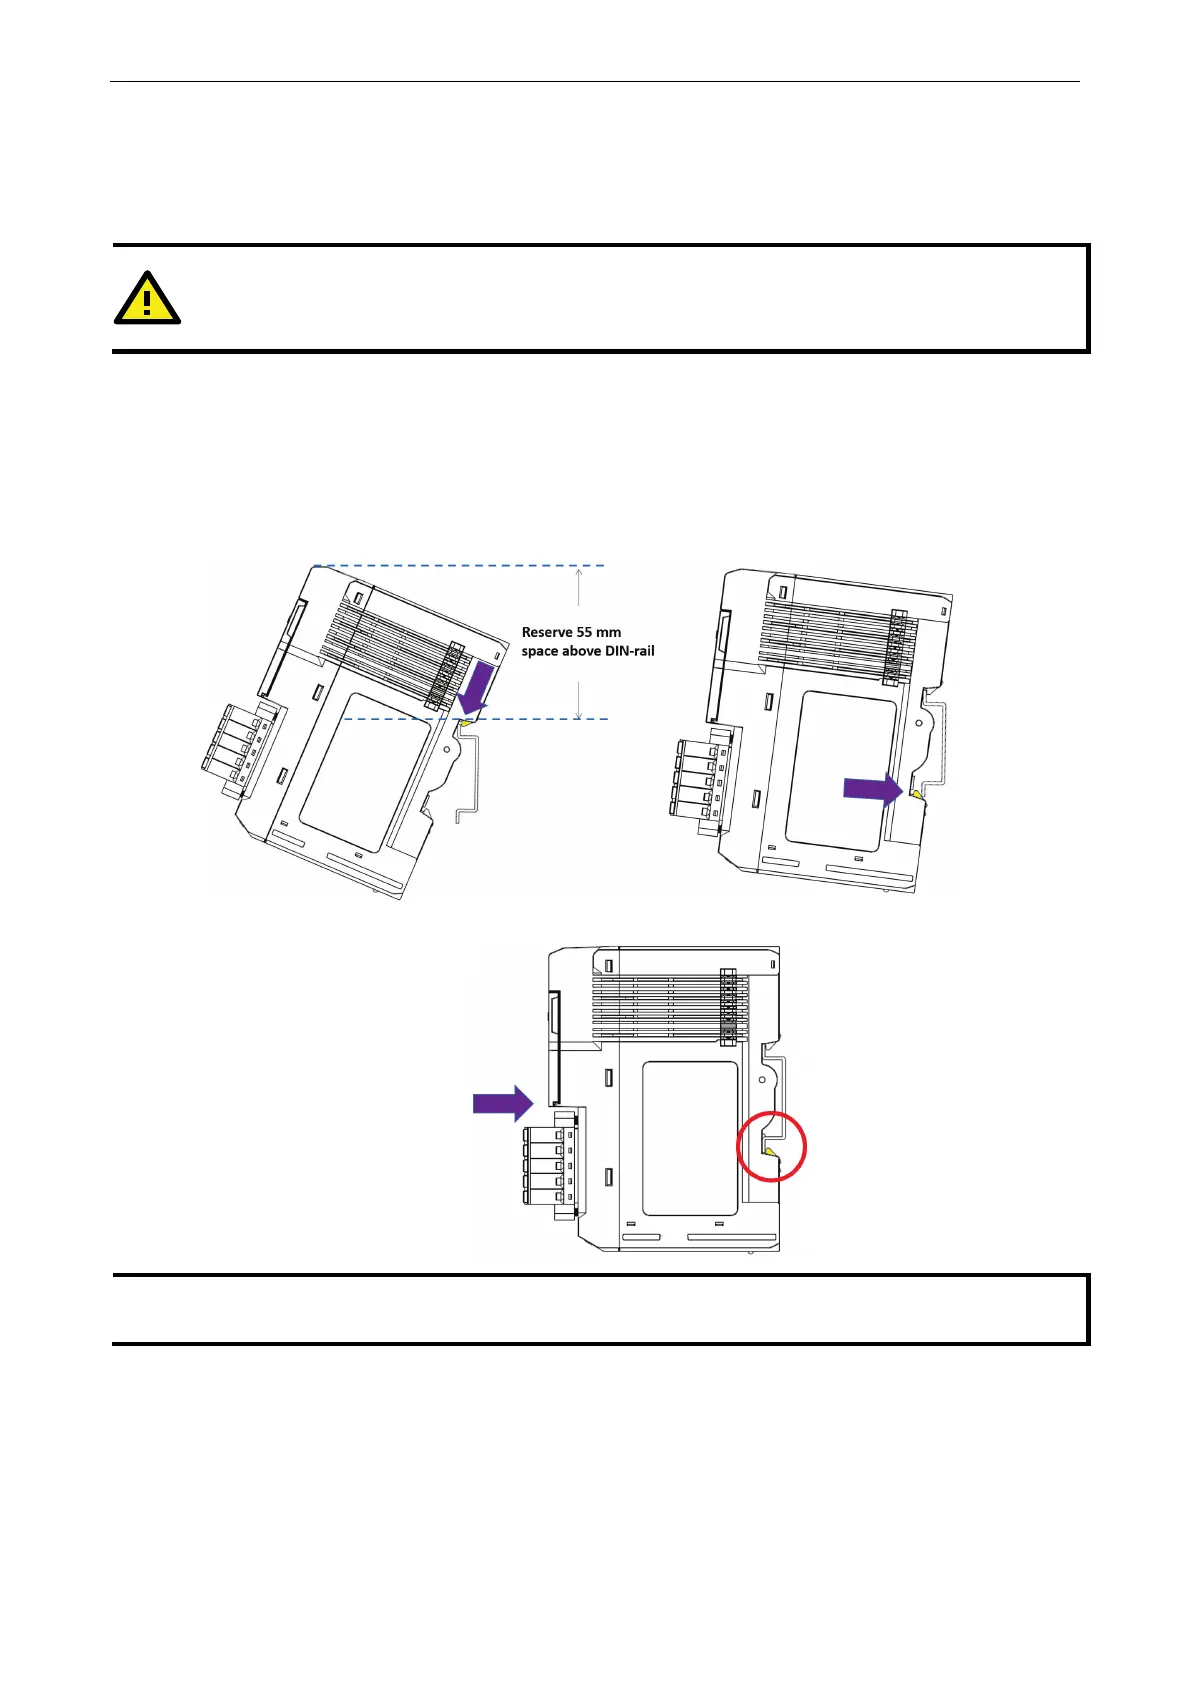
Installing the Unit on a DIN Rail
Take the following steps to install the unit on a DIN rail.
Step 1: Hook the mounting clip of the unit onto the DIN rail, and then lower the clip onto the DIN rail. At
least 55 mm of space above the DIN rail should be kept free to ensure that the installation can be done
correctly.
Step 2: Push the unit towards the DIN rail until the end of the mounting clip snaps into place.
When the I/O module is inserted into the correct position, the connection between the internal bus
and the previous module is established.