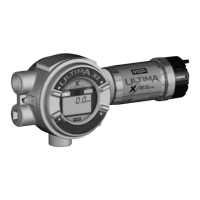
Do not locate the general-purpose enclosure models in an
area which may contain a flammable mixture of gas and air;
otherwise, an explosion may occur. The general-purpose
Ultima X Series Gas Monitors can be a source of ignition and
must not be mounted in an area where a flammable mixture
of combustible gas and air may become present; otherwise,
an explosion may occur. If such a location must be moni-
tored, use an explosion-proof gas monitor.
Installing the Ultima XA Gas Monitor
Remove lid and drill enclosure for power, signal and optional relay cable
entry. Use one of the following methods to mount the general-purpose
Ultima XA Gas Monitor/Less Sensor or the Ultima XA Gas Monitor.
• Using customer-installed wiring holes, install the Ultima XA Gas
Monitor to the end of rigid conduit.
• Use mounting holes in the corners of the Ultima XA enclosure to
mount directly to a wall.
• Use mounting holes in the corners of the Ultima XA enclosure to
mount to the optional Mounting Kit (P/N 10047561);
see FIGURE 1-7.
• The Ultima XA gas sensor is not shipped attached to the main
enclosure. Ensure the sensor wiring harness is through the entry
and the sensor is pointed downward.
Installing the Ultima XE Gas Monitor
• The optional Mounting Bracket Kit (P/N 10047561) can be attached
to the rear holes of the Ultima XE Gas Monitor (FIGURE 1-7).
• The Ultima XE Gas Monitor main enclosure can be rotated 360°
and mounted to ensure easy access to any of the four entryways.
The electronics assembly inside the metal enclosure can be
repositioned in any of the four self-aligning interior holes to ensure
the display is properly oriented.
• The Ultima XE Gas Monitor sensor is not shipped attached to the
main enclosure. Ensure the sensor wiring harness is through the
entry and the sensor is pointing downward. Tighten with a strap
wrench.
"
WARNING
1-6

 Loading...