4
EN
About This Manual
About This Manual
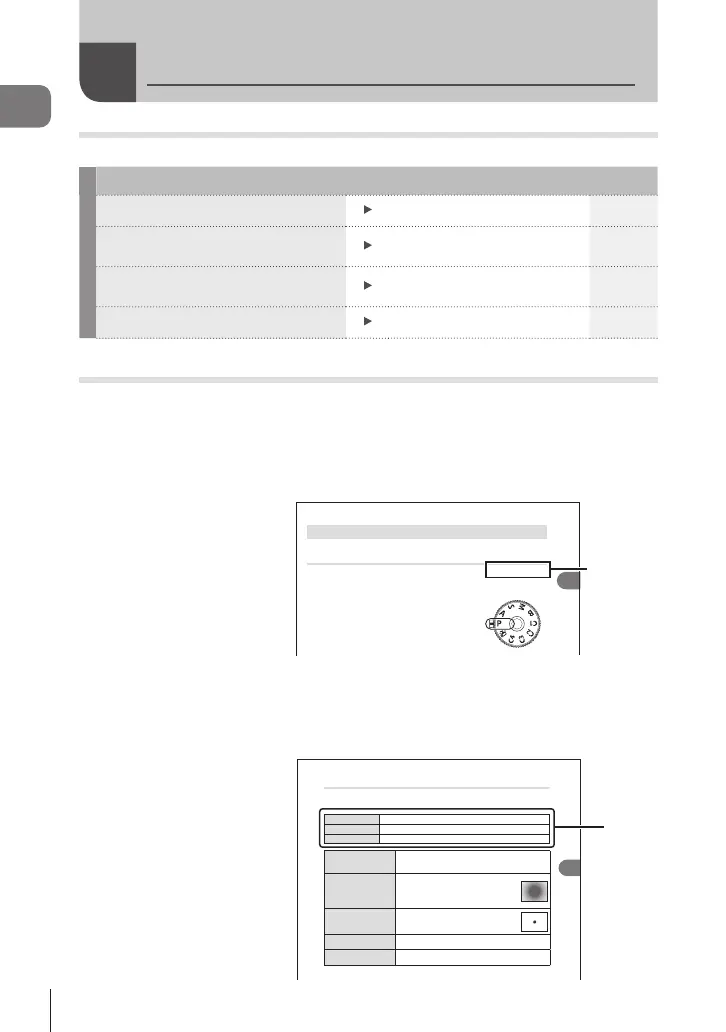
How to nd what you want to know
You can use the following methods to nd what you want to know in this manual.
Search method Where to look
g
Search based on what you want to do Table of Contents P. 6
Search based on names of buttons
and parts of the camera
Names of parts P. 15
Search based on menus and terms
displayed on the monitor
Default Settings P. 311
Search based on words
Index P. 337
How to read this manual
Shooting modes in which the function is available
In each explanation of a shooting function, the shooting modes in which the function
can be used are shown at the beginning. The shooting modes in which the function can
be used are shown in black. The shooting modes in which the function cannot be used
are shown in gray.
Shooting
2
Taking Pictures Using the Shooting Modes
Letting the camera choose aperture and shutter speed
(P: Program AE)
PASMB
n
The camera chooses the optimal aperture and shutter speed according to subject
brightness.
1
Rotate the mode dial to P.
2
Focus and check the display.
• Use the front and rear dials to adjust the following
settings.
Front dial: Exposure compensation (P. 106)
Rear dial: Program shift (P. 44)
• The shutter speed and aperture chosen by the camera
are displayed.
• Exposure compensation can also be adjusted using the
F button. Press the F button and then rotate the front
or rear dial.
3
Take pictures.
1
10231023
P
1
/
250
P
1
/
F
250 5.65.6
[
1
:
02
:
03
][
1
:
02
:
03
]
FF
60p60p L
-
8L
-
8
0
%
rr
OO
Shooting mode
Shutter speed
Aperture
%You can choose the functions performed by the front and rear dials. g "Assigning Roles
to the Front and Rear Dials
(KDial Function / nDial Function)" (P. 216)
%You can use the Fn lever to reverse the roles of the front and rear dials. The lever can
also be assigned other roles. g "Customizing the Fn Lever (Fn Lever Settings)"
(P. 219)
Availability
of the
function
in each
shooting
mode
How to set the function
The procedures for setting each function is described at the beginning of the
explanation of the function. For details, see “How to operate the menus” (P. 63) and
“How to change the shooting settings (Direct buttons/Super Control Panel)” (P. 66).
Shooting Settings
4
Choosing how the camera measures brightness (Metering)
PASMB
n
You can choose how the camera meters subject brightness.
Button
AF m button n FGk
Super Control Panel
Q n Metering
Menu
MENU n
_
n5. Metering n Metering
p
Digital ESP
metering
Suited to most scenes, including back-lit subjects. The
camera meters 324 areas of the frame and calculates optimal
exposure taking into consideration the nature of the scene.
B
Center weighted
averaging
metering
Suited to compositions that place the main
subject at the center of the frame. The camera
sets exposure based on the average light level
for the entire frame while assigning the greatest
weight to the area in the center.
C
Spot metering
Use a specic area of the subject meter
exposure. The camera meters a small portion
(approximately 2%) of the frame.
CHi
Spot metering
(highlight)
Increases spot metering exposure. Ensures bright subjects
appear bright.
CSh
Spot metering
(shadow)
Lowers spot metering exposure. Ensures dark subjects
appear dark.
%The spot metering position can be set at the selected AF target. g “"Metering the Focus
Target (NSpot Metering)" (P. 112)
Locking the exposure (AE Lock)
PASMB
n
You can lock the exposure by pressing the AEL button. Use this when you want to
adjust the focus and exposure separately or when you want to shoot several images at
the same exposure.
Button AEL button
%The camera can be congured to automatically release the lock after shooting. g [B
Auto Reset] (P. 110)
• If the AEL button has been assigned a dierent role, you will need to assign [AEL]
(P. 213) to a control using [Button Function] (P. 208).
• If you press the AEL button once, the exposure is locked and u is displayed.
• Press the button once again to release the AE Lock.
• The lock will be released if you operate the mode dial, MENU button, or Q button.
How to
set the
function