14 Assembly of the loader housing
The units described below must be assembled and adjusted by Olympus. If these units are
assembled or adjusted by the customer, the operations are not ensured.
The VS200 loader is shipped with the two side panels already mounted. Follow the
order of panel mounting as described in the chapter below.
14.1 Top panel
The units described below must be assembled and adjusted by Olympus. If these units are
assembled or adjusted by the customer, the operations are not ensured.
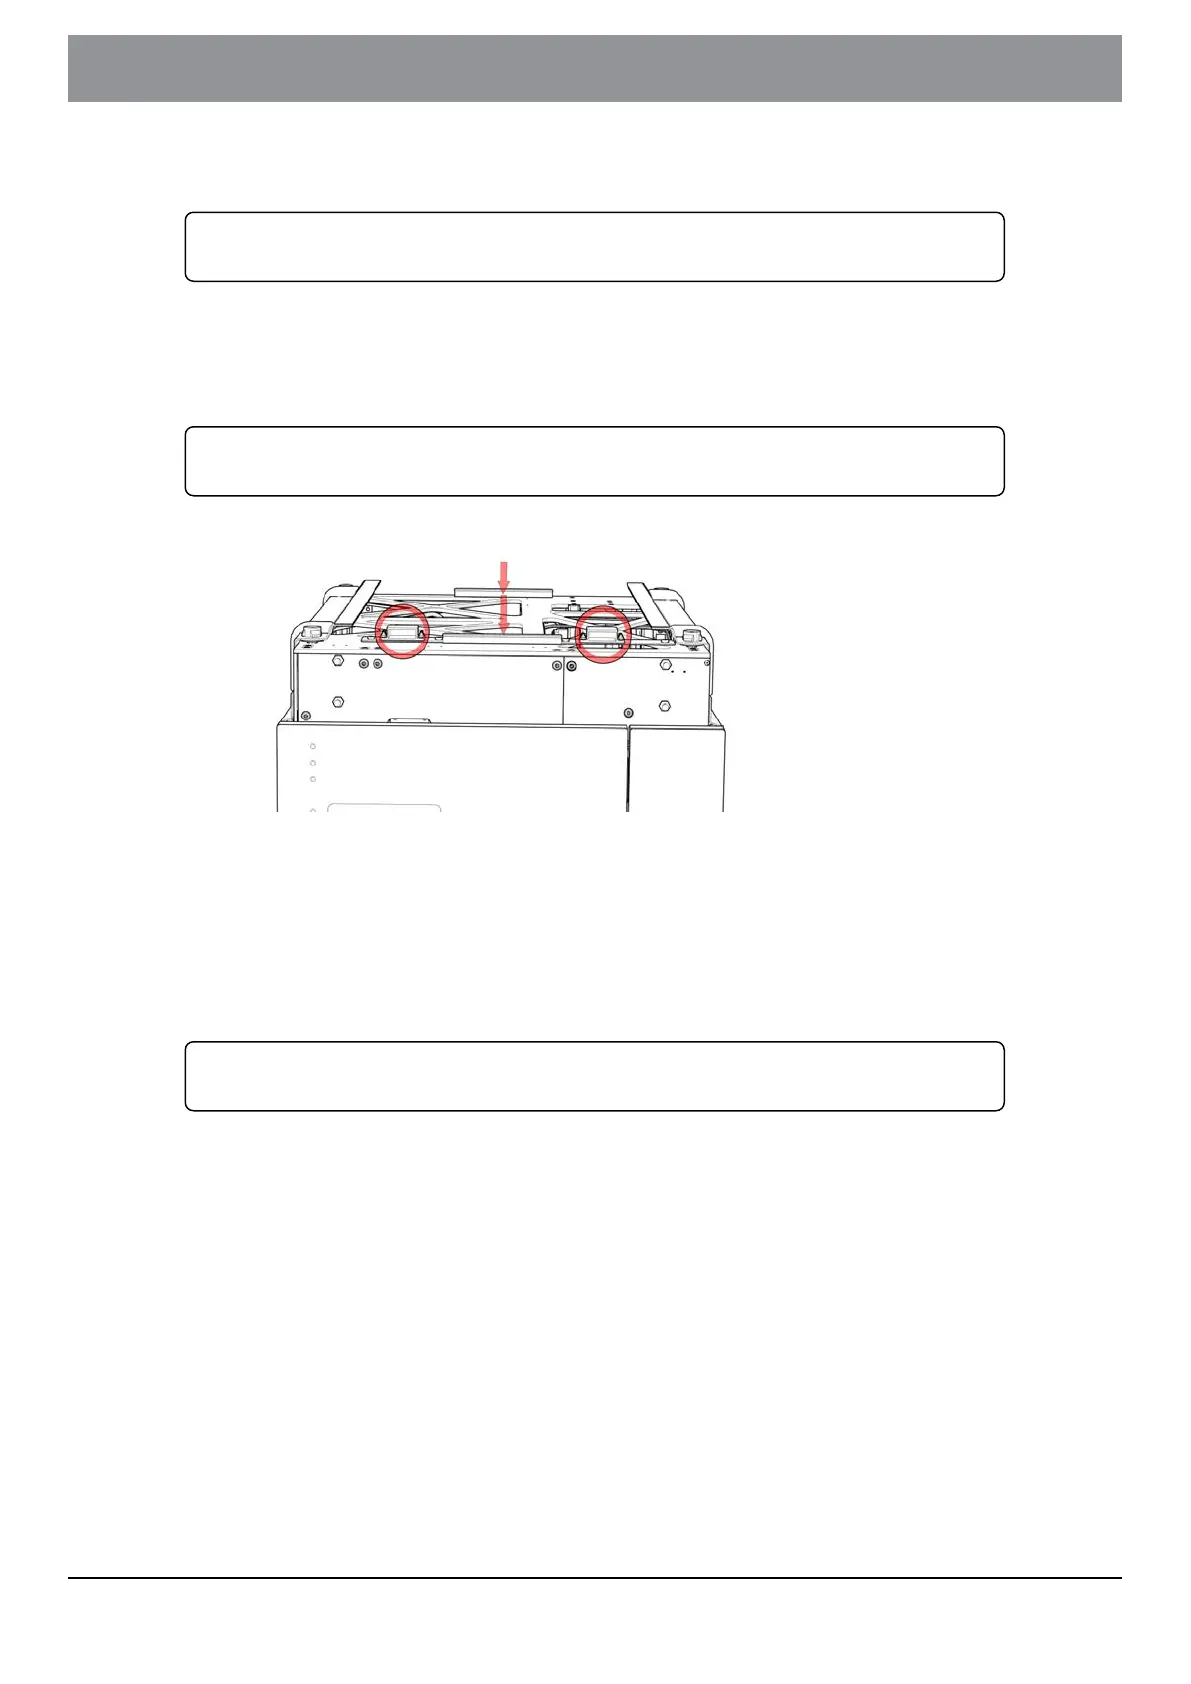
1. Place the top panel over the system.
1. Attach the two grounding flags at the backside of the loader to the con-
nectors of the panel like shown in the image below.
2. Position the panel so that it sticks out approximately 1.5 cm at the front.
3. Push it to the back until you hear a "click".
14.2 Back panel
The units described below must be assembled and adjusted by Olympus. If these units are
assembled or adjusted by the customer, the operations are not ensured.
The back panel is fixed with 8 knurled screws.
1. Center the back panel on the loader and start by tightening the middle
knurled screws.
- 72 -
Instructions for use
14 Assembly of the loader housing
OLYMPUS VS200 System