3. HW Installation
3.1. Overview
For a successful installation the following steps will be required:
•
Mount the components
NOTE:
The Eyes can be mounted either using Robot Mount or External Mount.
The Robot Mount allows the camera to be mounted on the robot's tool
flange.
The External Mount allows the camera to be mounted externally.
•
Wire the cables
•
Setup the Eye Box
•
Setup the Eyes software
•
Setup the robot software
In the following sections, these installation steps will be described.
3.2. Robot Mount
1. Mount the robot-specific adapter (if applicable)
2. Mount any optional accessories
3. Mount the Quick Changer option
4. Mount the tool(s) (if applicable)
3.2.1. HEX-E/H QC
The robot mount is attached together with the OnRobot Quick Changer mounting options.
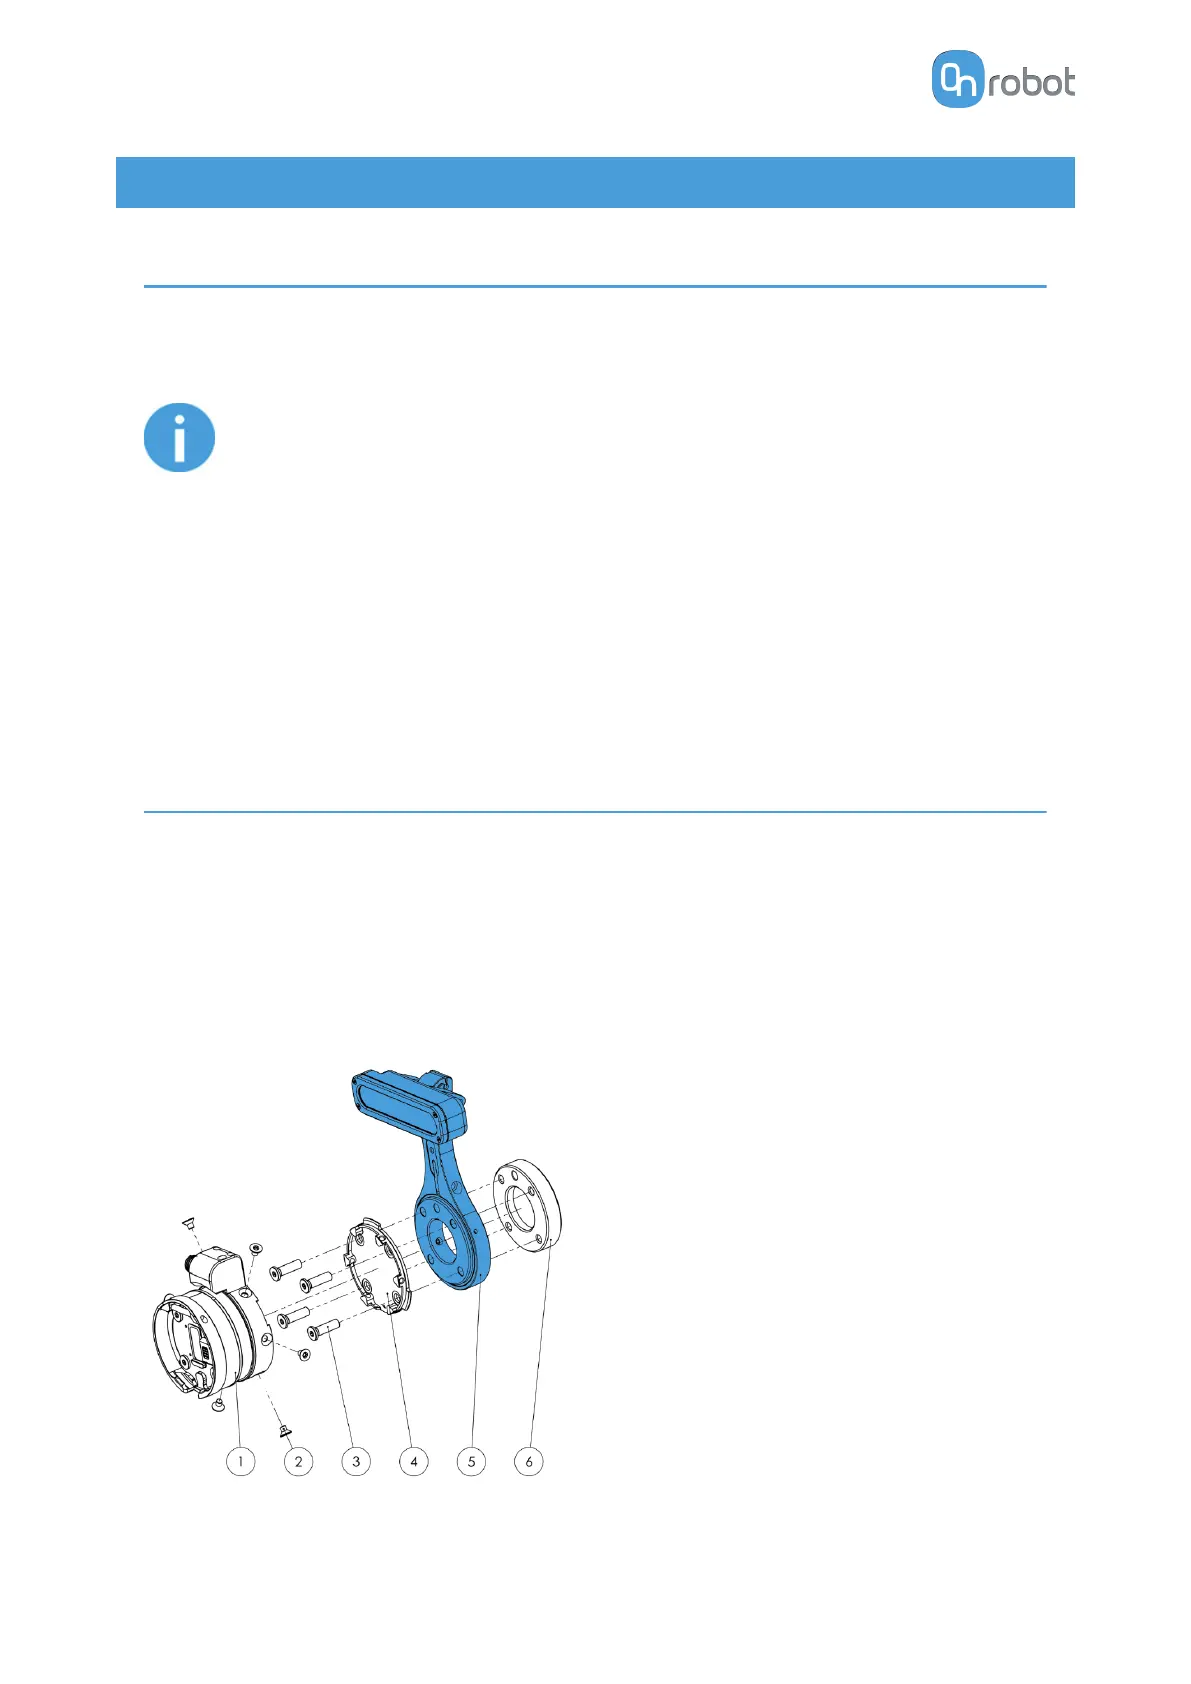
HEX-E/H QC
1. HEX-E/H QC sensor
2. M4x6mm (ISO14581 A4-70)
3. M6x20mm (DIN7984LT A2)
4. HEX-E/H QC adapter
5. Eyes Robot Mount
6. Adapter/ Robot tool
flange (ISO
9409-1-50-4-M6)
Use 1.5 Nm tightening torque for M4x6mm.
Use 3.8 Nm tightening torque for M6x8mm.
HW INSTALLATION
14


 To Next Page