Chapter 2 Setup
Equipment 2.1
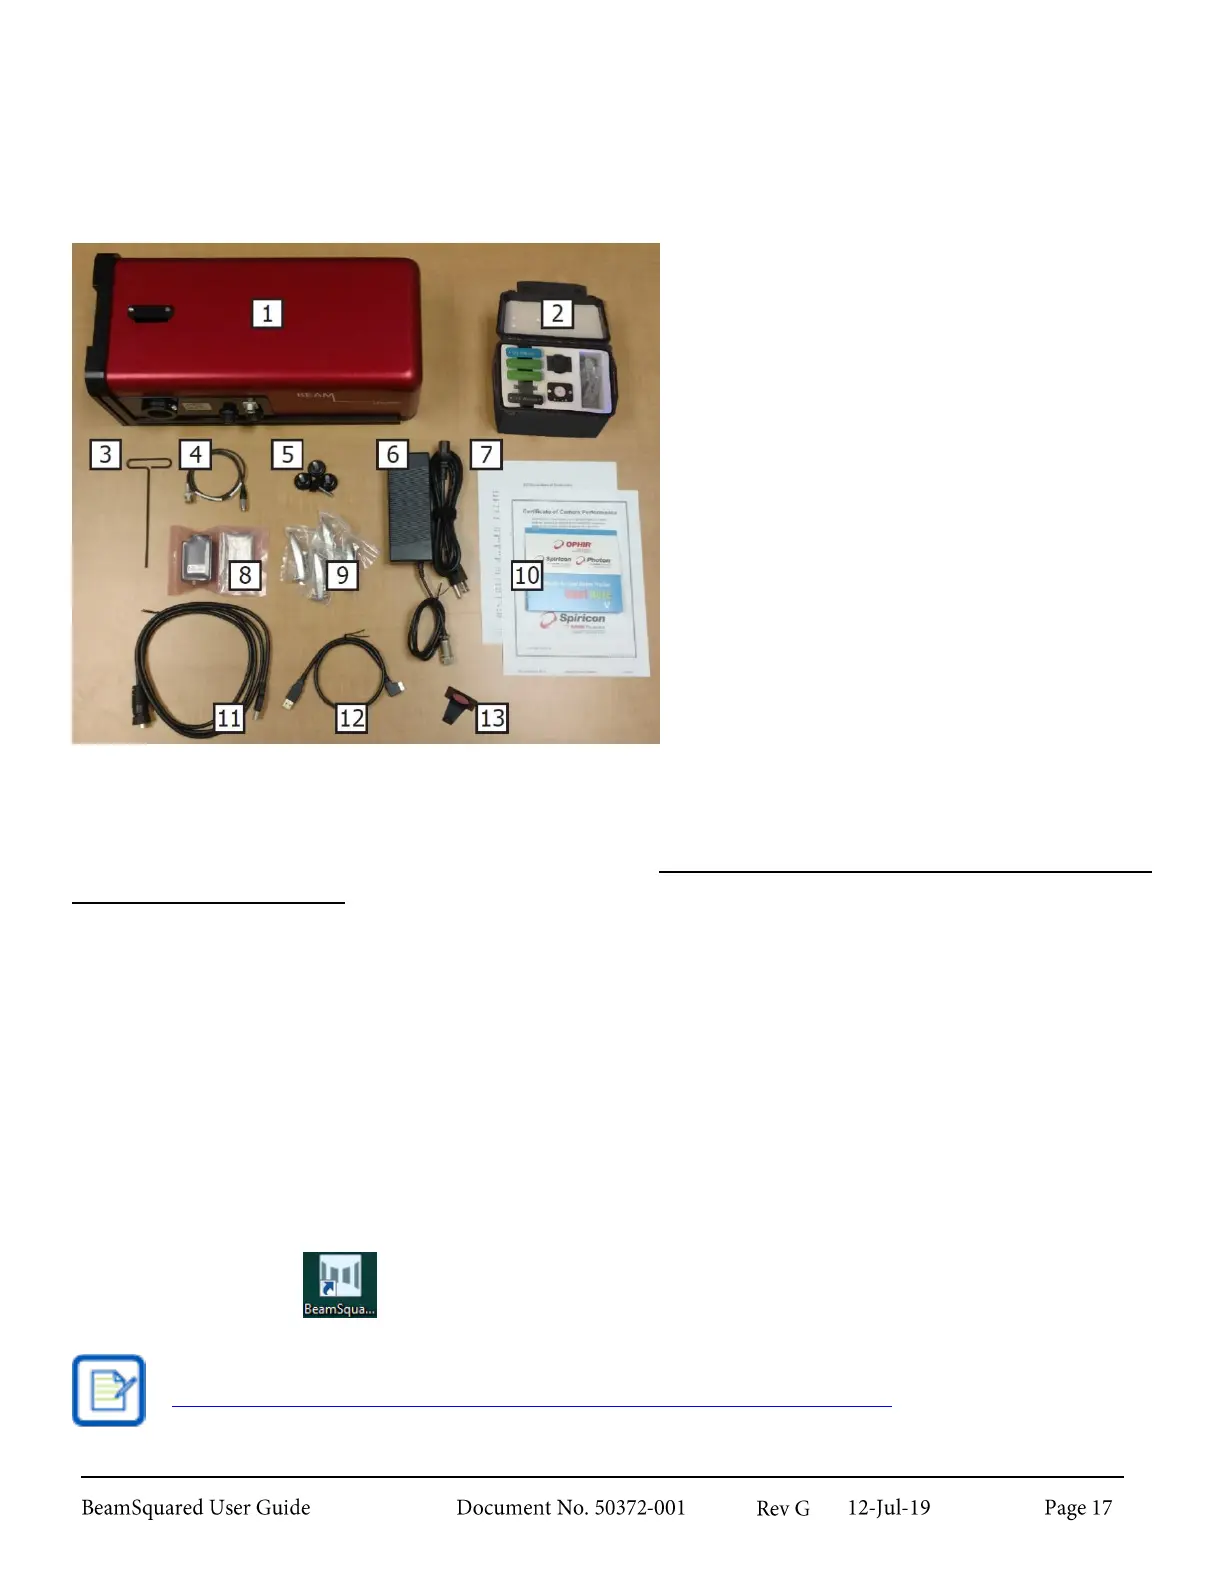
The following components are found in your BeamSquared system:
BeamSquared System Components
1.
BeamSquared M
2
Measurement System
2.
BeamSquared Lens Kit
3.
T-handle 7/64” Hex Wrench
4.
TTL Camera Trigger Cable
5.
Optional Use Leveling Feet (4)
6.
AC-DC 24V 5A Adapter
7.
CCD Camera Certificates
8.
Laser Profiling Grade CCD Camera
9.
Base Clamps (4)
10.
Software Installation DVD
11.
USB-A 3.0 to USB-A 3.0 IP68 Cable
12.
USB-A 3.0 to USB 3.0 Micro Cable
13.
Gunsight Beam Alignment Tool
BeamSquared Software Installation 2.2
There are two ways to install the software from the Ophir-Spiricon provided DVD. This procedure works as
described on Windows 7 and 10 operating systems. All installations must be performed with
Administrator privileges.
1.
If the computer is setup to Auto Play DVDs do the following:
a.
Insert the supplied DVD into the DVD drive and wait for the Ophir-Spiricon Software Auto
Install screen to appear.
b.
Click on the Software Install button.
c.
Follow the directions that appear on the screen.
2.
If the computer does not have the Auto Play feature enabled:
a.
Insert the supplied DVD into the DVD drive and open Windows Explorer.
b.
Select My Computer and right-click the DVD drive that contains the Ophir-Spiricon disk. Click
on the Autoplay option. This will open the Ophir-Spiricon Software Auto Install screen.
c.
Click on the Software Install button.
d.
Follow the directions that appear on the screen.
The BeamSquared icon appears on the desktop after installation completes.
If your computer does not have a DVD drive, the software may be downloaded from our website
(https://www.ophiropt.com/laser--measurement/software-download?r=drp).