Initial Setup and Rough Beam Alignment 2.5.2
Live Playback
2.5.2.1
The Live Playback video mode is provided to assist with the alignment process and displays
a video feed in the 2D Beam Display window. Enable Live Playback on the Run ribbon to
assist with aligning the beam after attenuation has been completed. Live Playback is
also used to collect Positional Stability data when the Positional Stability window is open.
The beam may not appear in the 2D Beam Display window until after the alignment is completed.
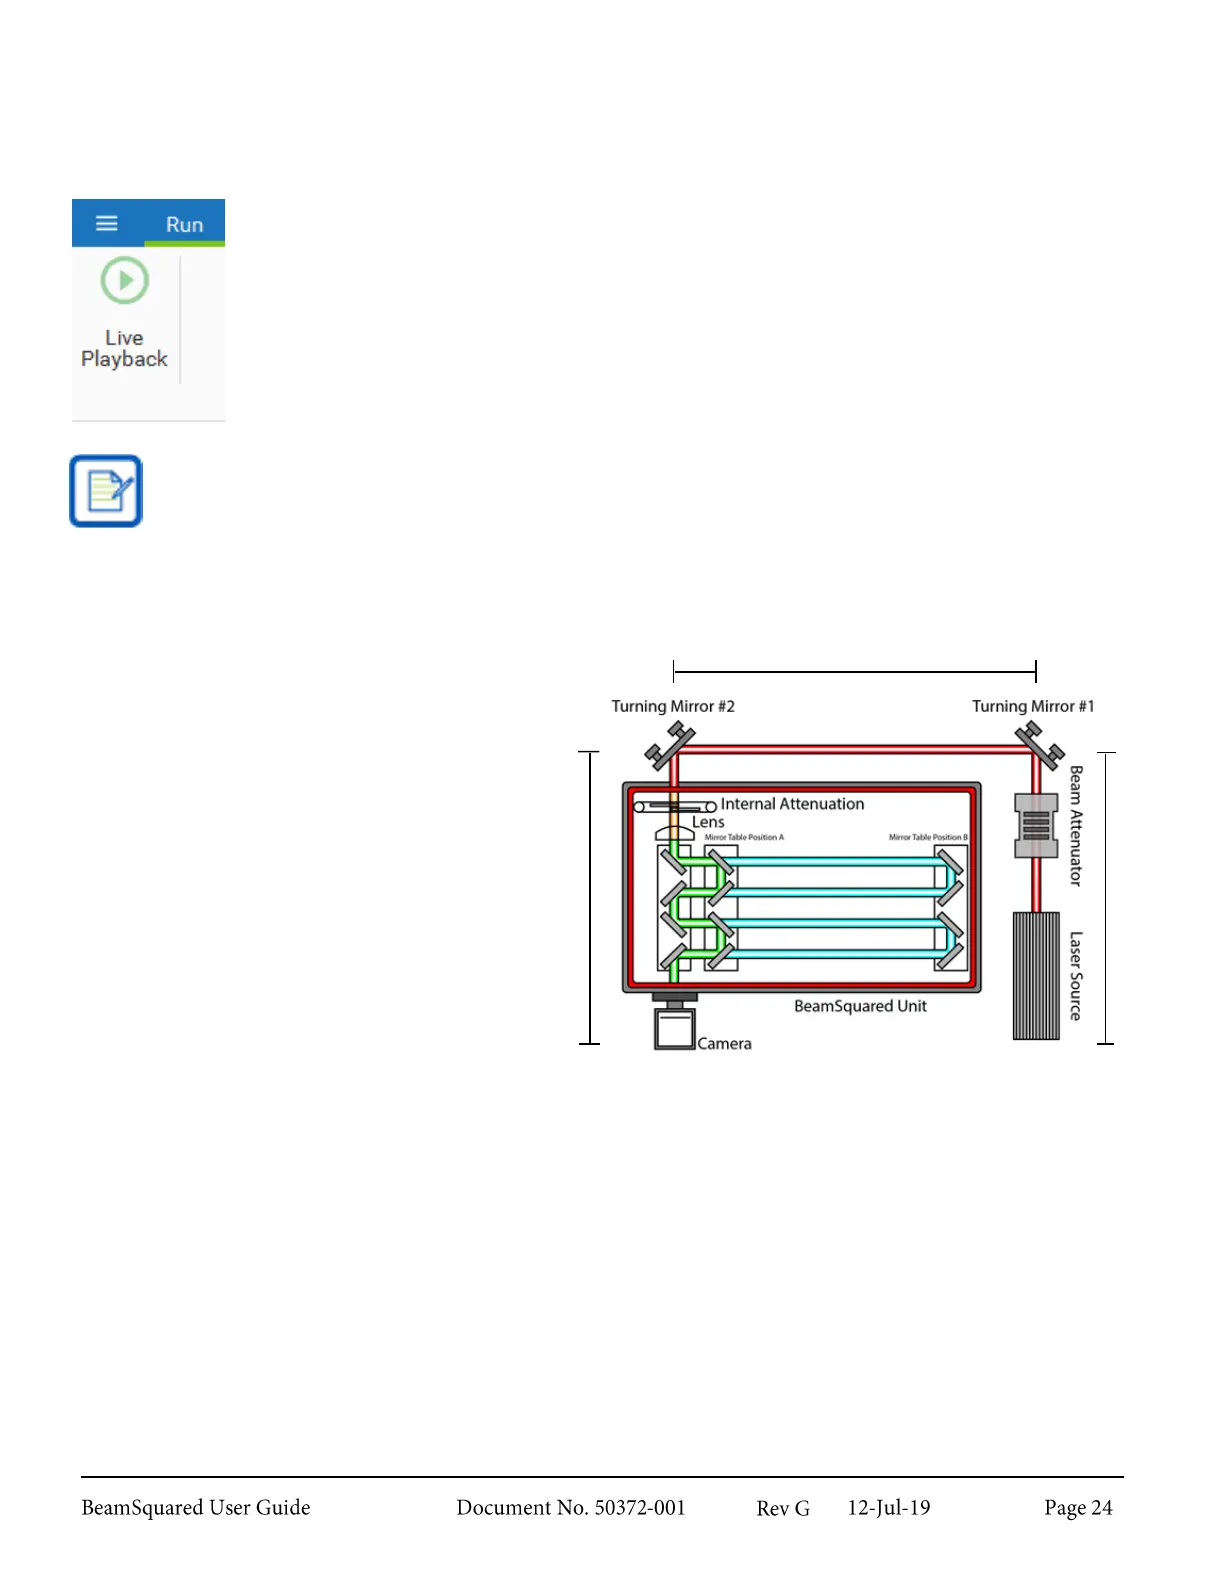
External Steering Mirrors 2.5.2.2
Position the pair of beam turning mirrors with
Mirror #1 in the beam axis, and Mirror #2 on
the optical axis of the BeamSquared with both
mirrors in line with each other.
Laser Mounting Height 2.5.2.3
Where possible, the height of the laser source should be set to the same height as the optical train’s optical
axis. This makes centering the beam easier, as adjustments to the steering mirrors X and Y tilt adjustments
have similar axial effects. Otherwise, a change in one mirror’s X adjustment requires both an X and Y
adjustment of the opposite mirror to bring it back to center.
Gunsight Alignment Tool 2.5.2.4
An alignment tool is included to assist in aligning the beam with the instrument. The tool consists of a
mounted pinhole and an alignment sight. The pinhole disk is coated with a material that fluoresces when
exposed to NIR light.