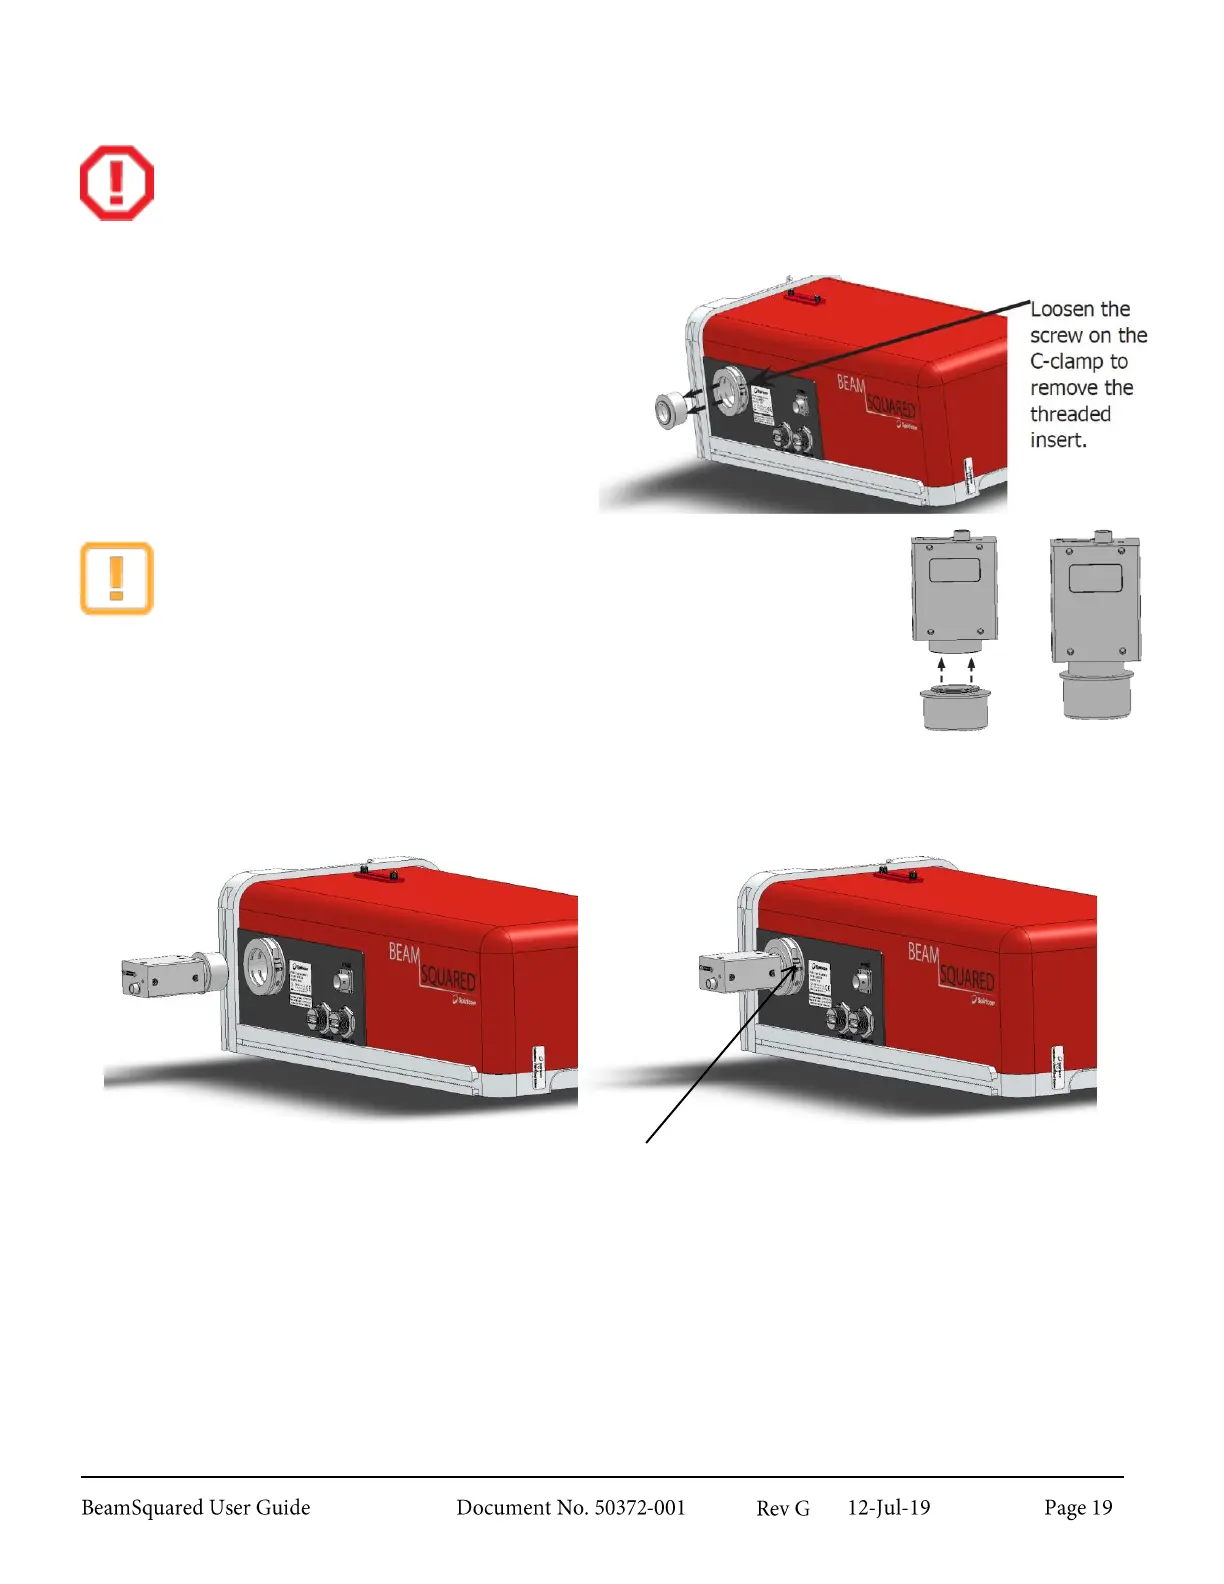
Install the Camera 2.3.2
The camera imager is windowless and can be easily damaged if it comes in contact with any foreign
objects. Only clean the camera imager by gently blowing on it with clean dry air or nitrogen.
1.
Remove the C-mount threaded insert from
the camera mounting clamp.
2.
Point the camera to the floor and remove
the protective dust cover.
3.
Thread the C-mount insert into the camera.
Take care not to cross thread the
components.
Keep the camera face down as you attach the threaded insert to prevent
dust from contacting the imager.
4.
Insert the camera completely into the optical train and re-secure the screw on the camera mounting
clamp.
Orientation of the camera is not critical at this point and will be covered more in section 2.5.4.
Specific camera information can be found in Appendix C.
Re-secure the screw to hold the camera in
place on the optical train.