168
Conguring the system
Setting
Conguring outgoing mail
When an alarm occurs, this unit can automatically send alarm mails.
Set the outgoing mail server and the mail destination.
1
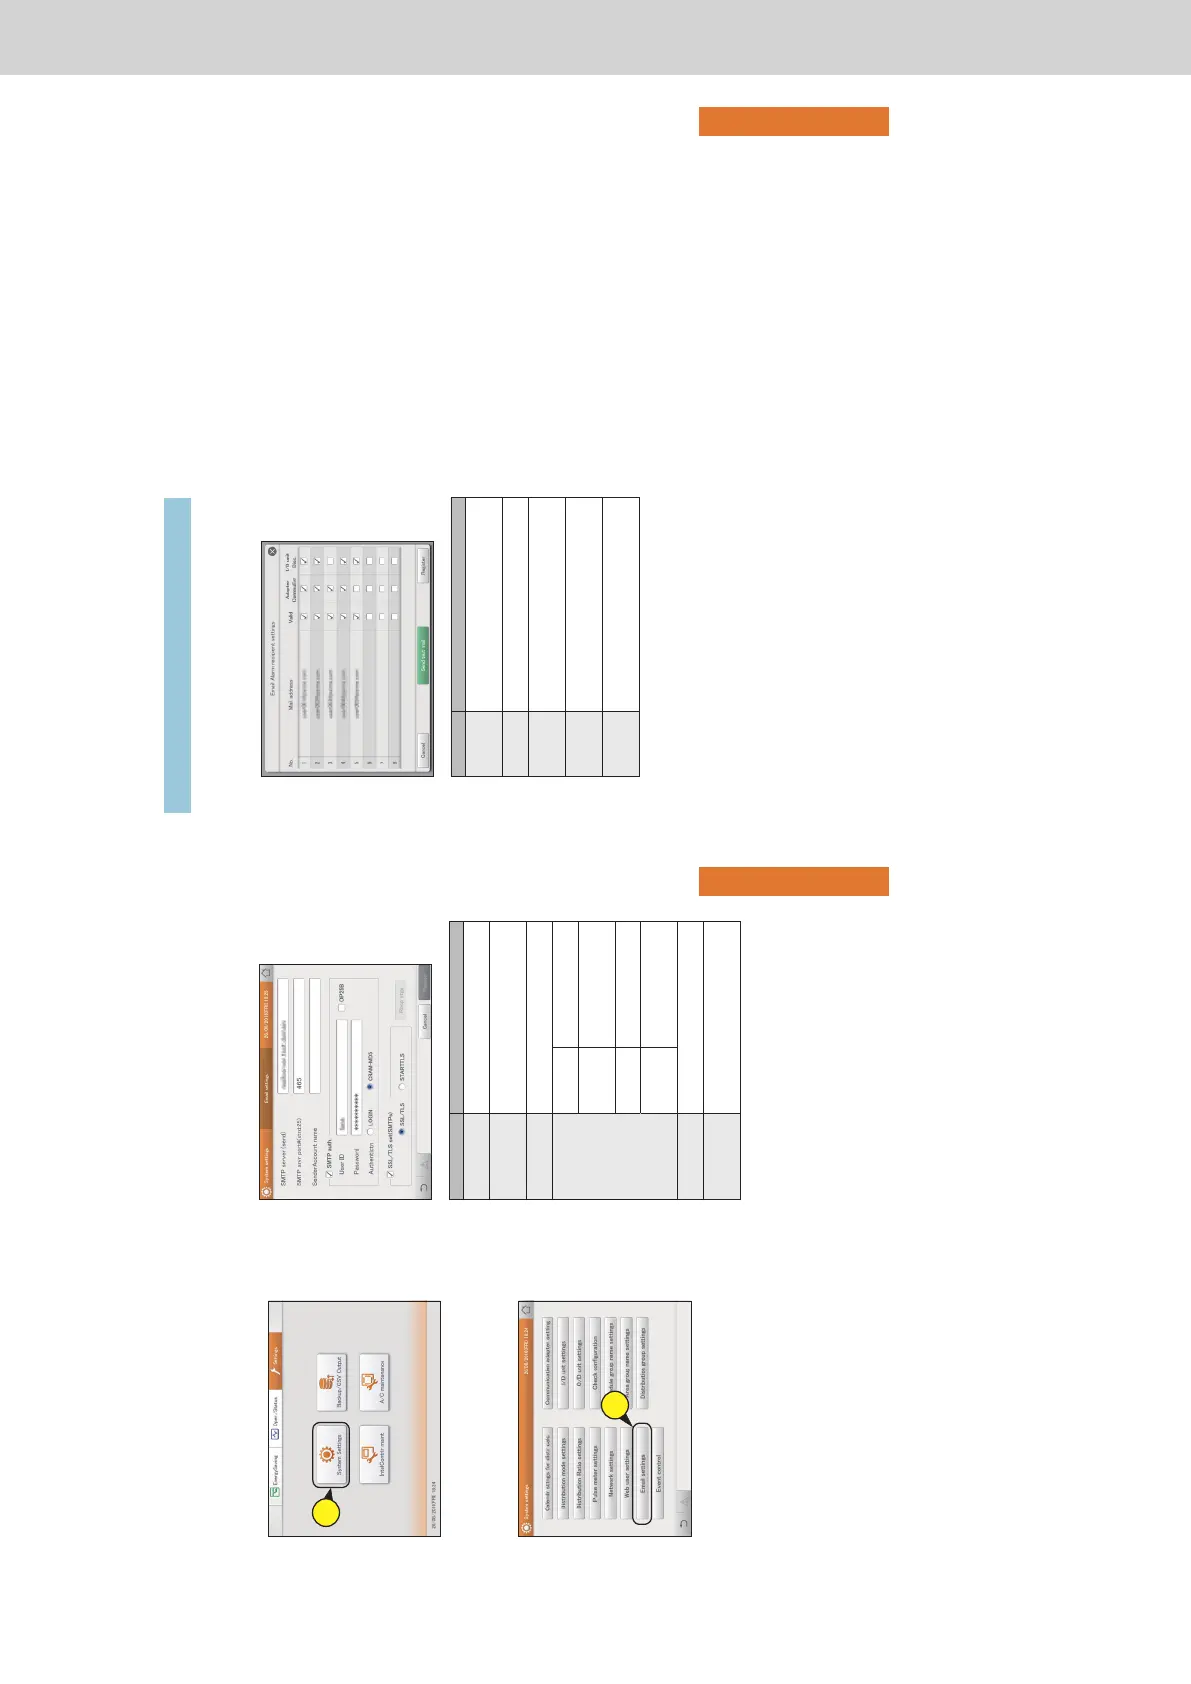
Touch [System Settings] in “Settings”.
z The “System settings” screen is displayed.
1
2
Touch [Email settings].
z The “Email settings” screen is displayed.
2
3
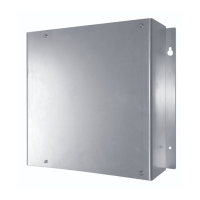
Change the settings.
Item Explanation
SMTP server (send) Set the IP address or host name of the SMTP
server.
SMTP srvr
port#(strd:25)
Set the port number (0 to 65535) for the SMTP
server.
(Factory setting: 25)
SenderAccount
name
Set the mail address to be put in the sender
section of the outgoing mail.
SMTP auth.*
1
User ID Set the user ID to use for
SMTP authentication.
OP25B The SMTP server port setting
is automatically set to “587” if
you put a check mark here.
Password Set the password to use for
SMTP authentication.
Authentictn Select either “LOGIN”
or “CRAM-MD5” as the
authentication method.
SSL/TLS
set(SMTPs)*
2
Select either “SSL/TLS” or “STARTTLS” as the
encryption method.
Recp stgs The “Email Alarm recipient settings” dialogue
is displayed when you touch this.
(→ “Setting the destination” (P.169))
*1 The settings at the left are enabled if you put a check mark here.
*2 The SMTP server port setting is automatically set to “465” if you put
a check mark here.
Note
y The SMTP server port number automatically changes if
“OP25B” and “SSL/TLS set(SMTPs)” are set. The priority
of setting is “OP25B”>“SSL/TLS set(SMTPs)”.
y The SMTP server port number cannot be changed if you
make the above settings. When the settings are cancelled,
the SMTP port number returns to the factory setting (25),
and you can enter any value again.
169
Conguring the system
Setting
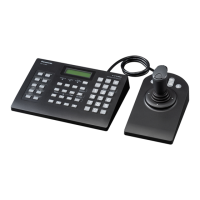
Setting the destination
Set the destination in the “Email Alarm recipient settings” dialogue.
1
Change the settings.
Item Explanation
Mail address Set the mail address to send alarms emails.
The touchscreen keyboard appears when you touch
this and you can change the mail address.
Valid Users with a check mark in this column will be sent
alarm mails.
Adapter
CommuErr
Users with a check mark in this column will be sent
alarm mails when there is a communications error
with the communication adaptor.
I/D unit Disc. Users with a check mark in this column will be sent
alarm mails when there is a disconnected alarm
with an indoor unit.
Send test mail A test mail is sent to the set mail address. Test
mails are not sent if there is a check mark in “Valid”,
“Adapter CommuErr”, or “I/D unit Disc.”, however.
2
Touch [Register].
z To cancel the settings, touch [Cancel].
Conguring outgoing mail
 Loading...