Chapter 5 Operations — Using the web control function
ENGLISH - 229
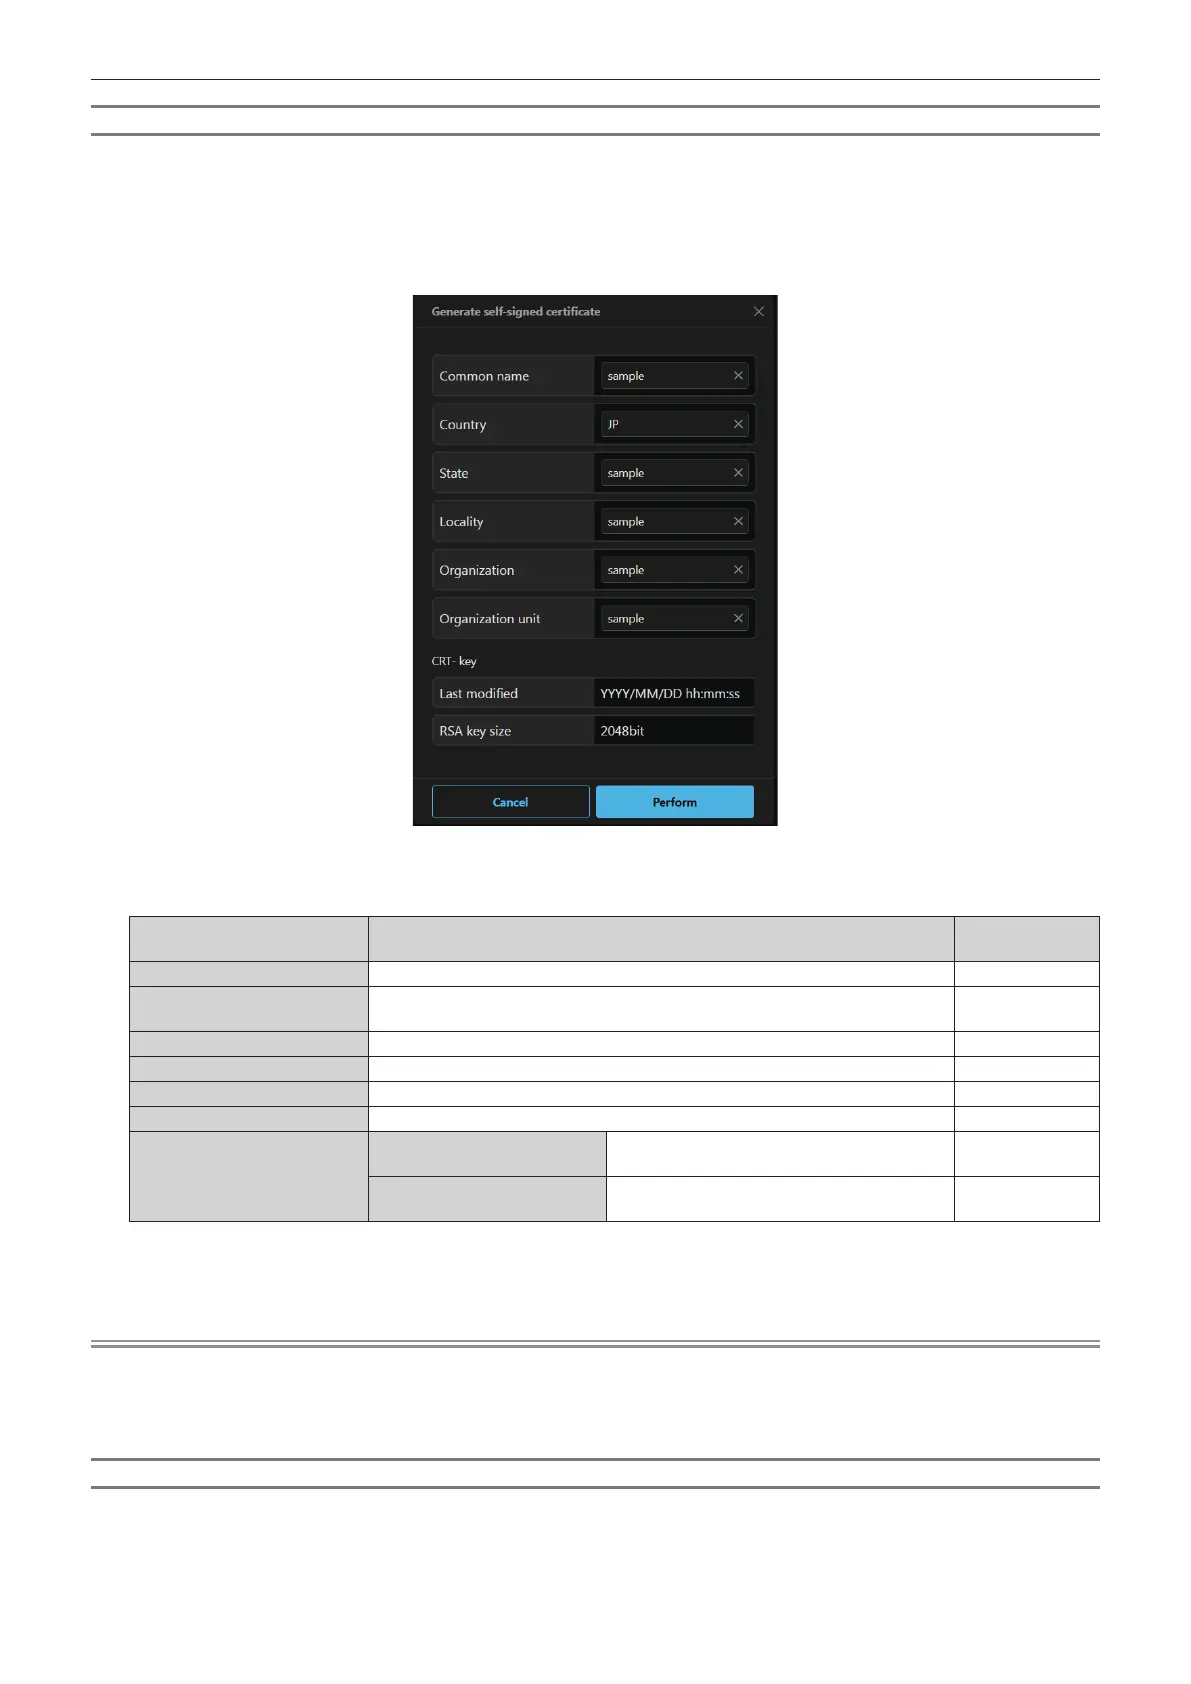
Generating the self-signed certicate
When the server certicate issued by the certication organization is not to be used as the security certicate, it
is possible to use the self-signed certicate generated in the projector. Generate the self-signed certicate after
generating the CRT key.
1) Click [Certificate] → [Self-signed certificate] → [Generate self-signed certificate] → [Generate].
f The screen to generate the self-signed certicate is displayed.
2) Enter the information required for generation.
f The details of each item are as follows.
Item Details
Character length
limit
[Common name]
Enter the projector name or the IP address set in the projector. 64 characters
[Country]
Enter the country code dened in ISO 3166-1 alpha-2 (two upper case
alphabets).
―
[State]
Enter the State, etc. 12 characters
[Locality]
Enter the locality. 12 characters
[Organization]
Enter the organization name. 6 characters
[Organization unit]
Enter the organization unit name. 6 characters
[CRT- key]
[Last modied]
The generation date and time of the current
CRT key is displayed.
―
[RSA key size]
The key size of the current CRT key is
displayed.
―
3) Click [Perform].
f Self-signed certicate is generated.
Note
f The characters that can be input are as follows.
g Single-byte numbers: 0 to 9
g Single-byte alphabets: A to Z, a to z
g Single-byte symbols: - . _ , + / ( )
Conrming the information of the self-signed certicate
Conrm the information of the self-signed certicate generated by the projector.
1) Click [Certificate] → [Self-signed certificate] → [Generated certificate information] → [Refer].
f The information of the generated self-signed certicate is displayed. The details of each item are as follows.